What you need to know:
This document provides guidance for users to effectively utilize their Texting app within ProConnect with Webex.
MENU
- Introduction
- 1. Overview of Texting Using Webex
- 2. Prerequisites
- 3. Access Texting in your Webex mobile app
- 4. Activate the notifications bot in Webex
- 5. Add Texting in Webex Spaces
- 6. Settings
- 7. Manage notification settings in Webex
- 8. Adjust device notification preferences
- 9. Send and view messages
- 10. Manage contacts
- 11. Access reports

Introduction
This document guides users to effectively utilize their mobile Texting app within ProConnect with Webex.
1
Overview of Texting Using Webex
- Texting allows you to send and receive text messages from your work phone numbers.
- Creates an easy way for you to use a work number for texting instead of your personal mobile phone.
- All the features of your smartphone from your business line.
2
Prerequisites
Prior to utilizing Texting for ProConnect with Webex, ensure that you have:
- An active ProConnect with Webex account.
- A ProConnect seat that includes Webex.
- An active Texting subscription.
- The Texting application is installed in your Webex mobile app. Texting is activated when installing your service.
Note: The app must be added to the desktop version of Webex to show up in the mobile app.
3
Access Texting in your Webex mobile app
-
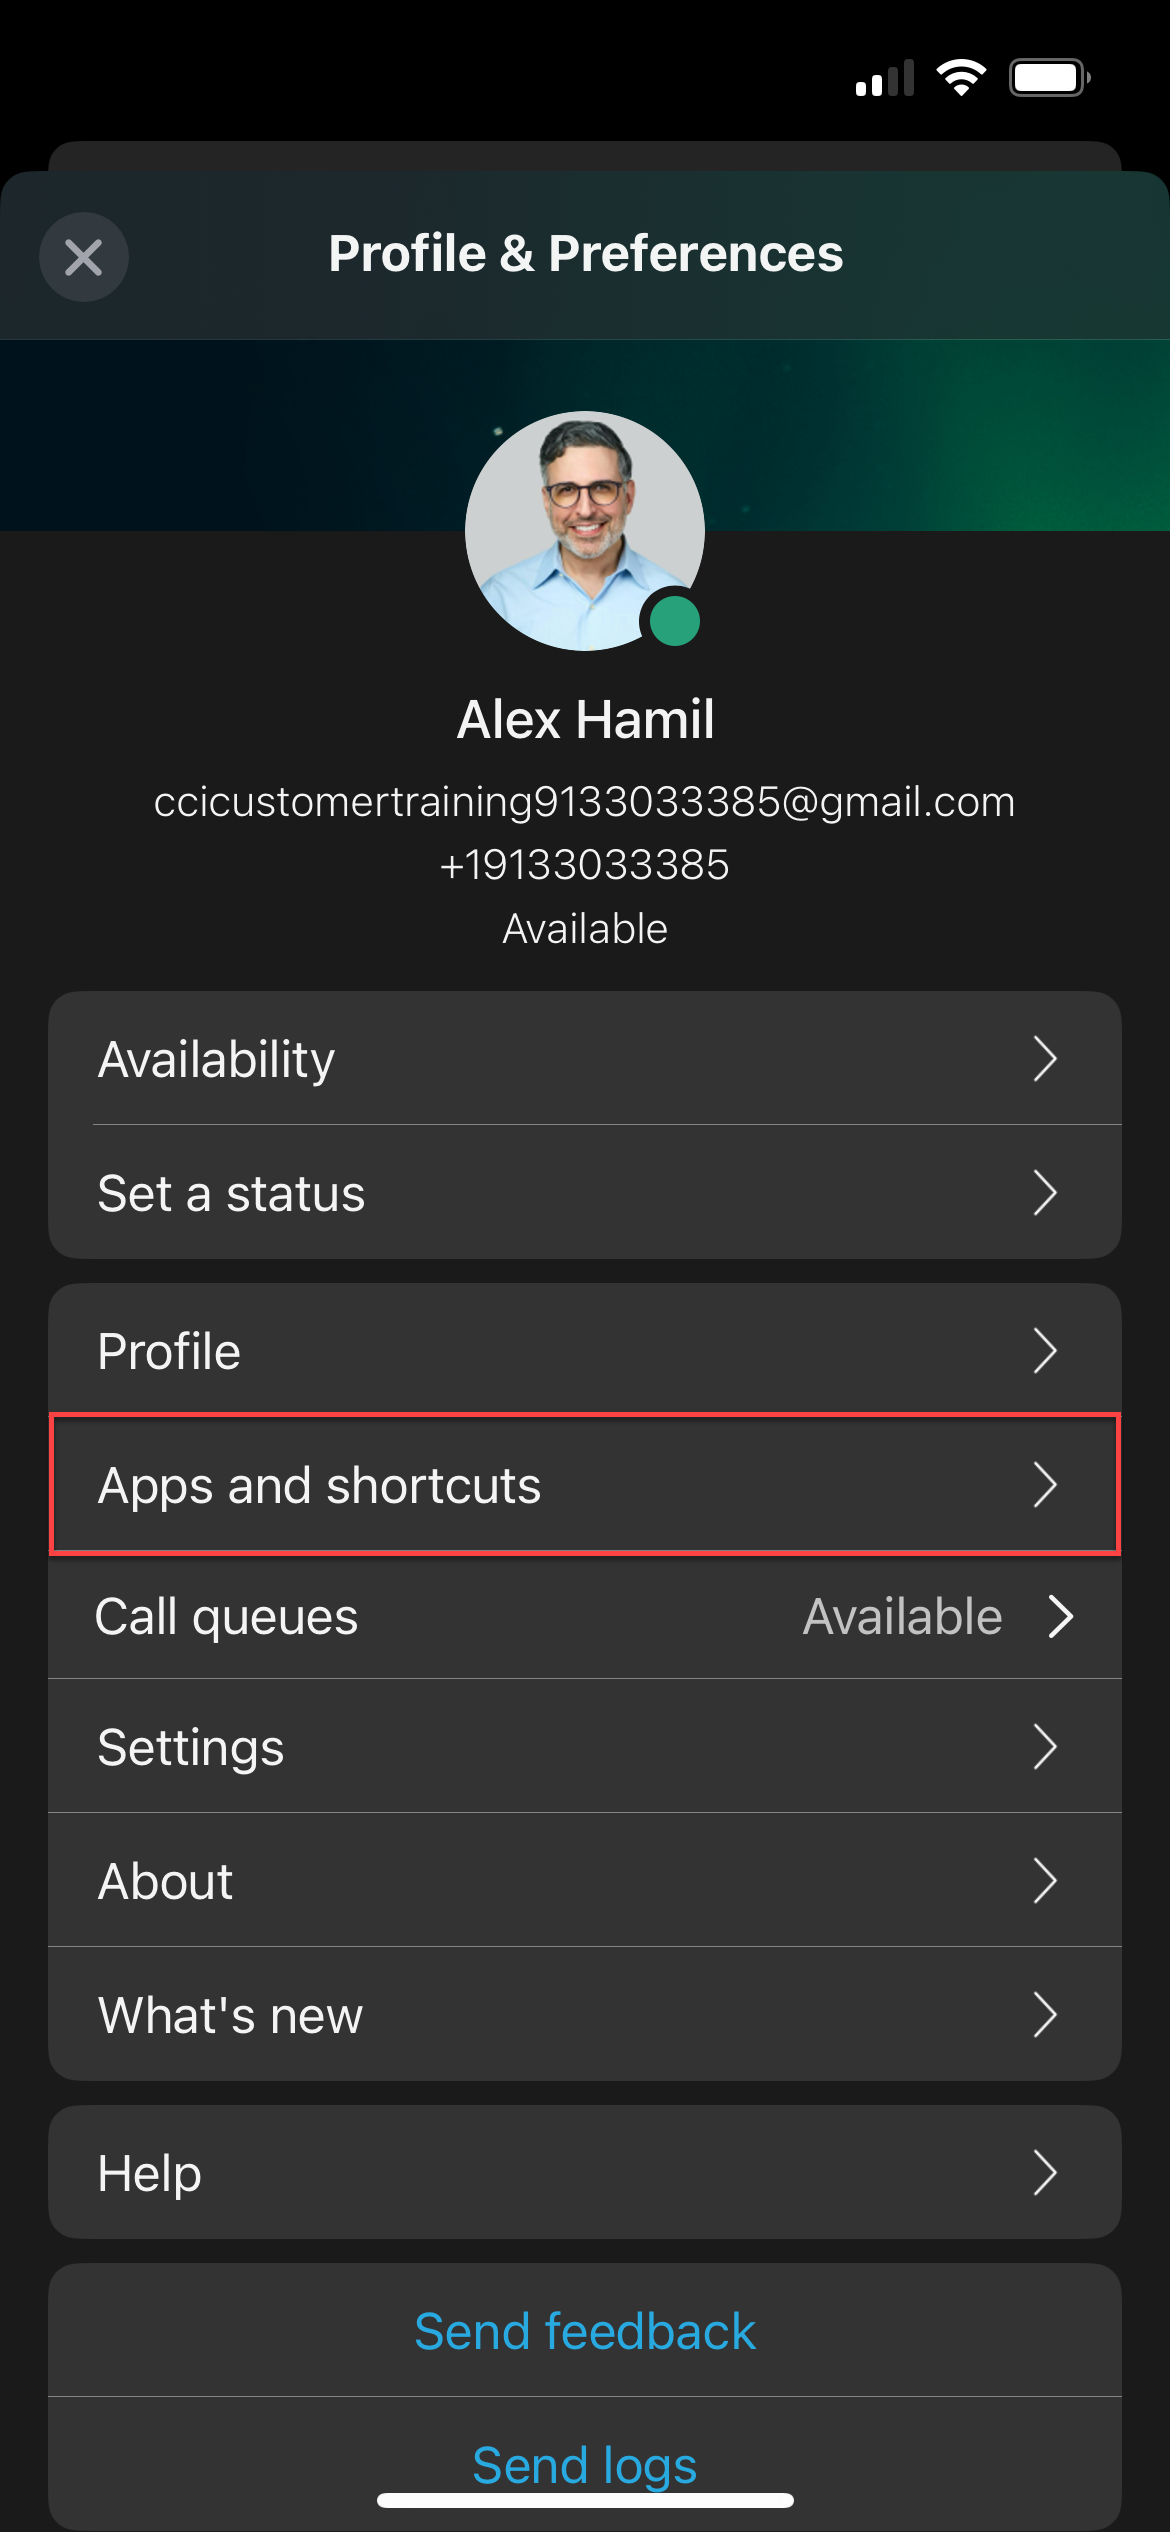
- Sign in to your Webex mobile app.
- Tap your profile icon.
- Tap Apps and shortcuts.
-
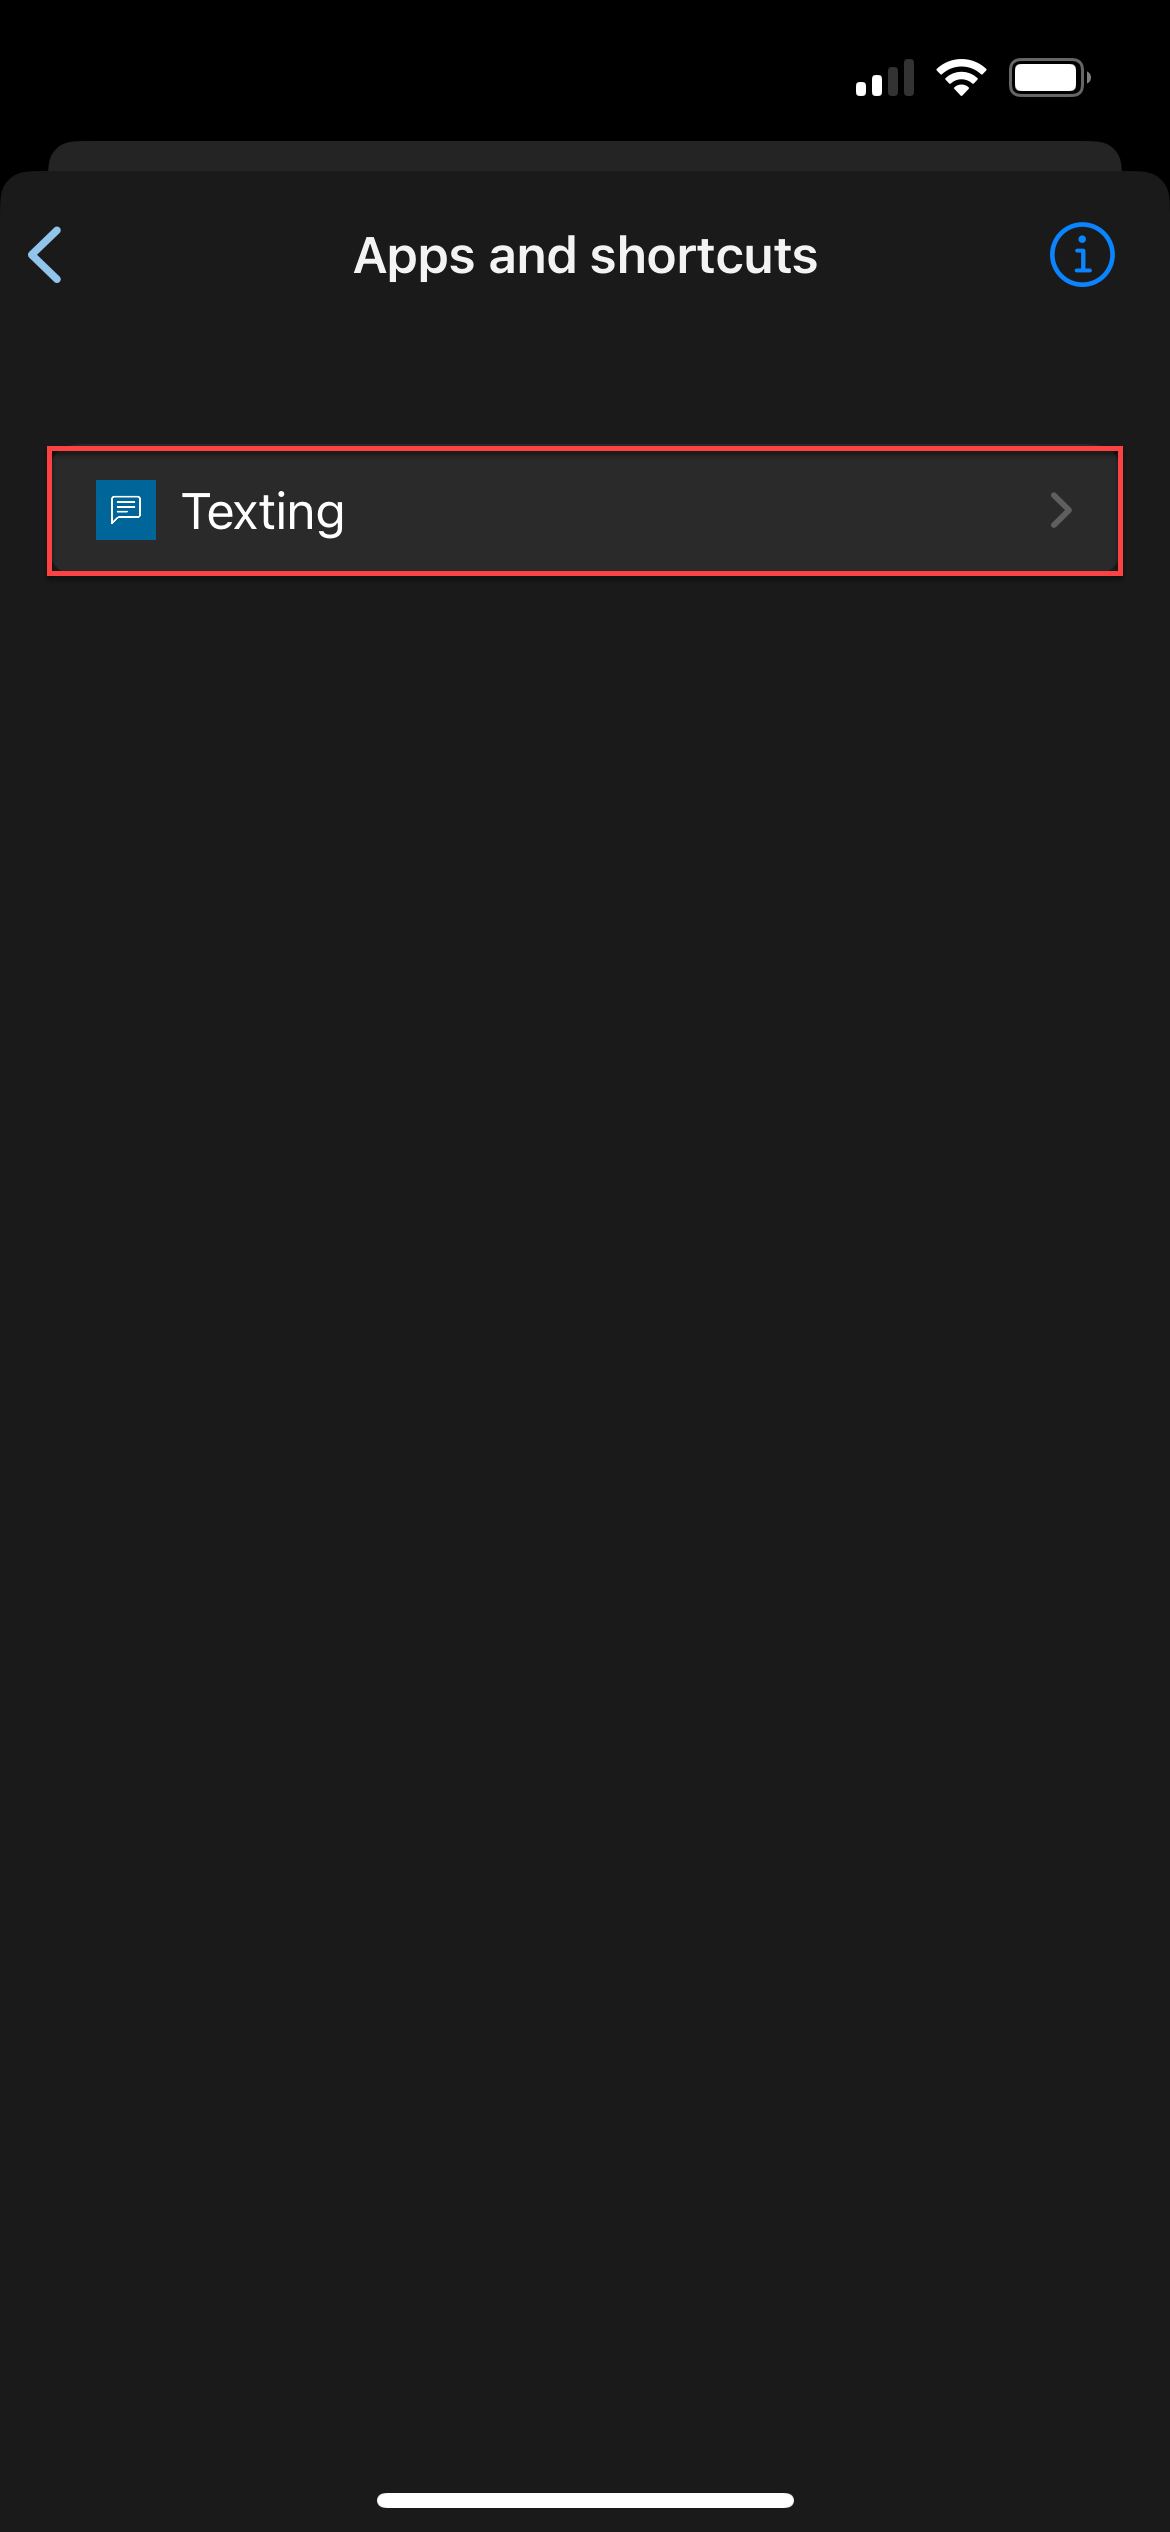
- Tap Texting. If prompted, sign in with your ProConnect credentials. Note: The app must be added to the desktop version of Webex to show up in the mobile app.
-
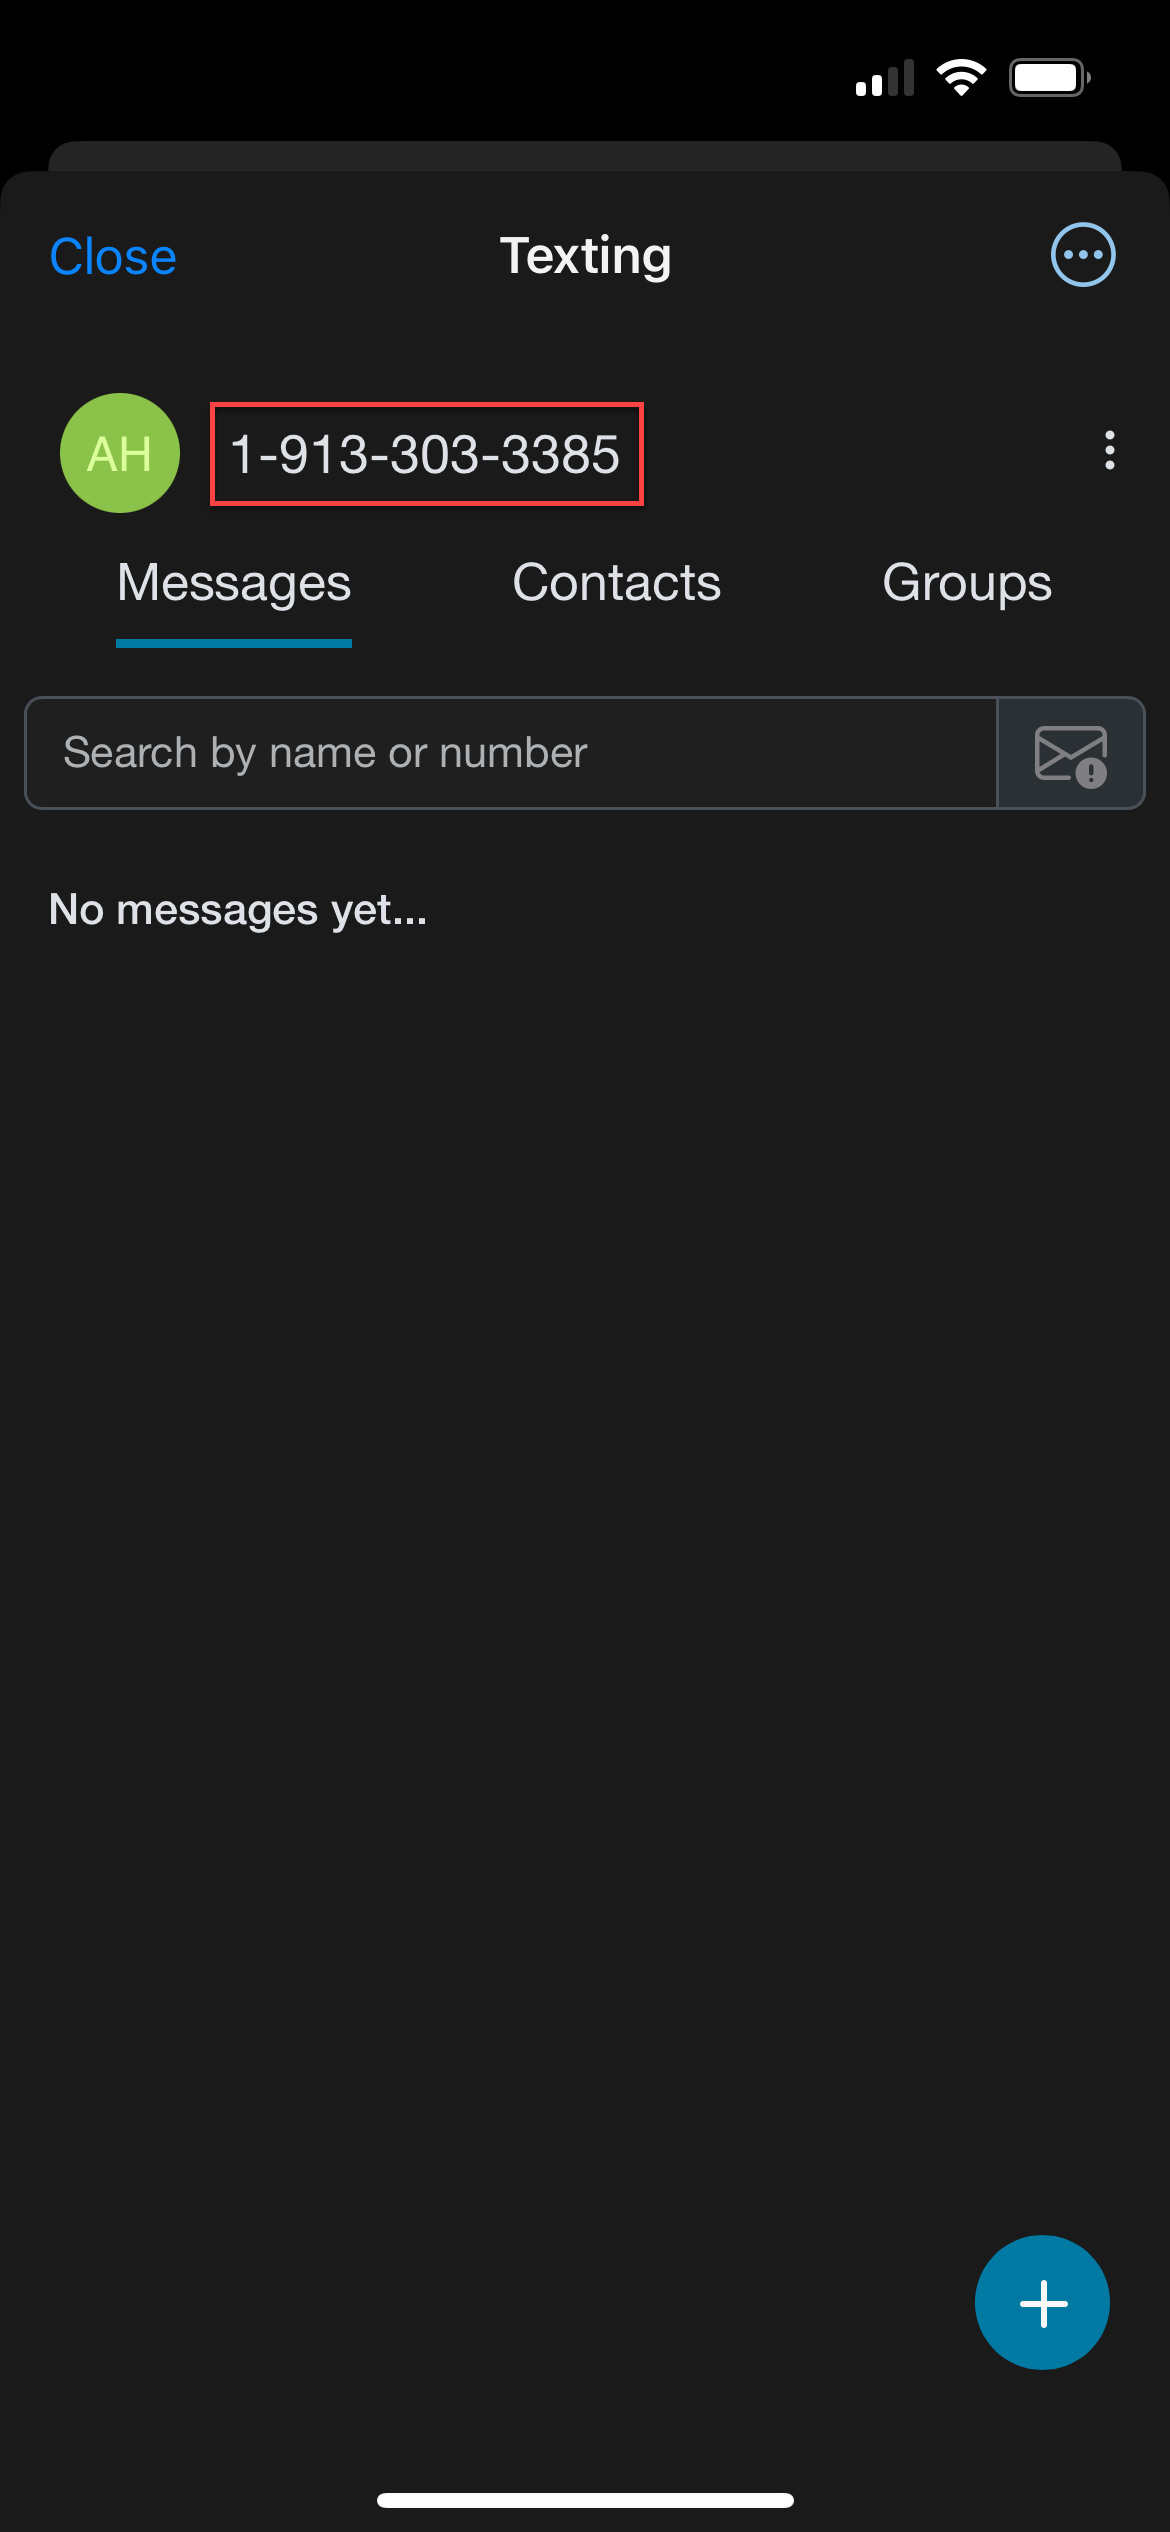
- Verify it is the correct phone number.
4
Activate the notifications bot in Webex
Adding the bot ensures you receive Webex alerts for each inbound message, so you’re always up to date. Once added, the bot sends notifications directly to your Webex Messaging tab.
-
- Sign in to your Webex account.
- From the Webex menu, tap Messaging and then Direct.
- Tap the plus (+) icon.
- Tap Send a Direct Message.
- In the recipient field, enter: new_text@webex.bot
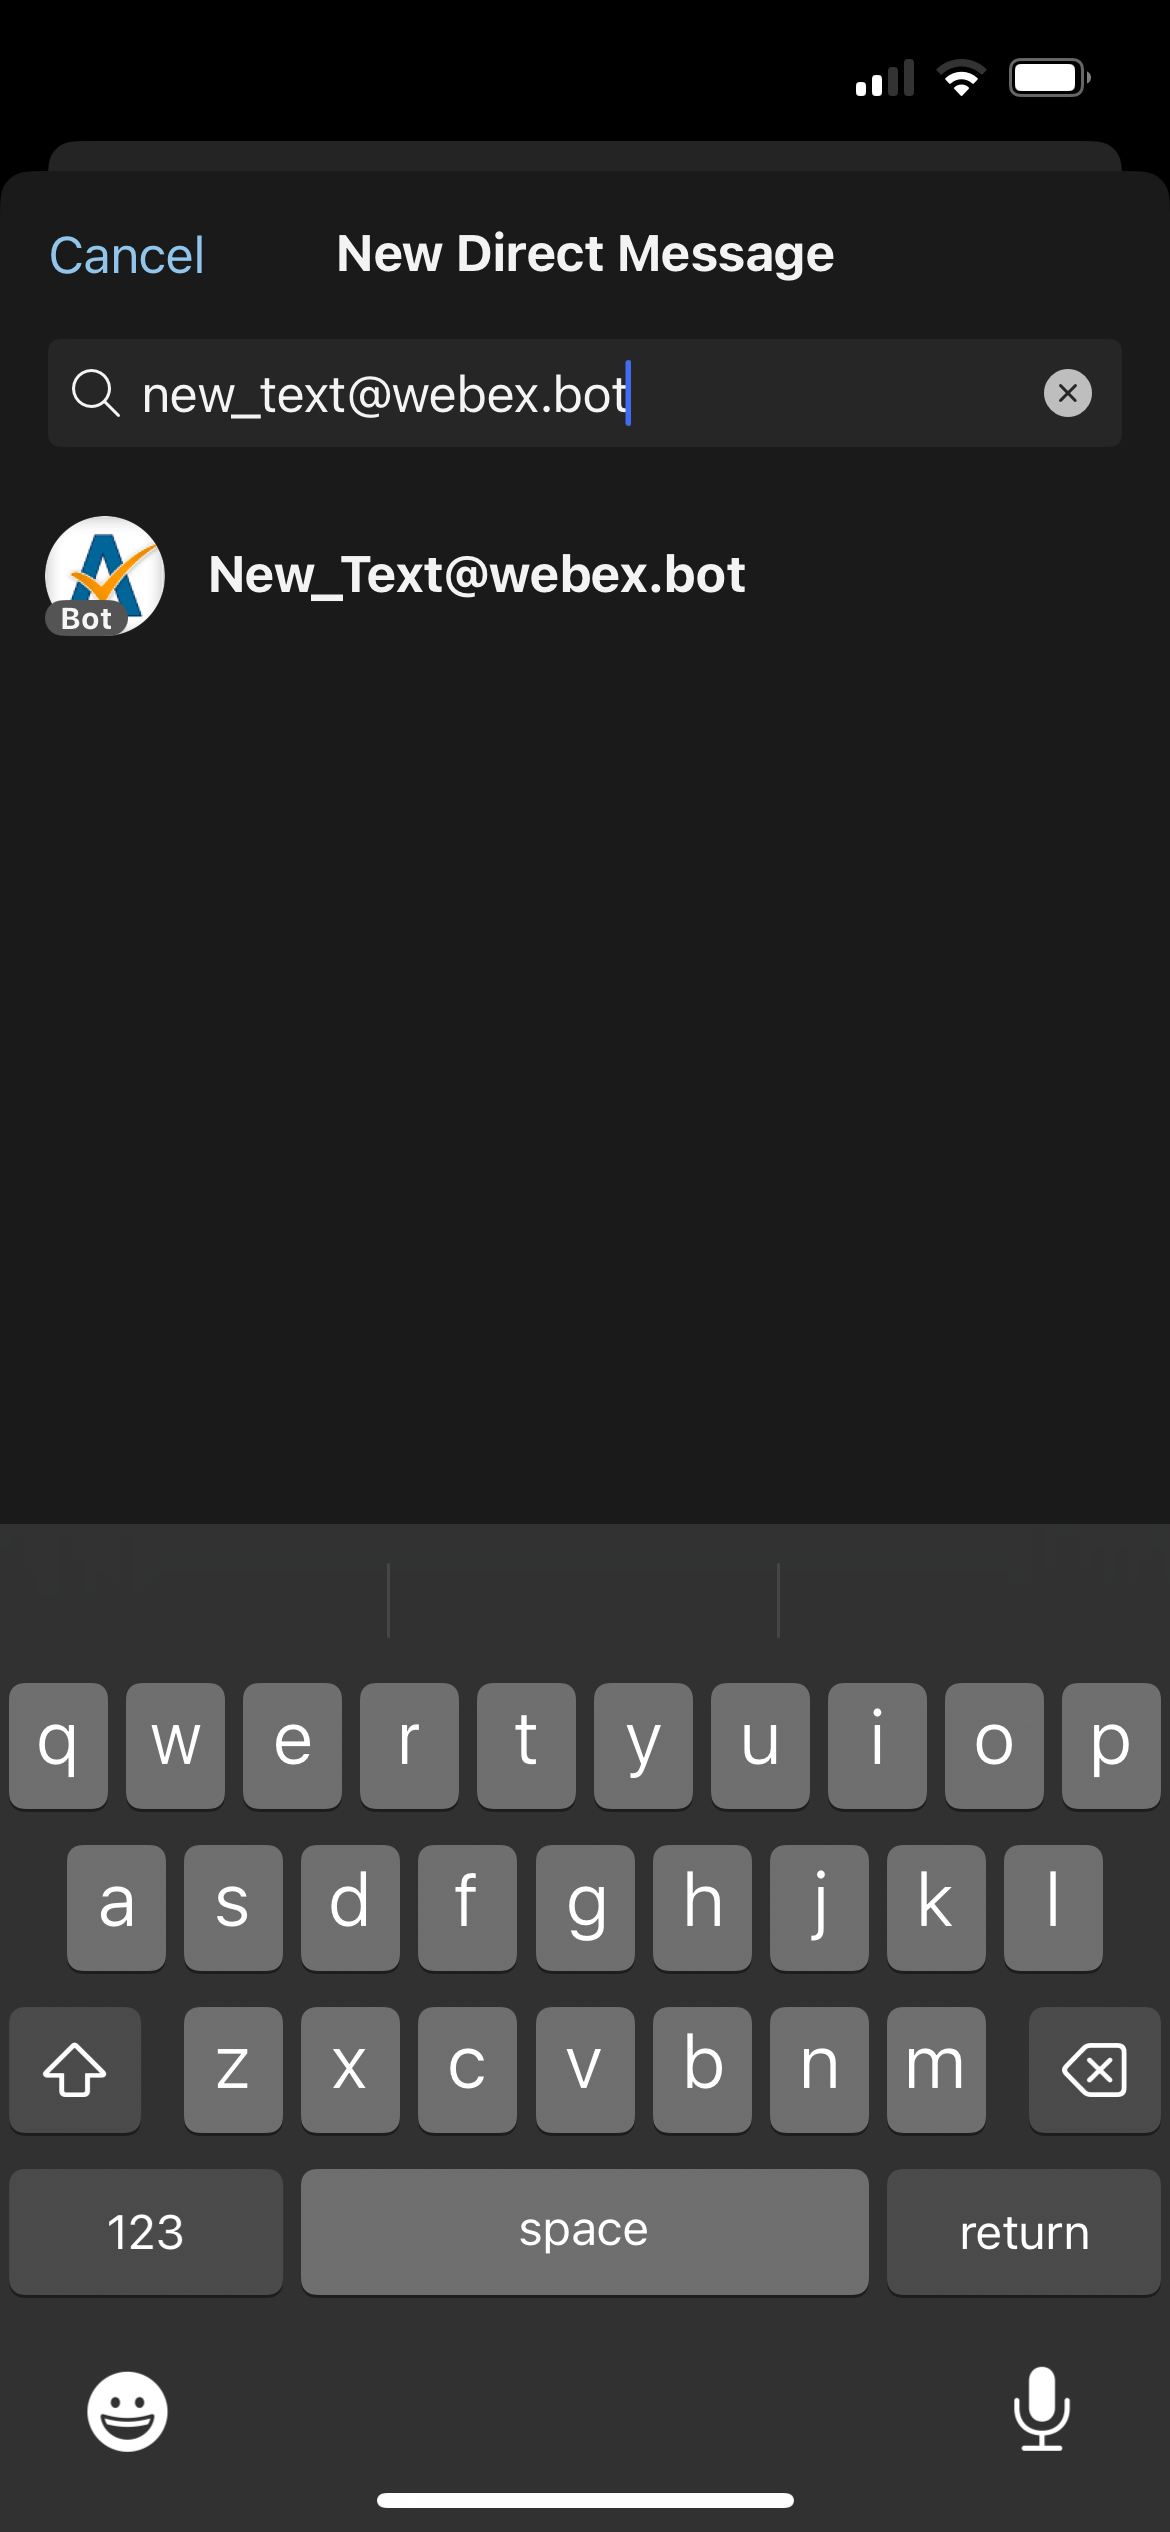
- Compose a message, and tap Send to create a direct message. Once added, it appears as Texting – Notification Bot.
- Sign out and back in to Webex to ensure notifications are properly authenticated.
5
Add Texting to Webex Spaces in your mobile app
Note: Only Space moderators can manage apps in moderated Spaces. All users can add apps in unmoderated Spaces.
- Sign in to your Webex mobile account.
- Navigate to Spaces and select the desired space where you wish to include Texting.
- To learn how to create a space, check out our Webex for Mobile guides for iPhone or Android.
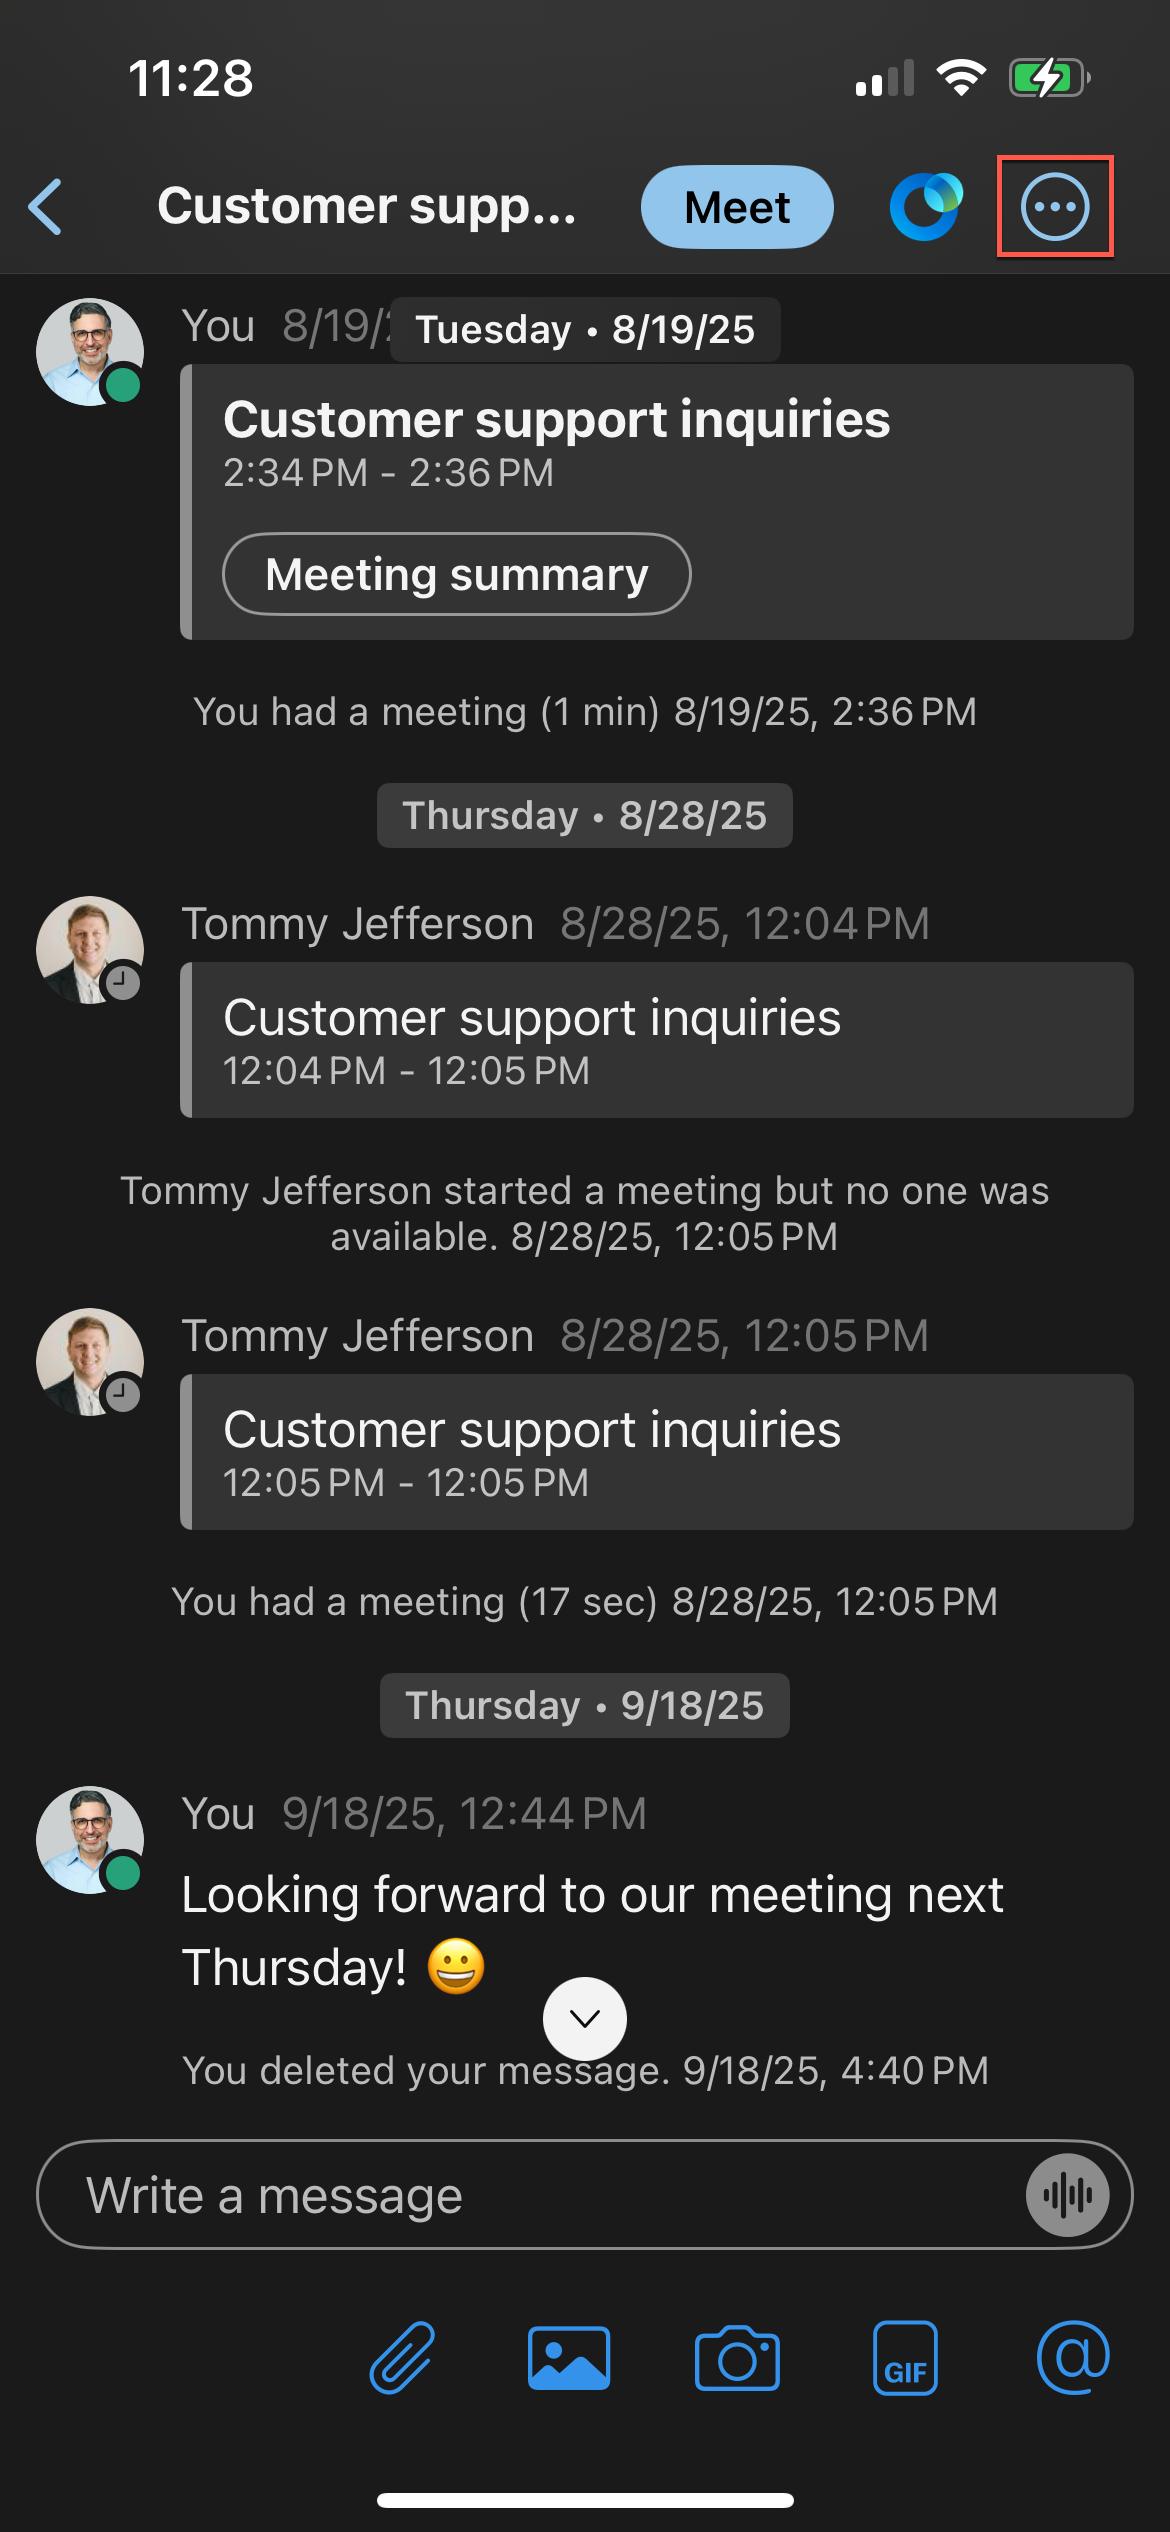
- Tap the More Options icon.
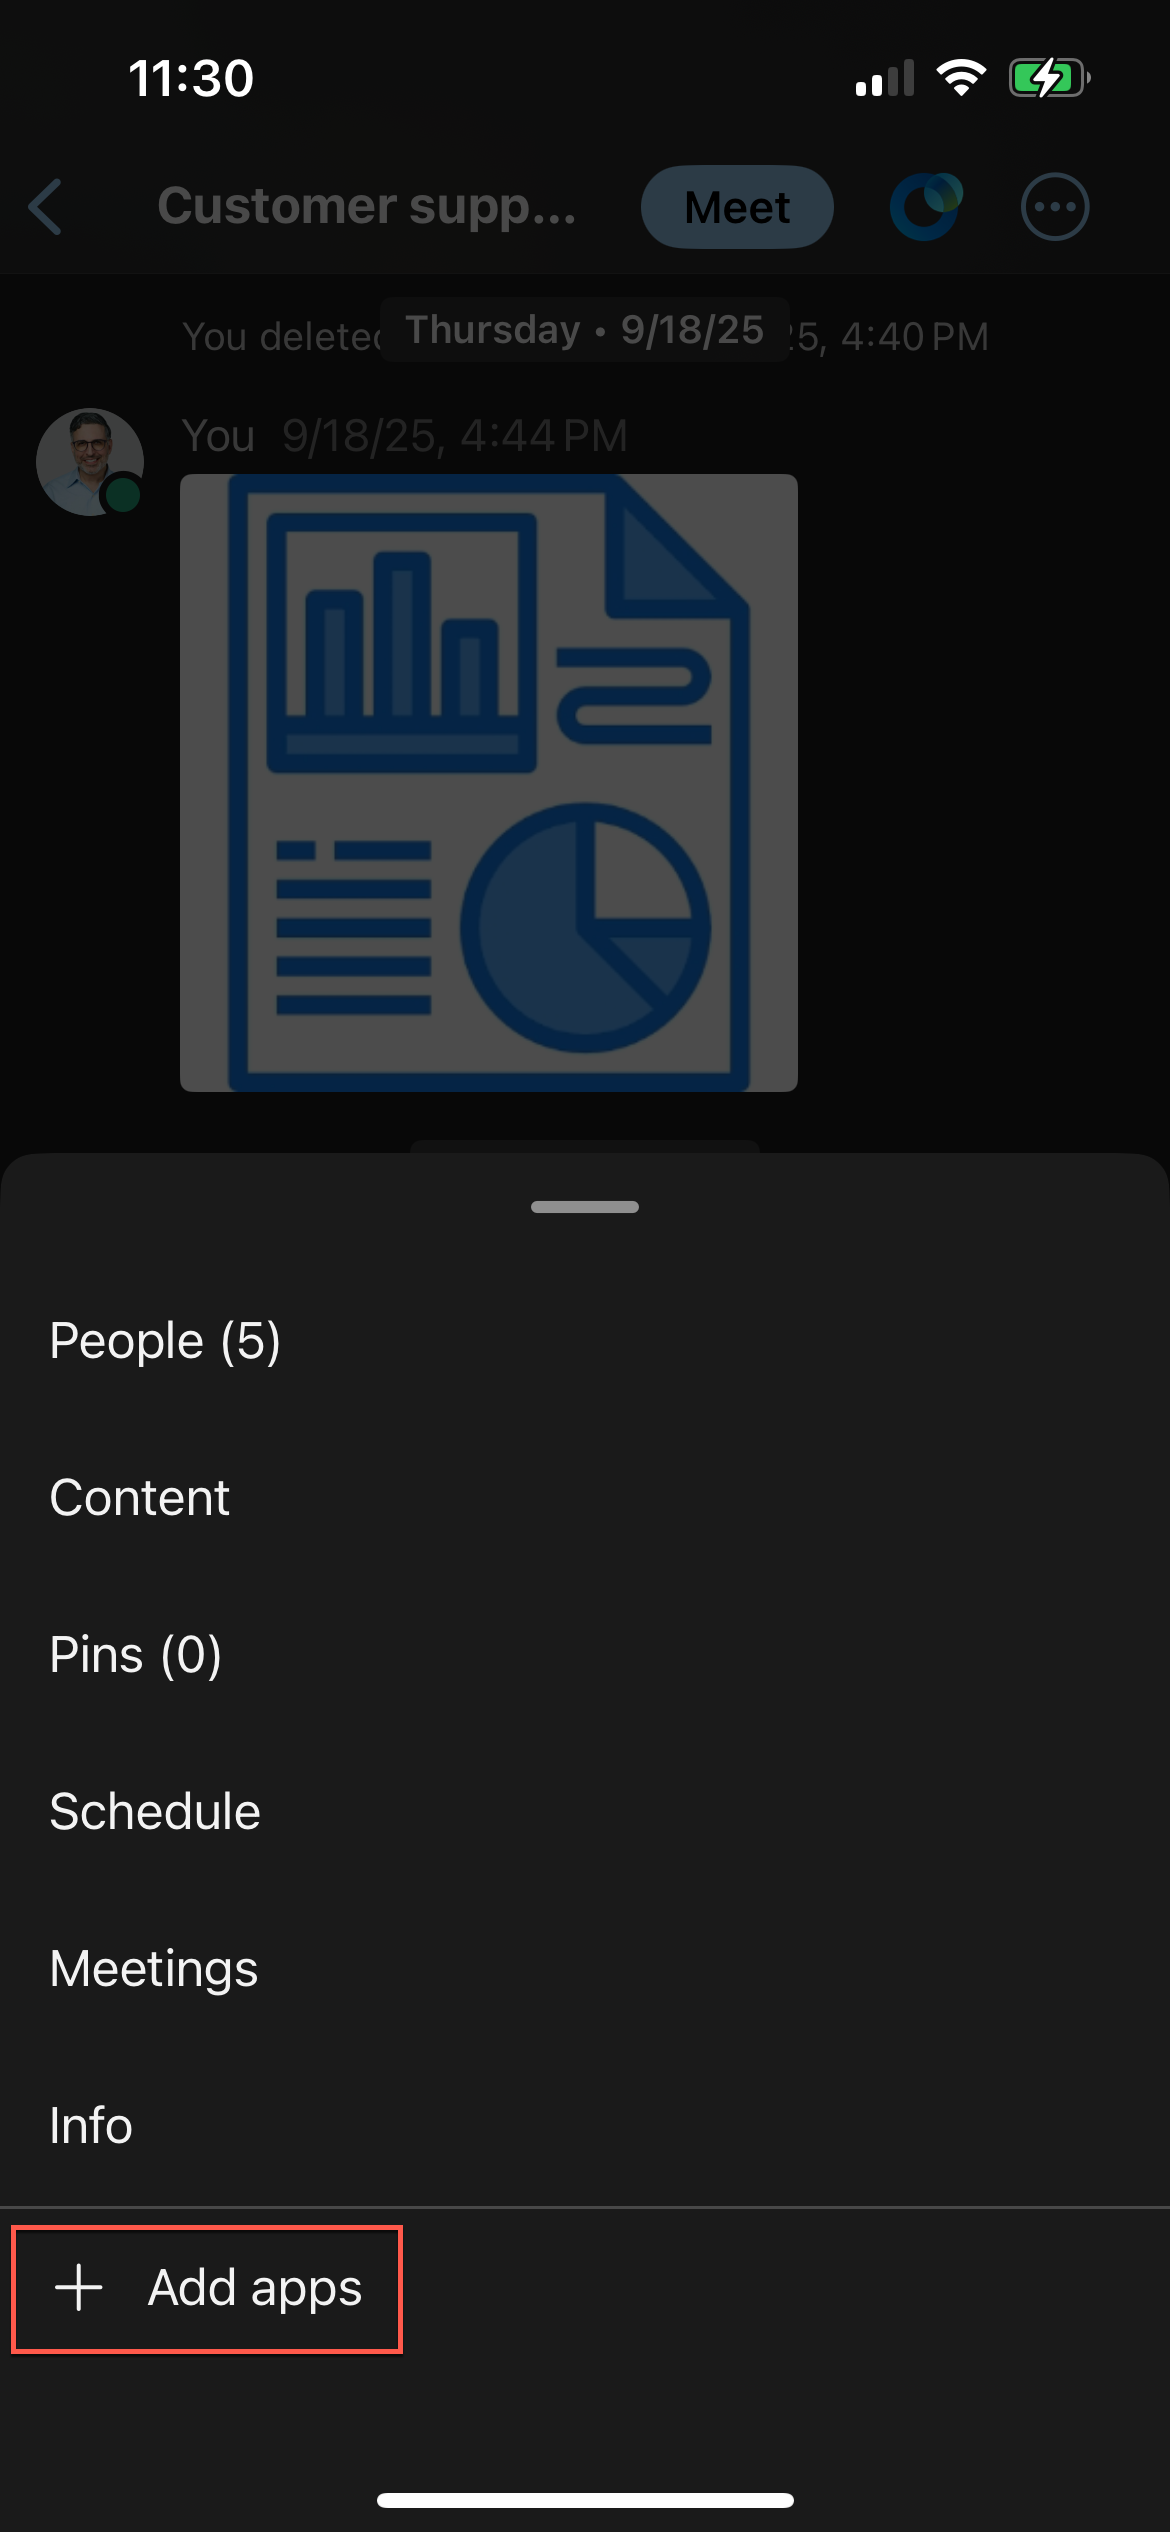
- Tap Add apps.
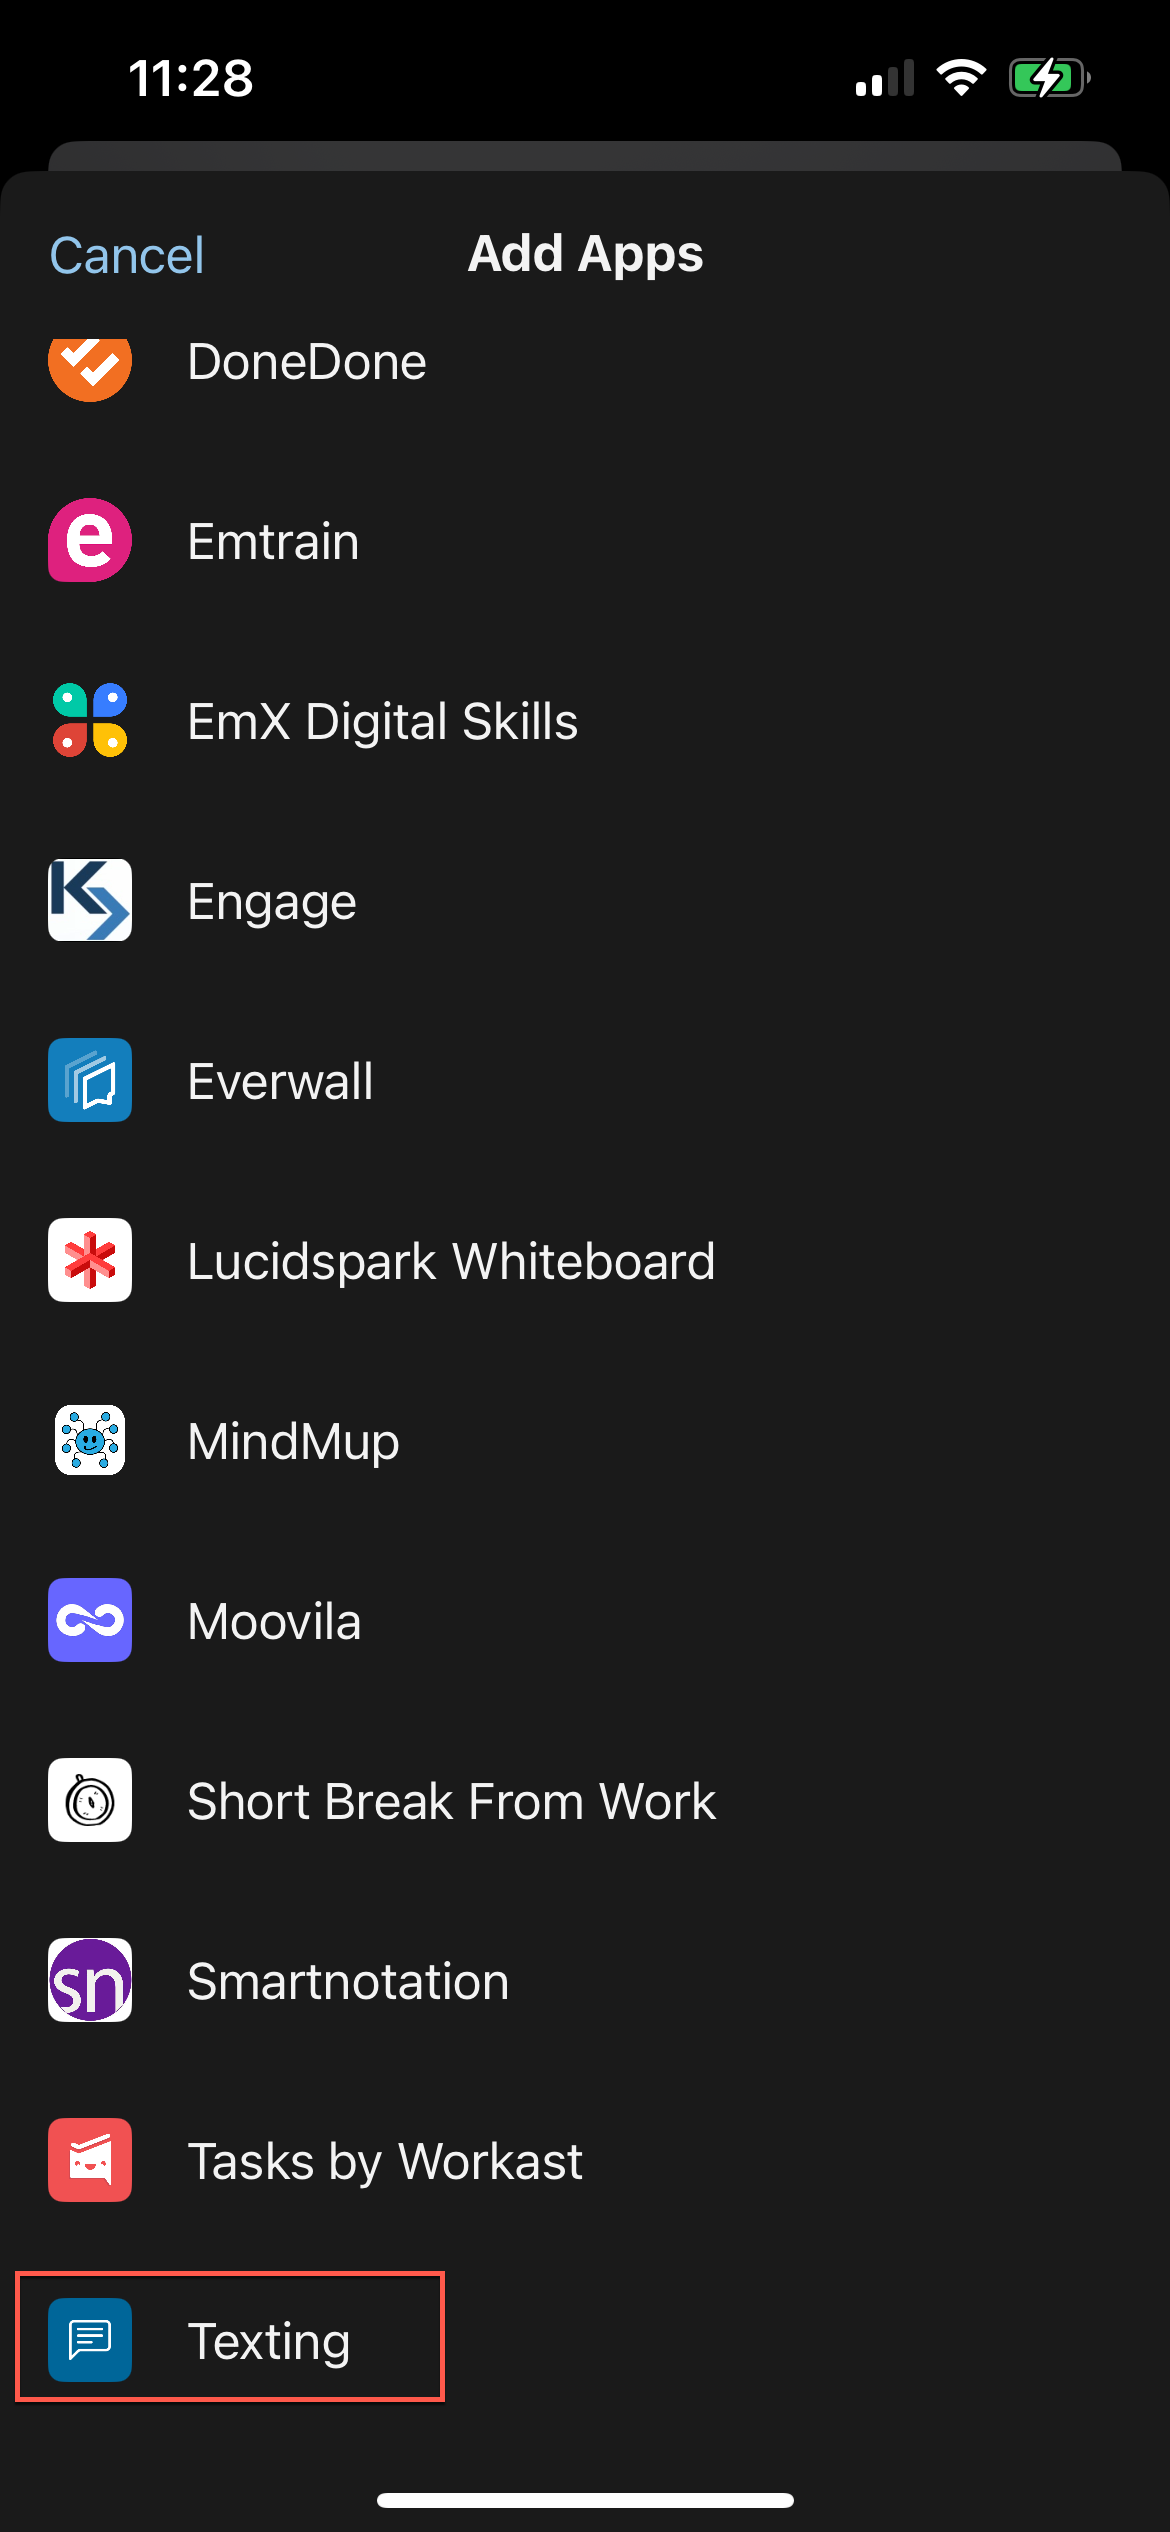
- Scroll to find Texting and then tap Texting.
- When prompted, enter the pre-approved phone number.
- Tap Add Phone Number.
- Tap Add to install it in the designated space.
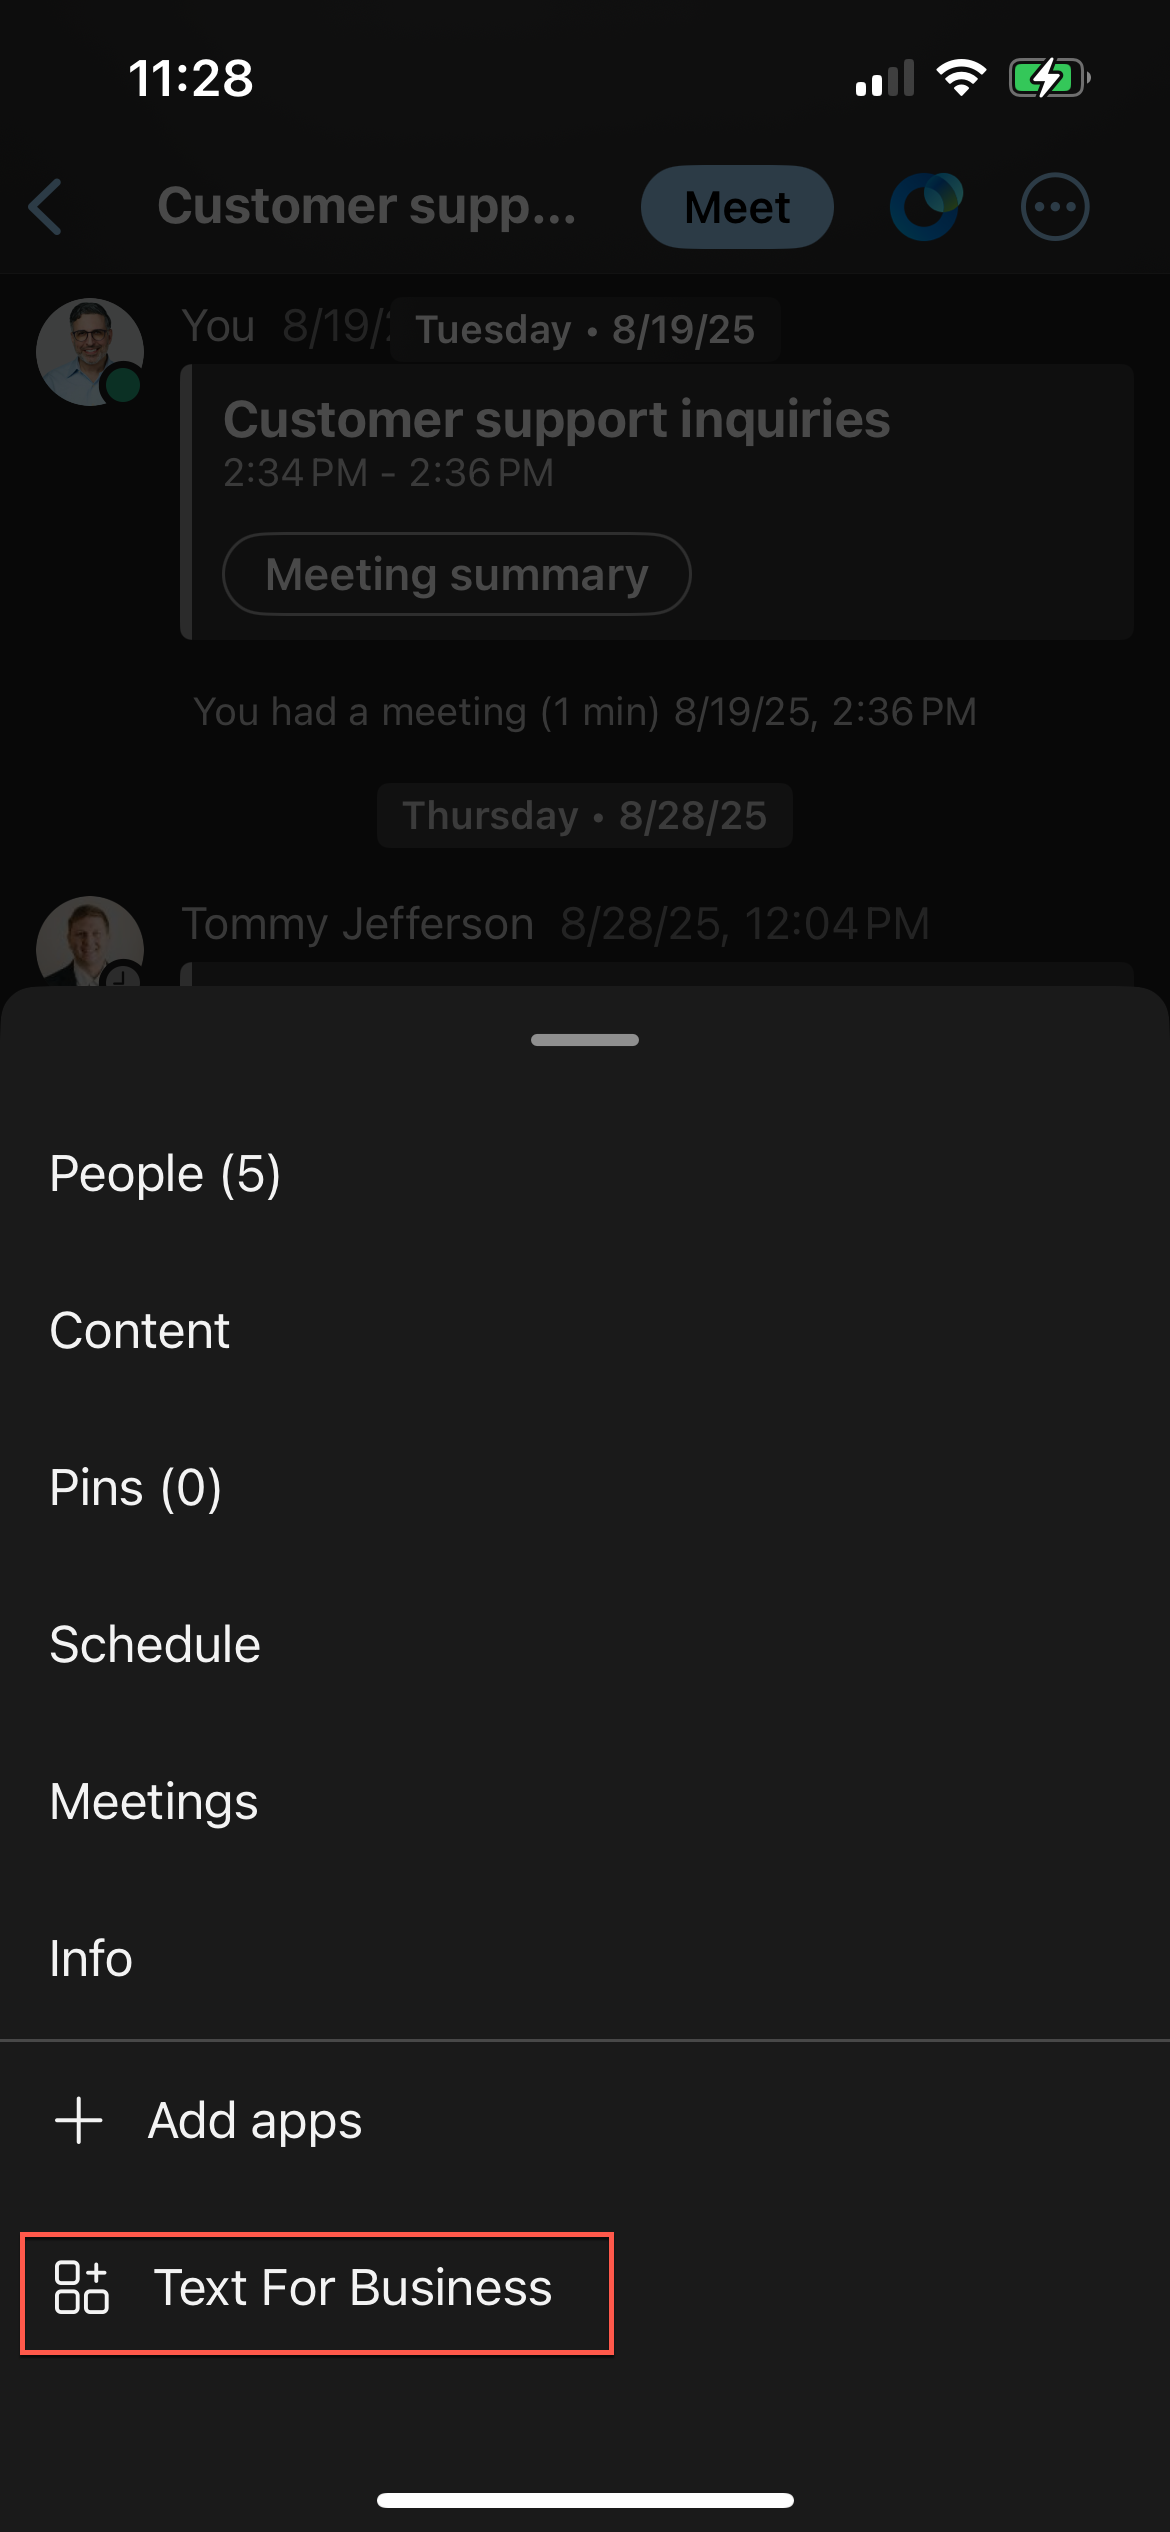
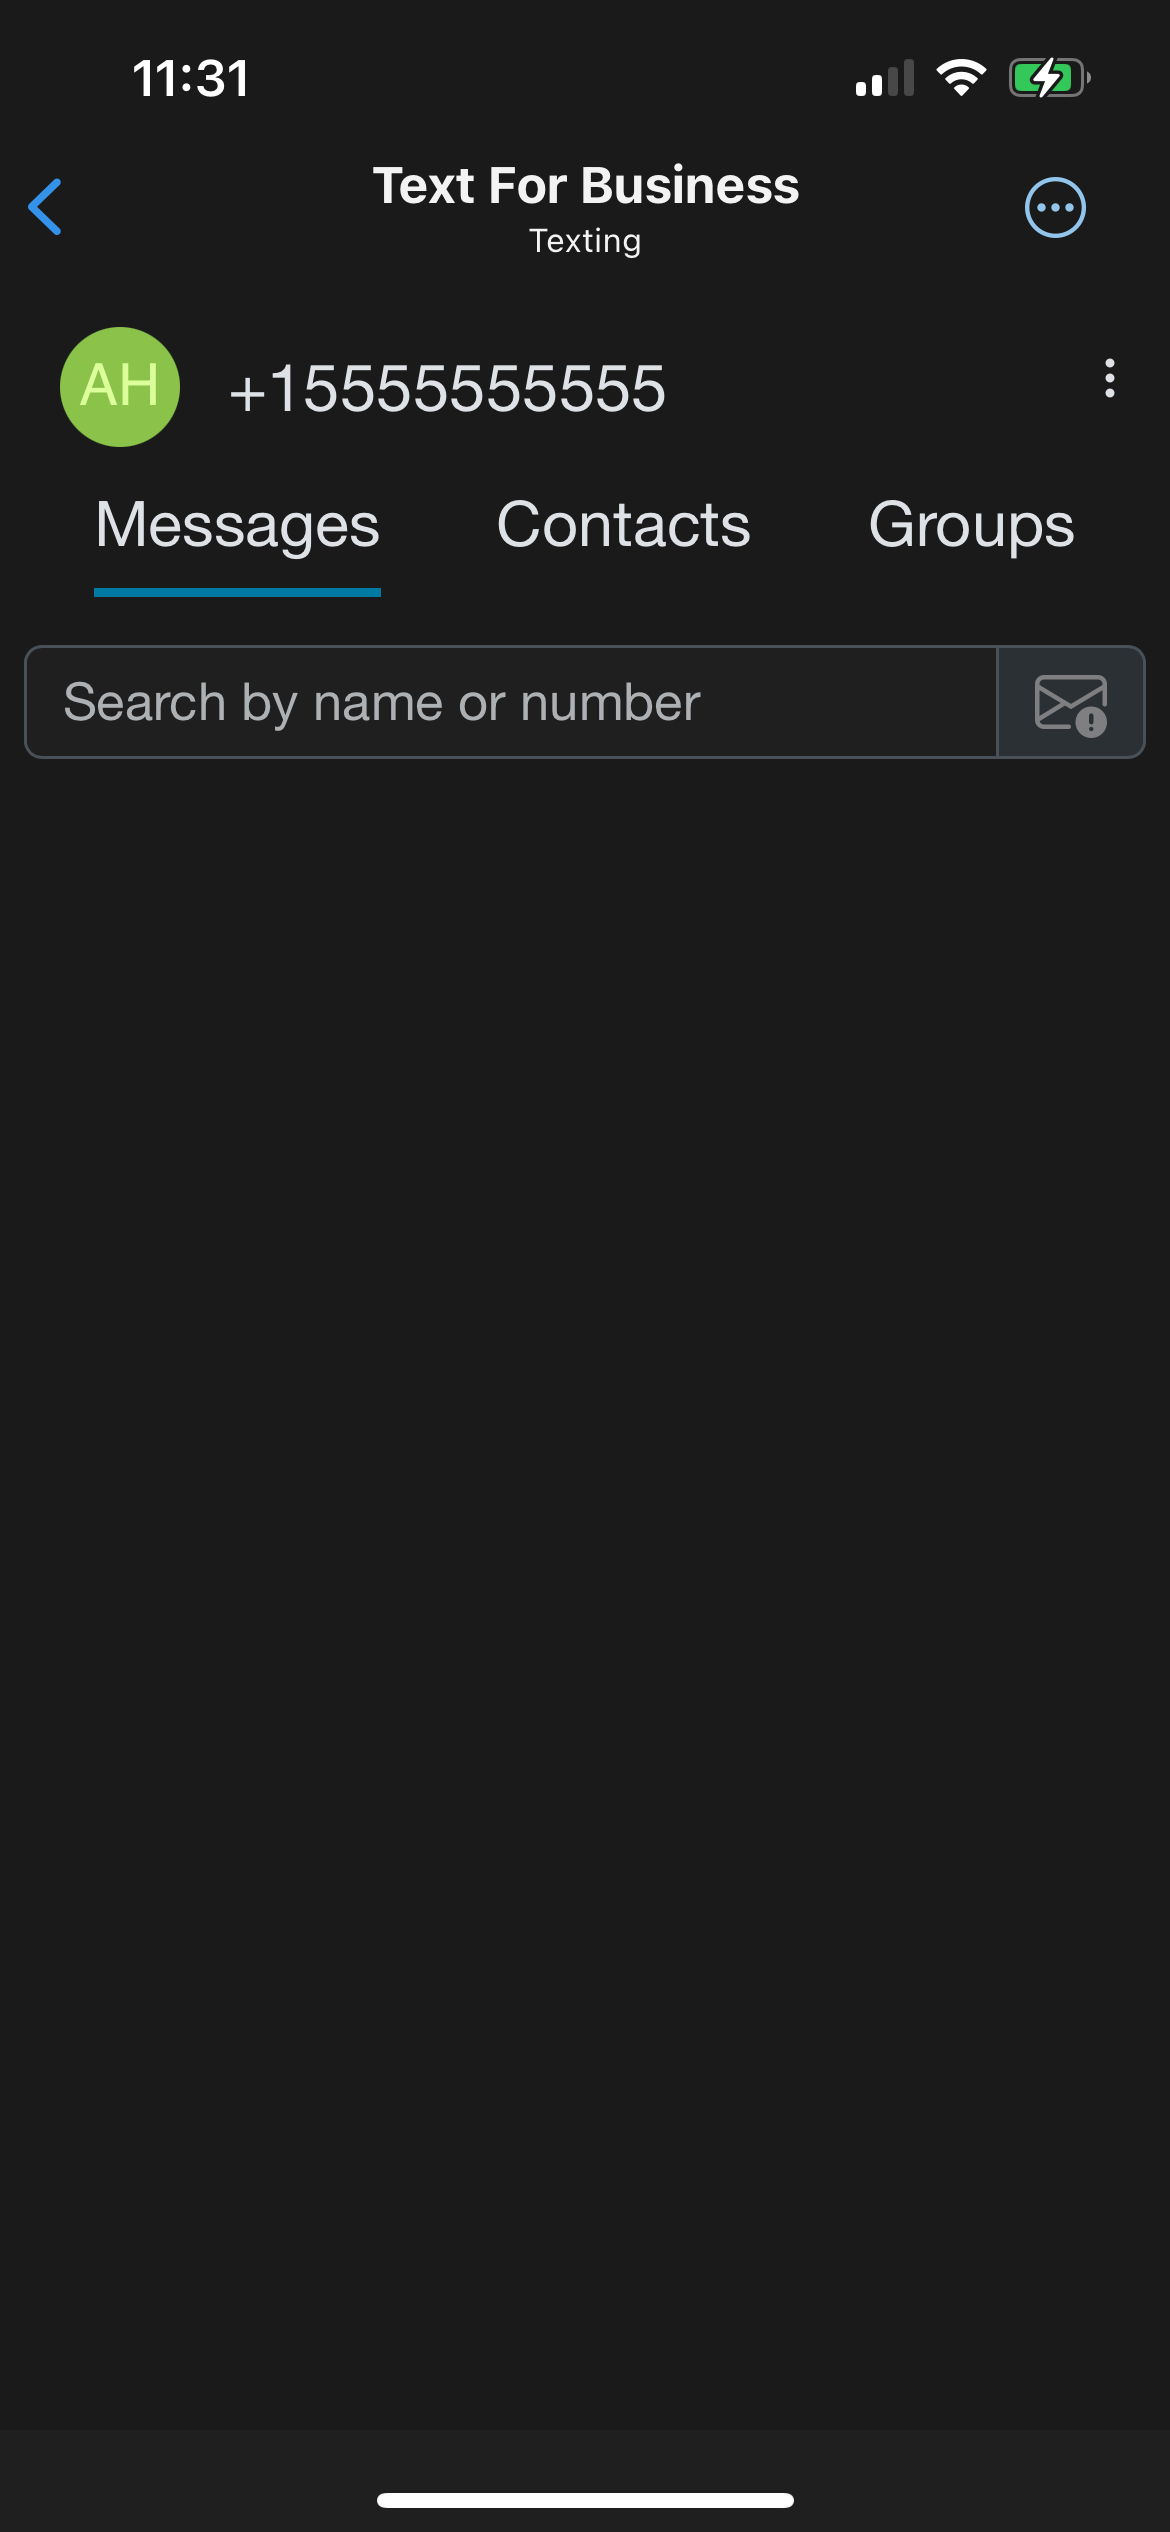
- To access, tap the More Options icon and select Text For Business.
- Texting opens for you to use it.

6
Settings
Configure your notification and auto-response settings
-
- Sign in to your Webex account and navigate to the Texting app.
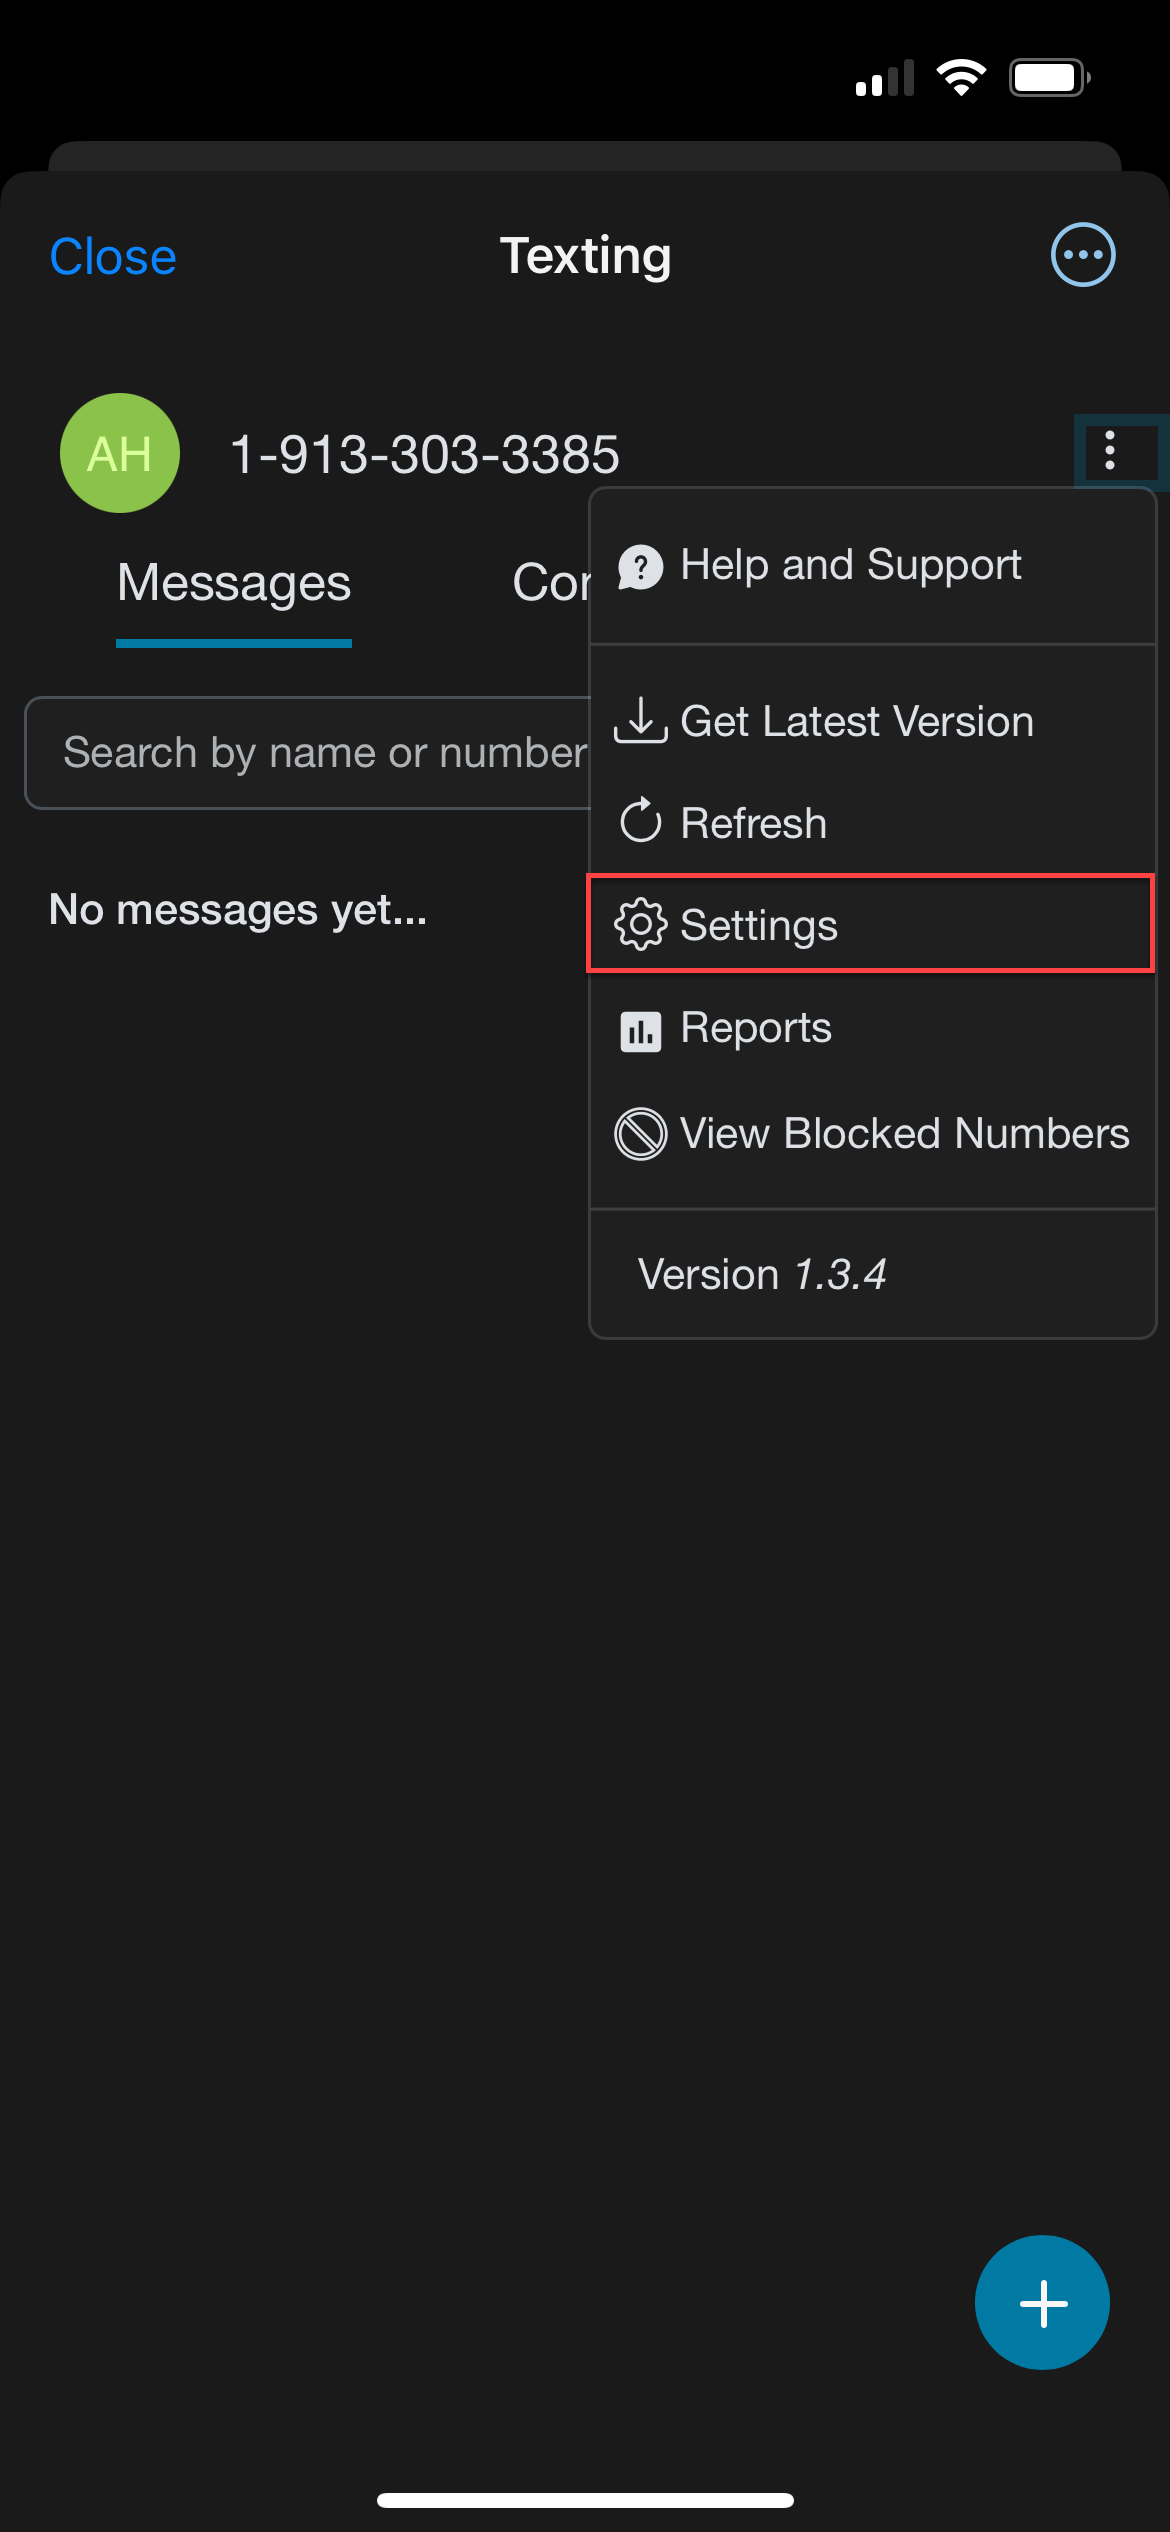
- Tap the more options icon next to your phone number.
- Tap Settings.
-
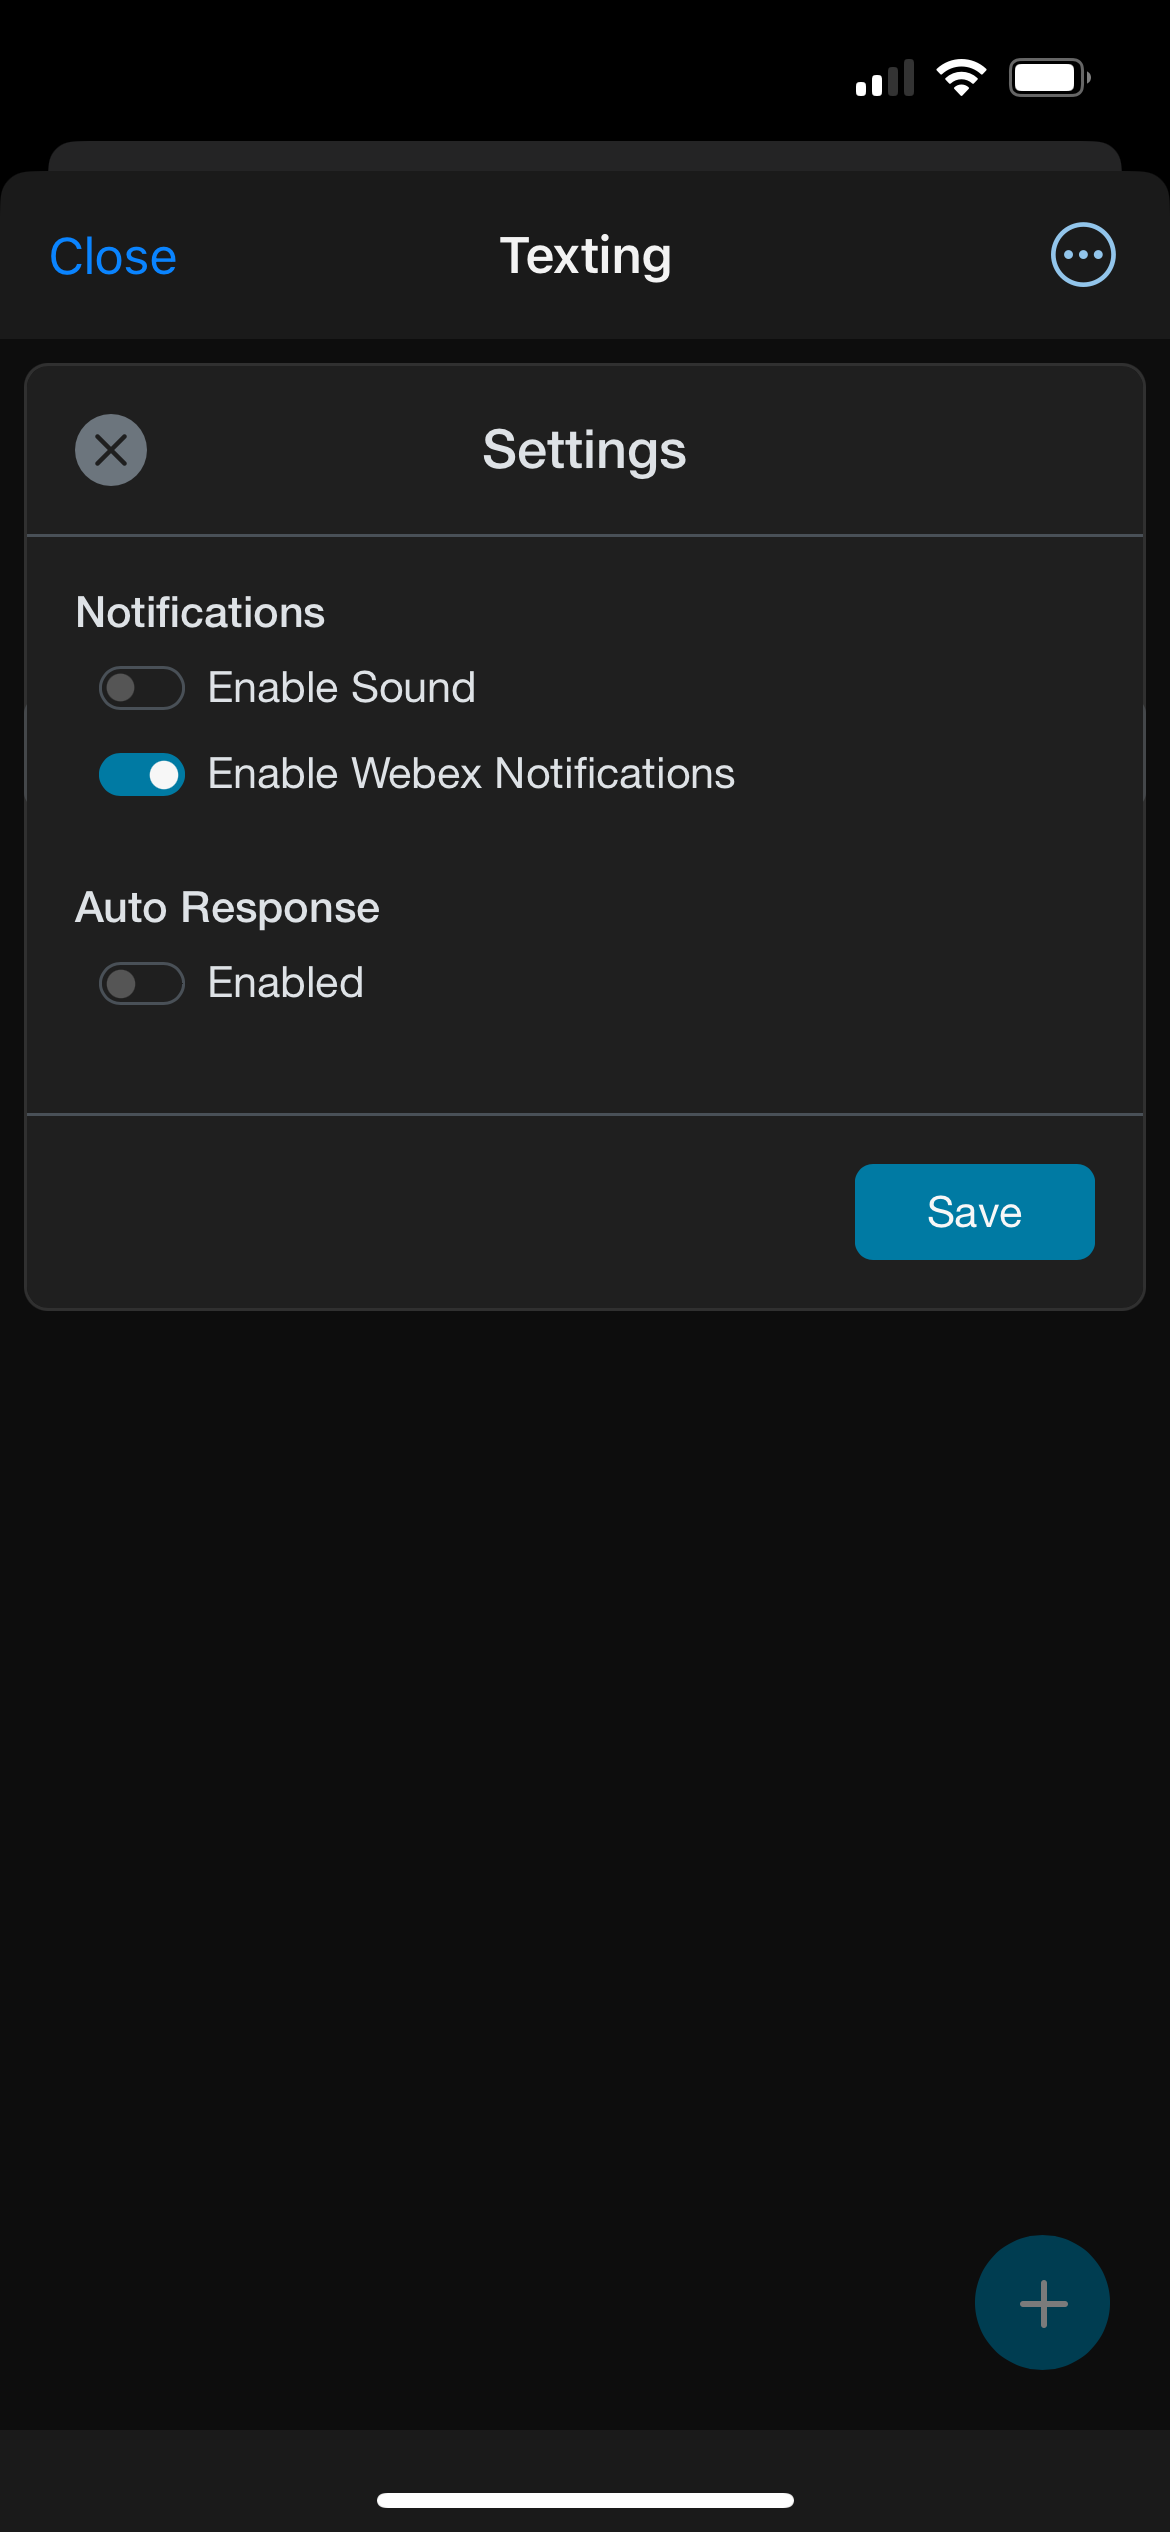
- From here, you can manage notifications and auto response settings.
-
- Set your desired Notifications options:
- Enable Sound – Toggle on and choose a notification sound that plays when you receive a new message.
- Enable Webex – This is toggled on by default and allows notifications to appear through Webex.
- Set your desired Notifications options:
Note: Webex app notifications are influenced by both organization-wide settings and individual user preferences. If some team members are receiving notifications, the organization’s settings likely allow them. If no one is receiving notifications, check your organization's settings in Control Hub, as well as user-level and device notification permissions.
-
- Set your desired Auto Response options:
- Enable Auto Response – By default, Auto Response is turned off. When enabled, it lets you automatically reply to incoming texts with a custom message. This can be especially helpful if you’re out of the office—just set a quick note letting people know you’ll respond when you return. Or, use it to acknowledge messages with a friendly reply right away.
- Set your desired Auto Response options:
Note: This feature is only available for A2P accounts (marketing campaigns) and will not work for person-to-person texting.
-
- Message – Enter the message you want to send as your auto response.
- On new messages only – Enable this to ensure each contact receives your auto-response only once.
- Tap Save to save your preferences.
7
Manage notification settings in Webex
-
- Sign in to your Webex mobile app.
- Tap your profile icon.
- Tap Settings.
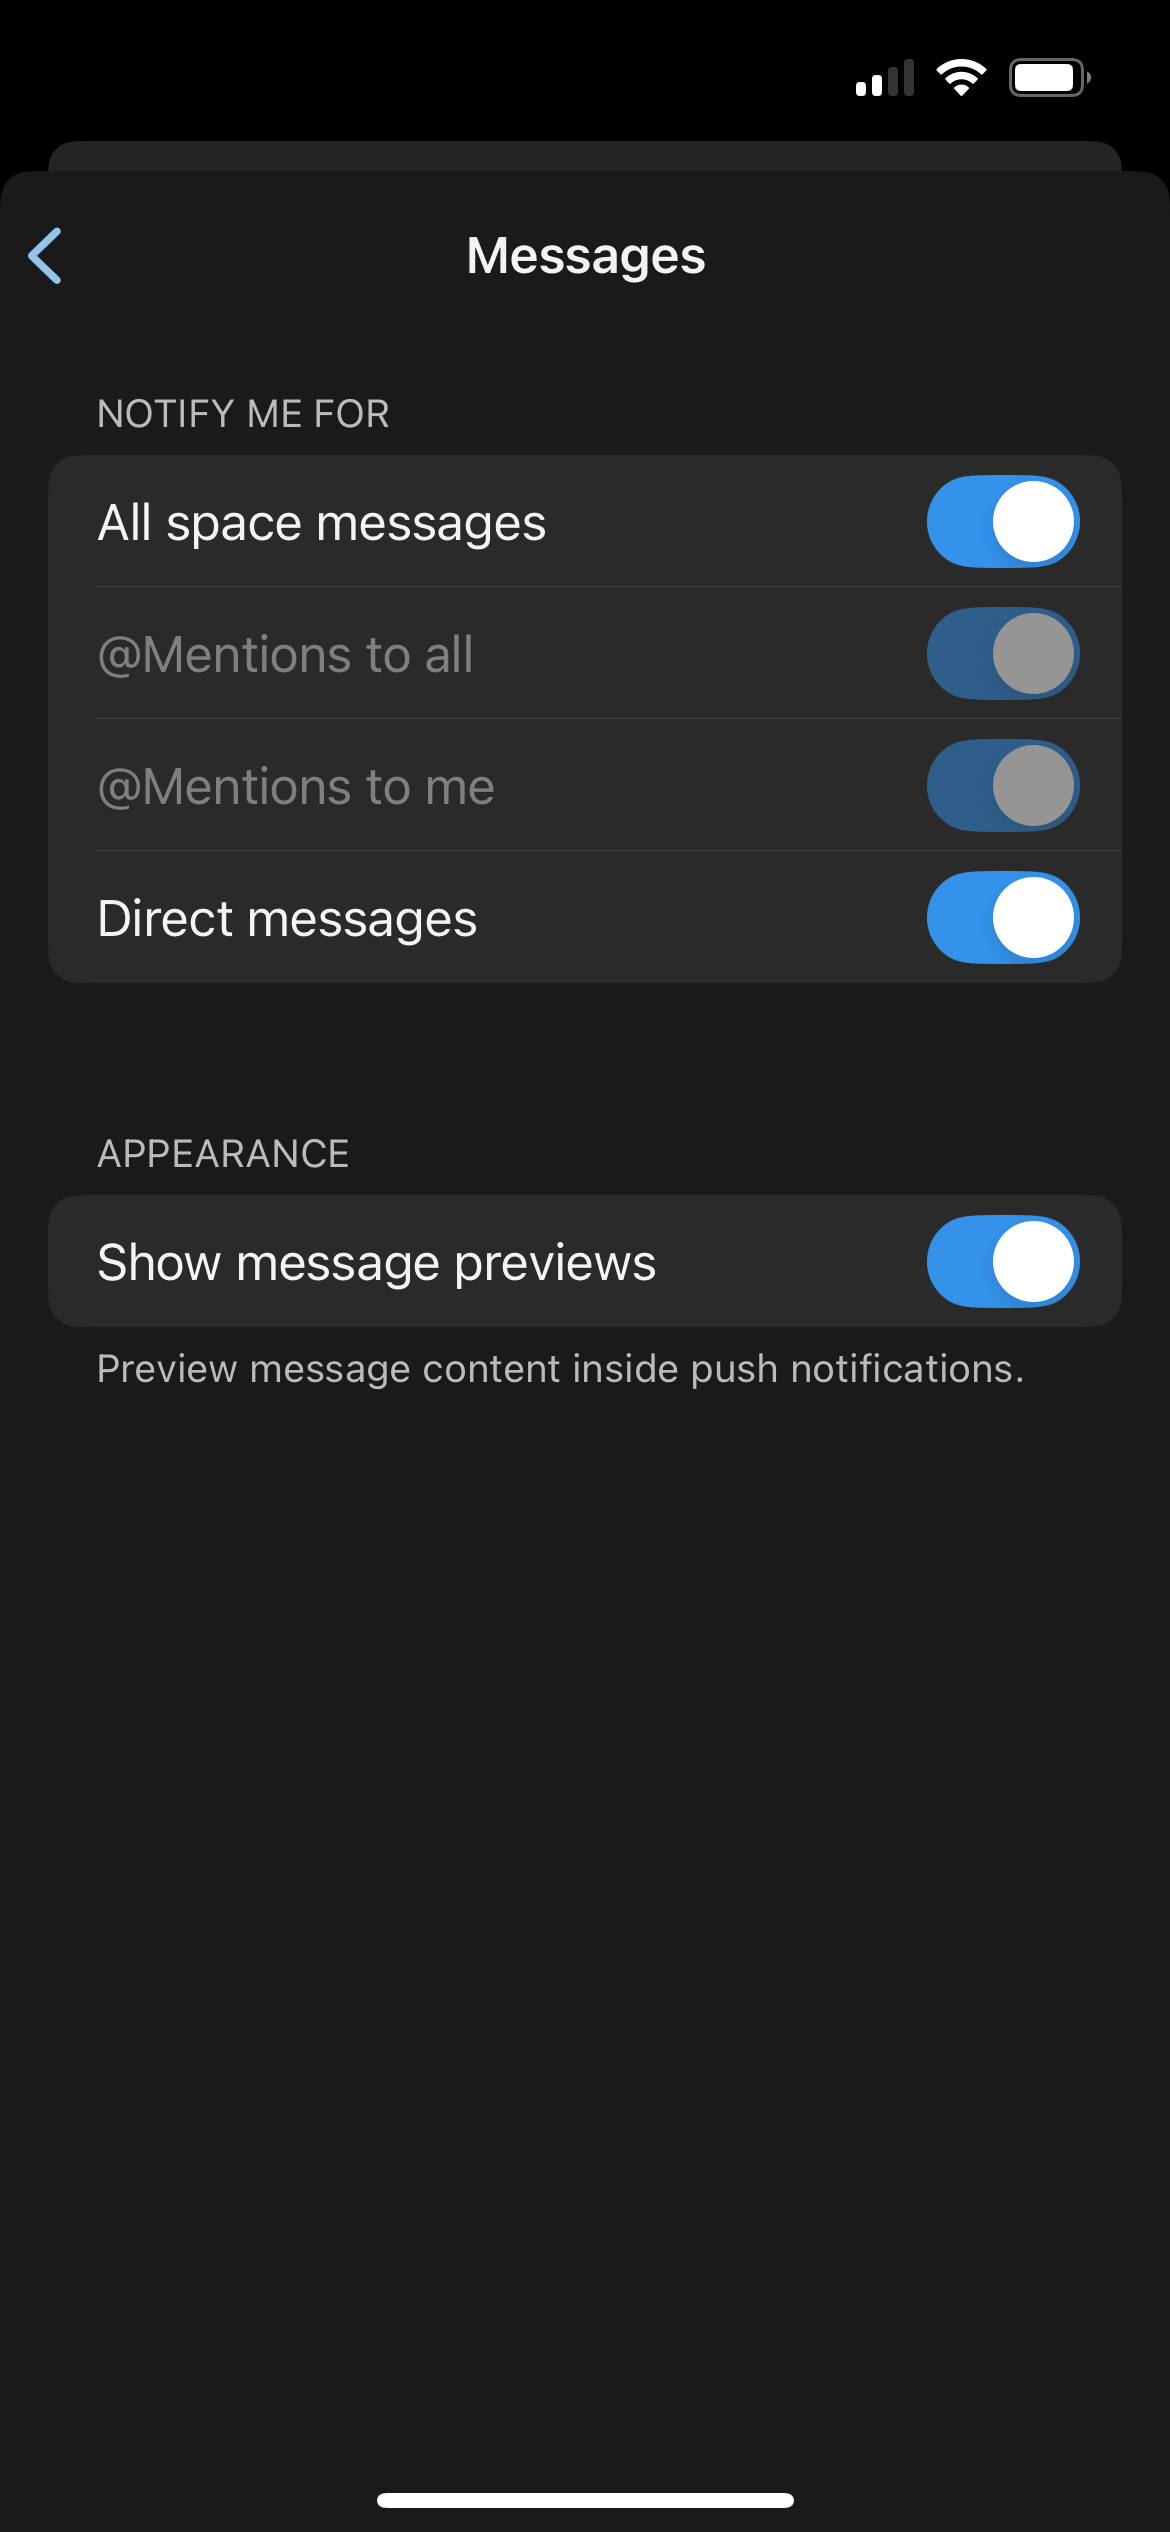
- Tap Notifications and then Messaging.
- Select your desired notifications. The following notification preferences can be set: All space messages, @Mentions to all, @Mentions to me, and Direct messages.
8
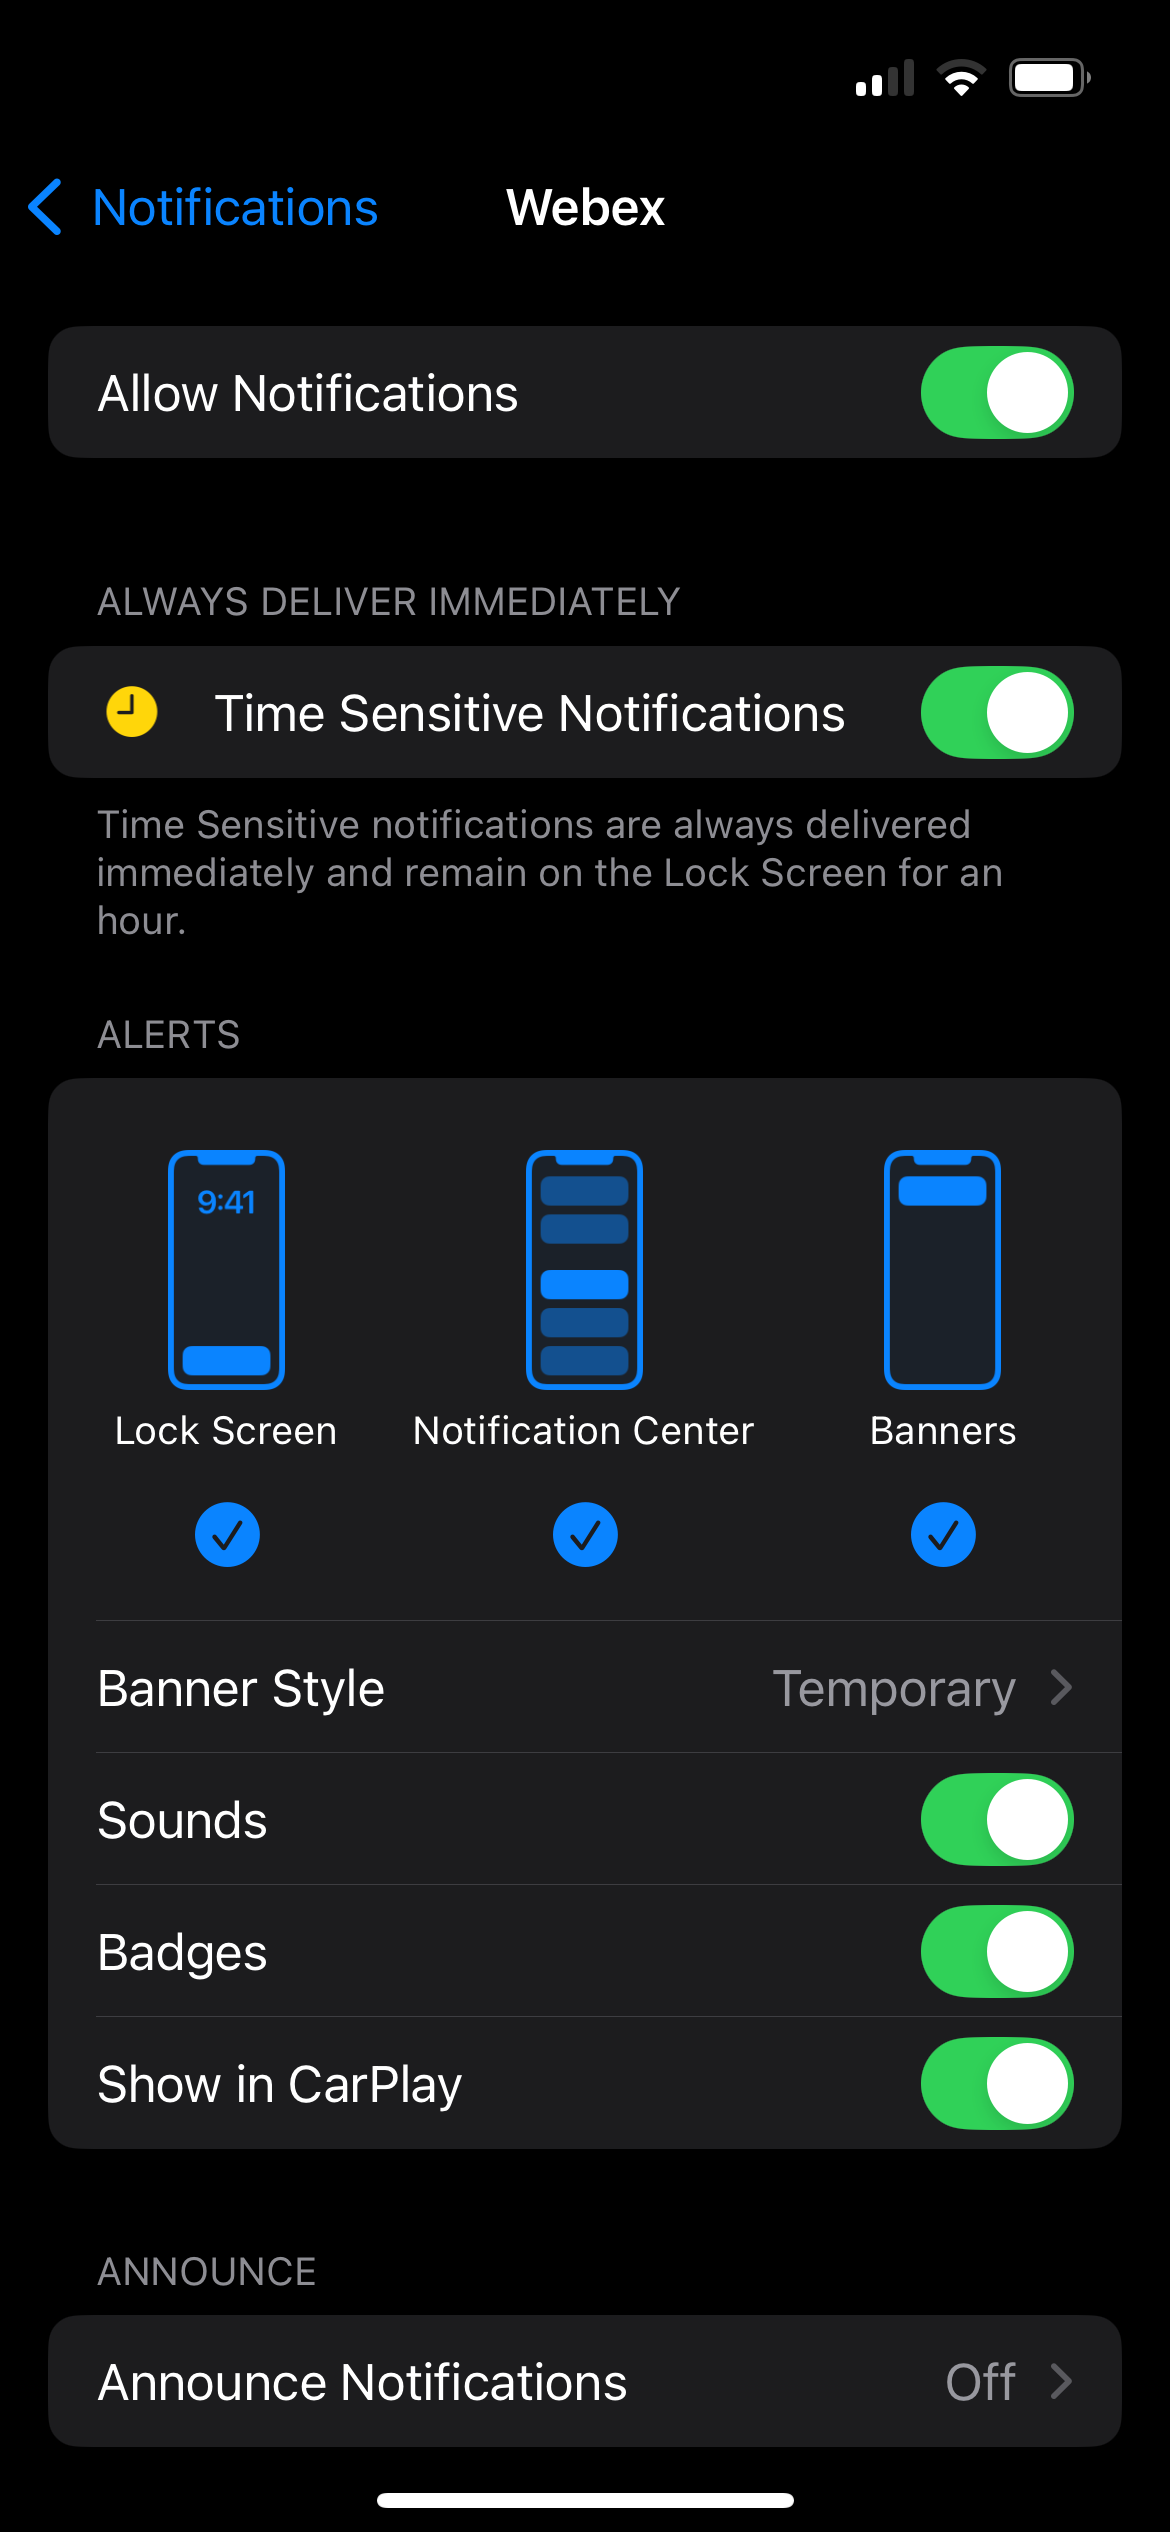
Adjust device notification preferences
Notification settings are managed at the device level and may vary slightly by platform. The following example covers iOS. Android follows similar steps.
-
- Open your device's system settings.
- Go to Notifications.
- In the list of apps, tap Webex.
- Make sure Allow Notifications is toggled on.
- Choose your preferred alert style (e.g., Banners or Alerts), and confirm that sounds and badges are enabled, if desired.
9
Send and view messages
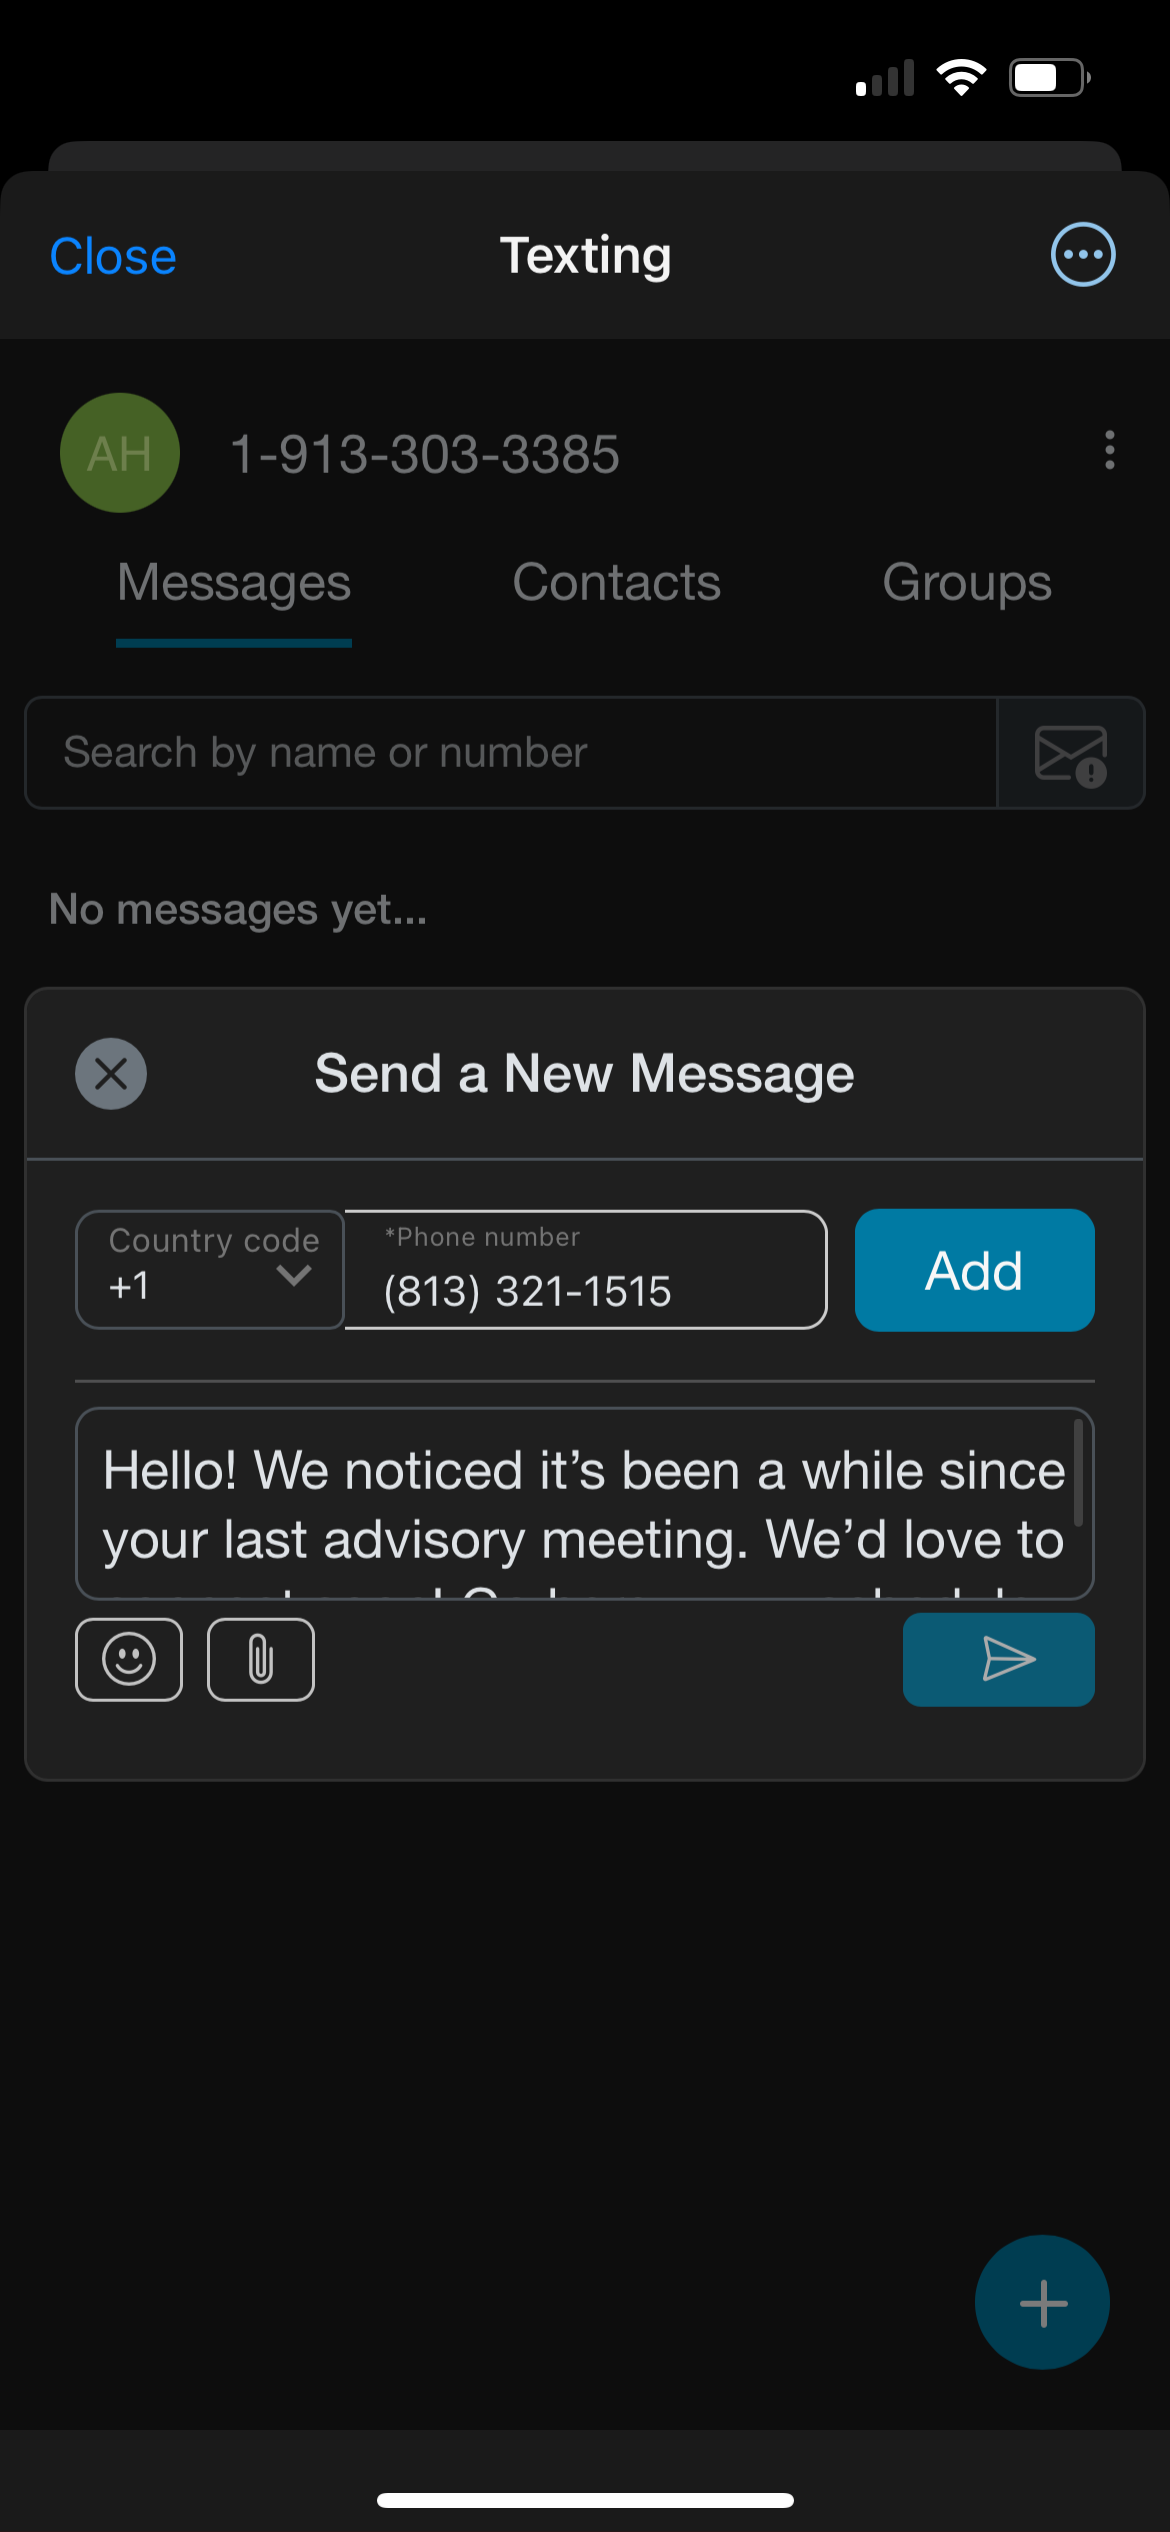
Send a message
-
- Sign in to your Webex account and navigate to the Texting app.
- From Messages, tap the Add (+) icon.
- In the Phone number field, enter the recipient’s ten-digit number and tap Add. The default country code is +1 (US). Use the dropdown to modify if needed.
- In the Type a message field, type your message.
- To personalize your message, you can add emojis or attach a file.
- Tap the arrow to send the message.
View messages
Messages are sent and received in real time. Conversations are organized in Messages.
To view sent and received messages:
-
- Sign in to your Webex account and navigate to the Texting app.
- Tap Messages. Your sent messages appear in a list, with the first line of the text displayed.
- Tap any message in the list to open it.
- The message view displays the complete conversation history with that phone number or group.
- You can continue the conversation by typing and sending additional messages.

- Tap the contact icon to save the number as a contact.
- In the contact window, add details like name, email, or an image (only the phone number is required). Tap the green checkmark to save.
- To delete a contact, tap the red trash can icon. Deleted contacts can still send messages, but only their number will display. ).
Contacts are private to you. No one else can view or edit them
10
Manage contacts
Contacts allow you to:
- Search and view contacts
- Edit or delete existing contacts
- Add new contacts
- Bulk import contacts
You’ll see an alphabetical list of your saved contacts. Use the search bar to quickly find a contact, or tap any name to open their message history.
Add a contact from a message
You can add a new contact quickly from a message thread.
-
- Sign in to your Webex account and navigate to the Texting app.
- Tap Messages and select a message to view.
- Tap the more options icon, then Create Contact, or tap the check-box icon within the message.
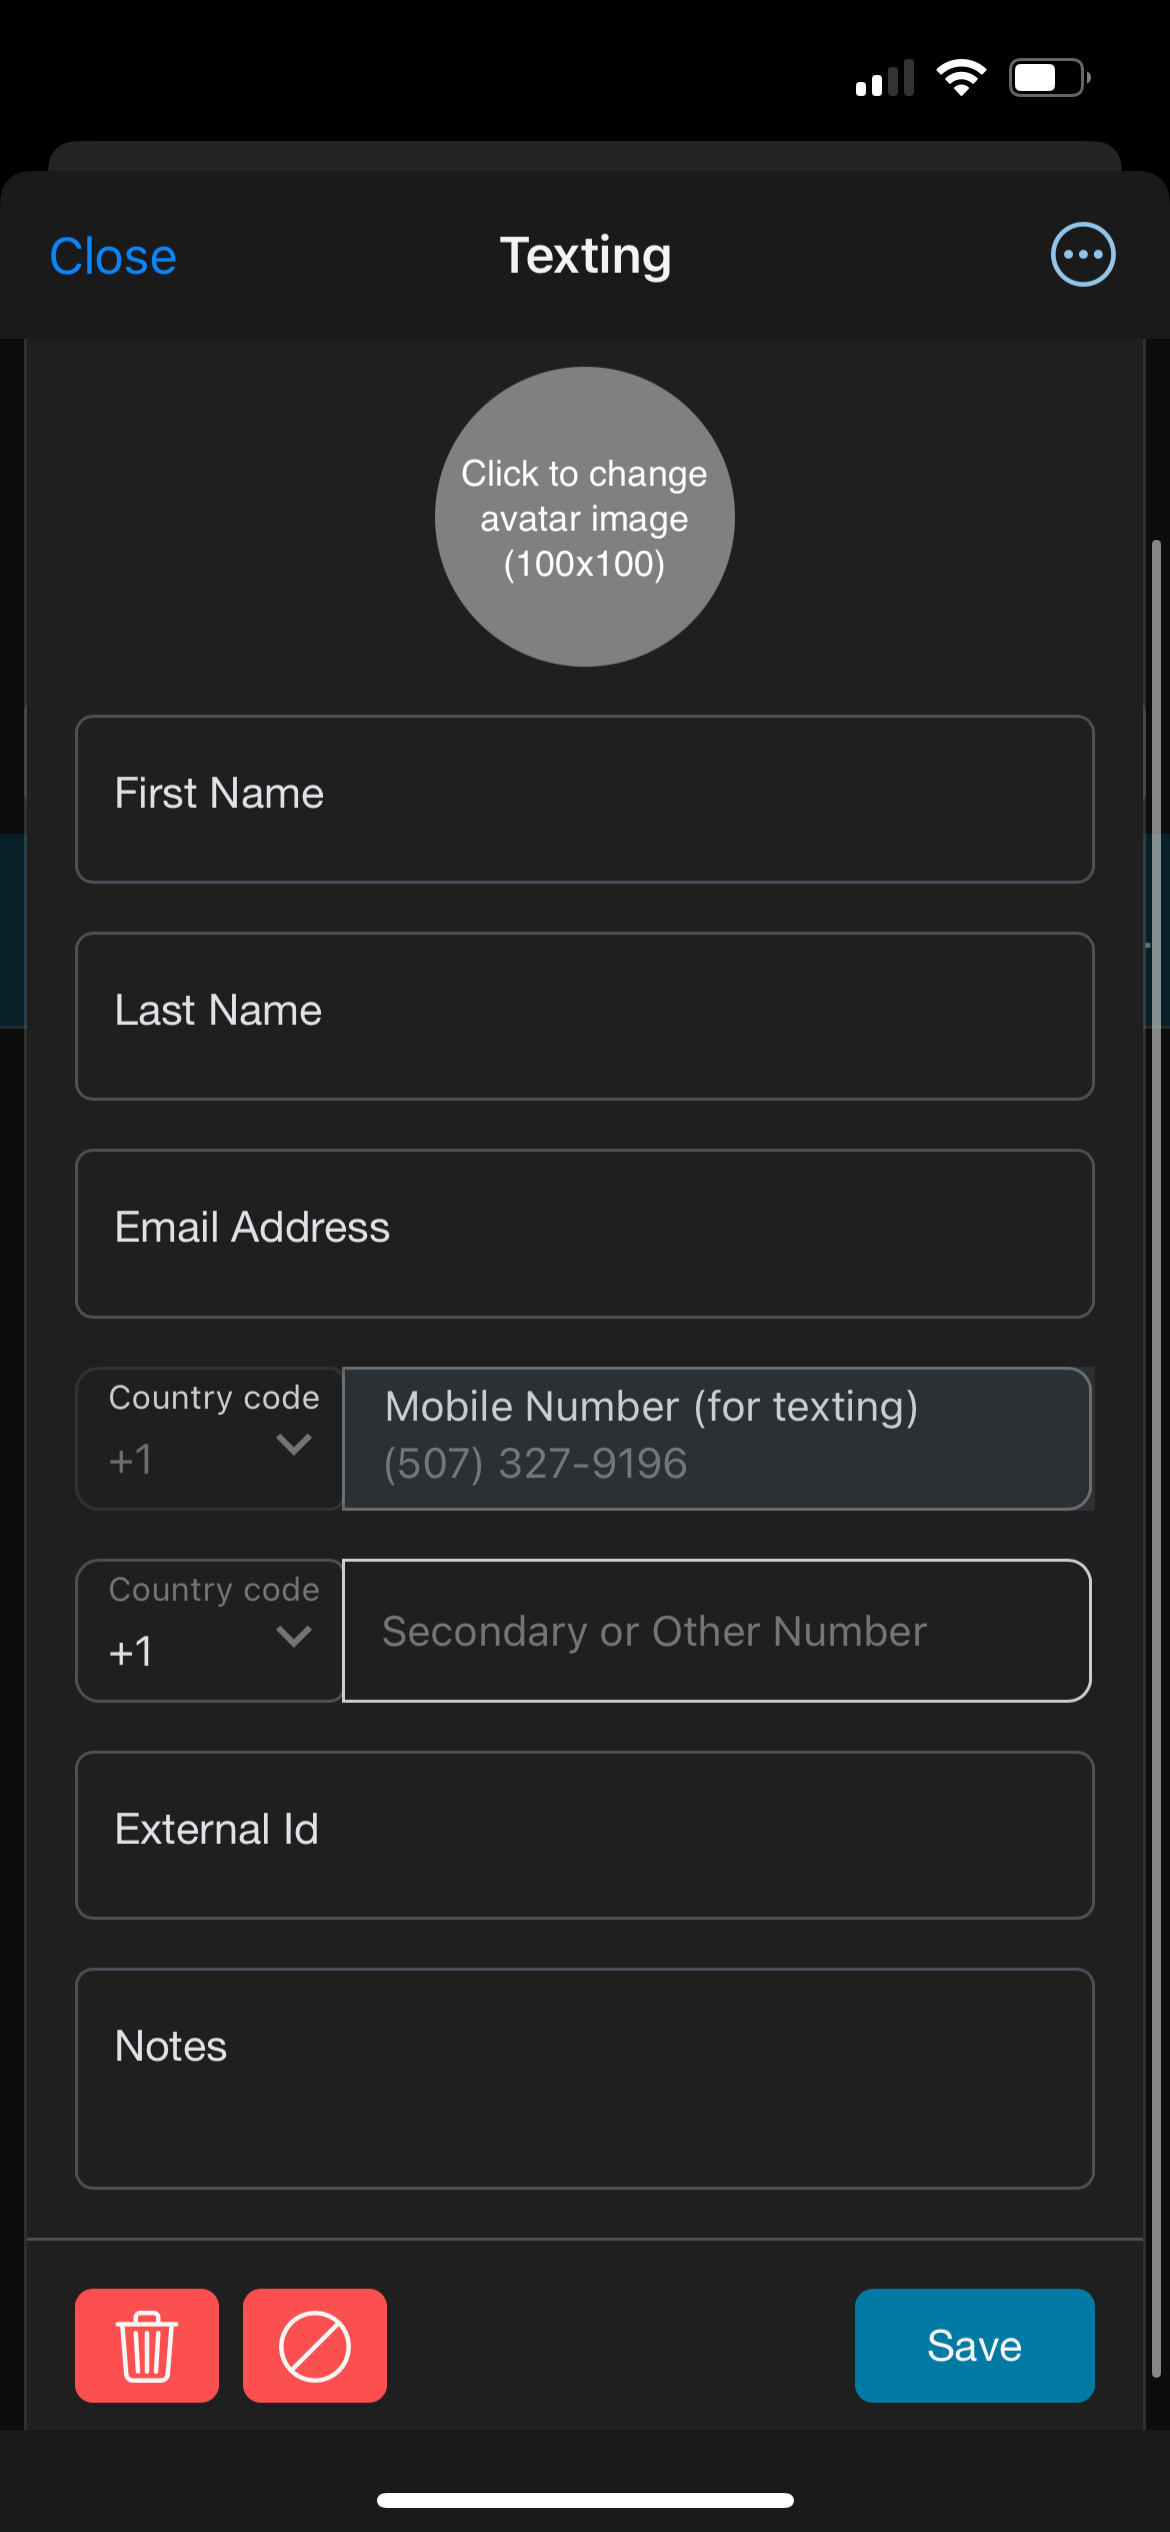
- A contact form opens.
- The Mobile Number is required and is automatically entered.
- Optionally, you can add an image, Name, Email, External Id, and Notes.
Note: External Id can help link your contacts to other systems if needed later.
-
- Tap Save to create the contact.
Add a contact within Contacts
You can add a new contact within Contacts.
-
- Tap Contacts.
- Tap the Add (+) icon.
- Tap Add Contact.
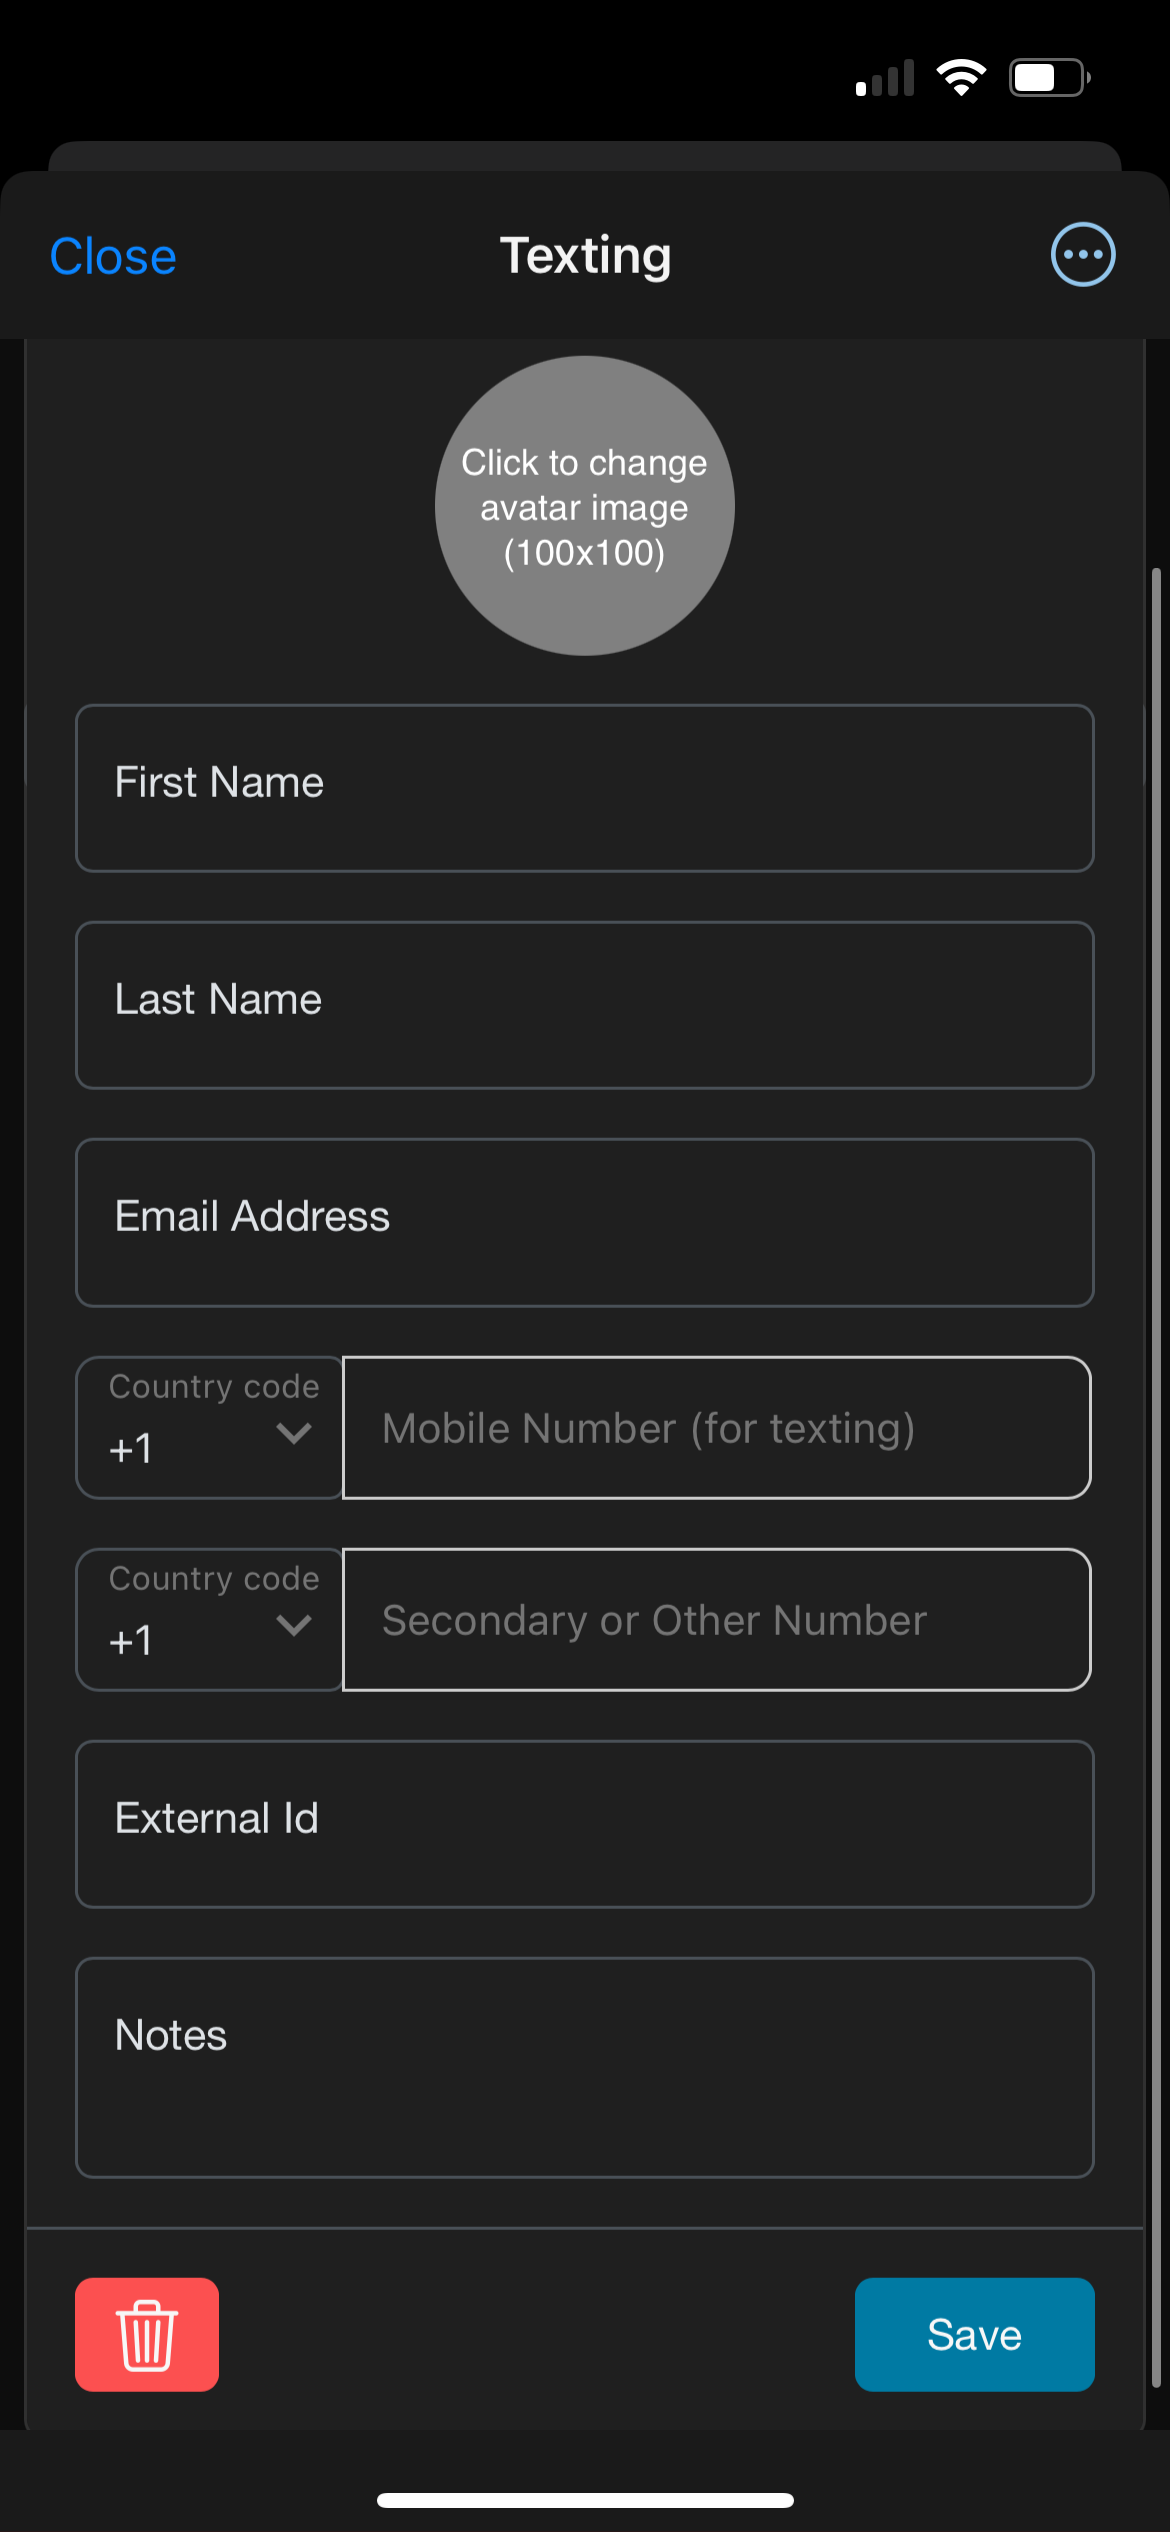
- A blank contact form opens.
- The Mobile Number is required.
- You can optionally add an image, Name, Email, External Id, and Notes. Note: External Id can help link your contacts to other systems if needed later.
- Tap Save to add the contact.
Edit a contact
-
- Sign in to your Webex account and navigate to the Texting app.
- Tap Contacts.
- Next to the contact you’d like to update, Tap the more options icon.
- Tap Edit Contact.
- The following fields can be modified:
- Image - Tap to add an image or avatar to help visually identify the contact.
- First Name - Update the contact’s first name.
- Last Name - Update the contact’s last name.
- Email Address - Add or modify the contact’s email address.
- Mobile Number - This is the primary number used for texting. It is required and must be in 10-digit format with no dashes or spaces.
- Secondary or Other number - Use this for an alternate number.
- External Id - A unique identifier from your internal system, useful for integrating contact data with a CRM or other platform.
- Notes - Add relevant information or context about the contact.
- If changes were made, tap Save.

Delete a contact
-
- Tap Contacts.
- Next to the contact you’d like to update, tap the more options icon.
- Tap the Delete Contact to remove the contact. Confirm that you wish to delete the contact by tapping Delete.

- The contact is removed from your contact list, and the message thread is no longer accessible in your inbox. Your message history is not lost—it's securely stored in the background for future reporting or validation needs.
Note: If a deleted contact sends a new message, the previous message thread automatically reappears. The phone number is visible, but previously saved contact details aren’t restored unless you re-add the contact.
10
Access reports
Reports give you a quick view of your text message activity, including how many messages you’ve sent and received. They provide a simpler way to track usage, monitor communication, and ensure everything is running smoothly.
To view your message reports:
-
- Sign in to your Webex account and navigate to the Texting app.
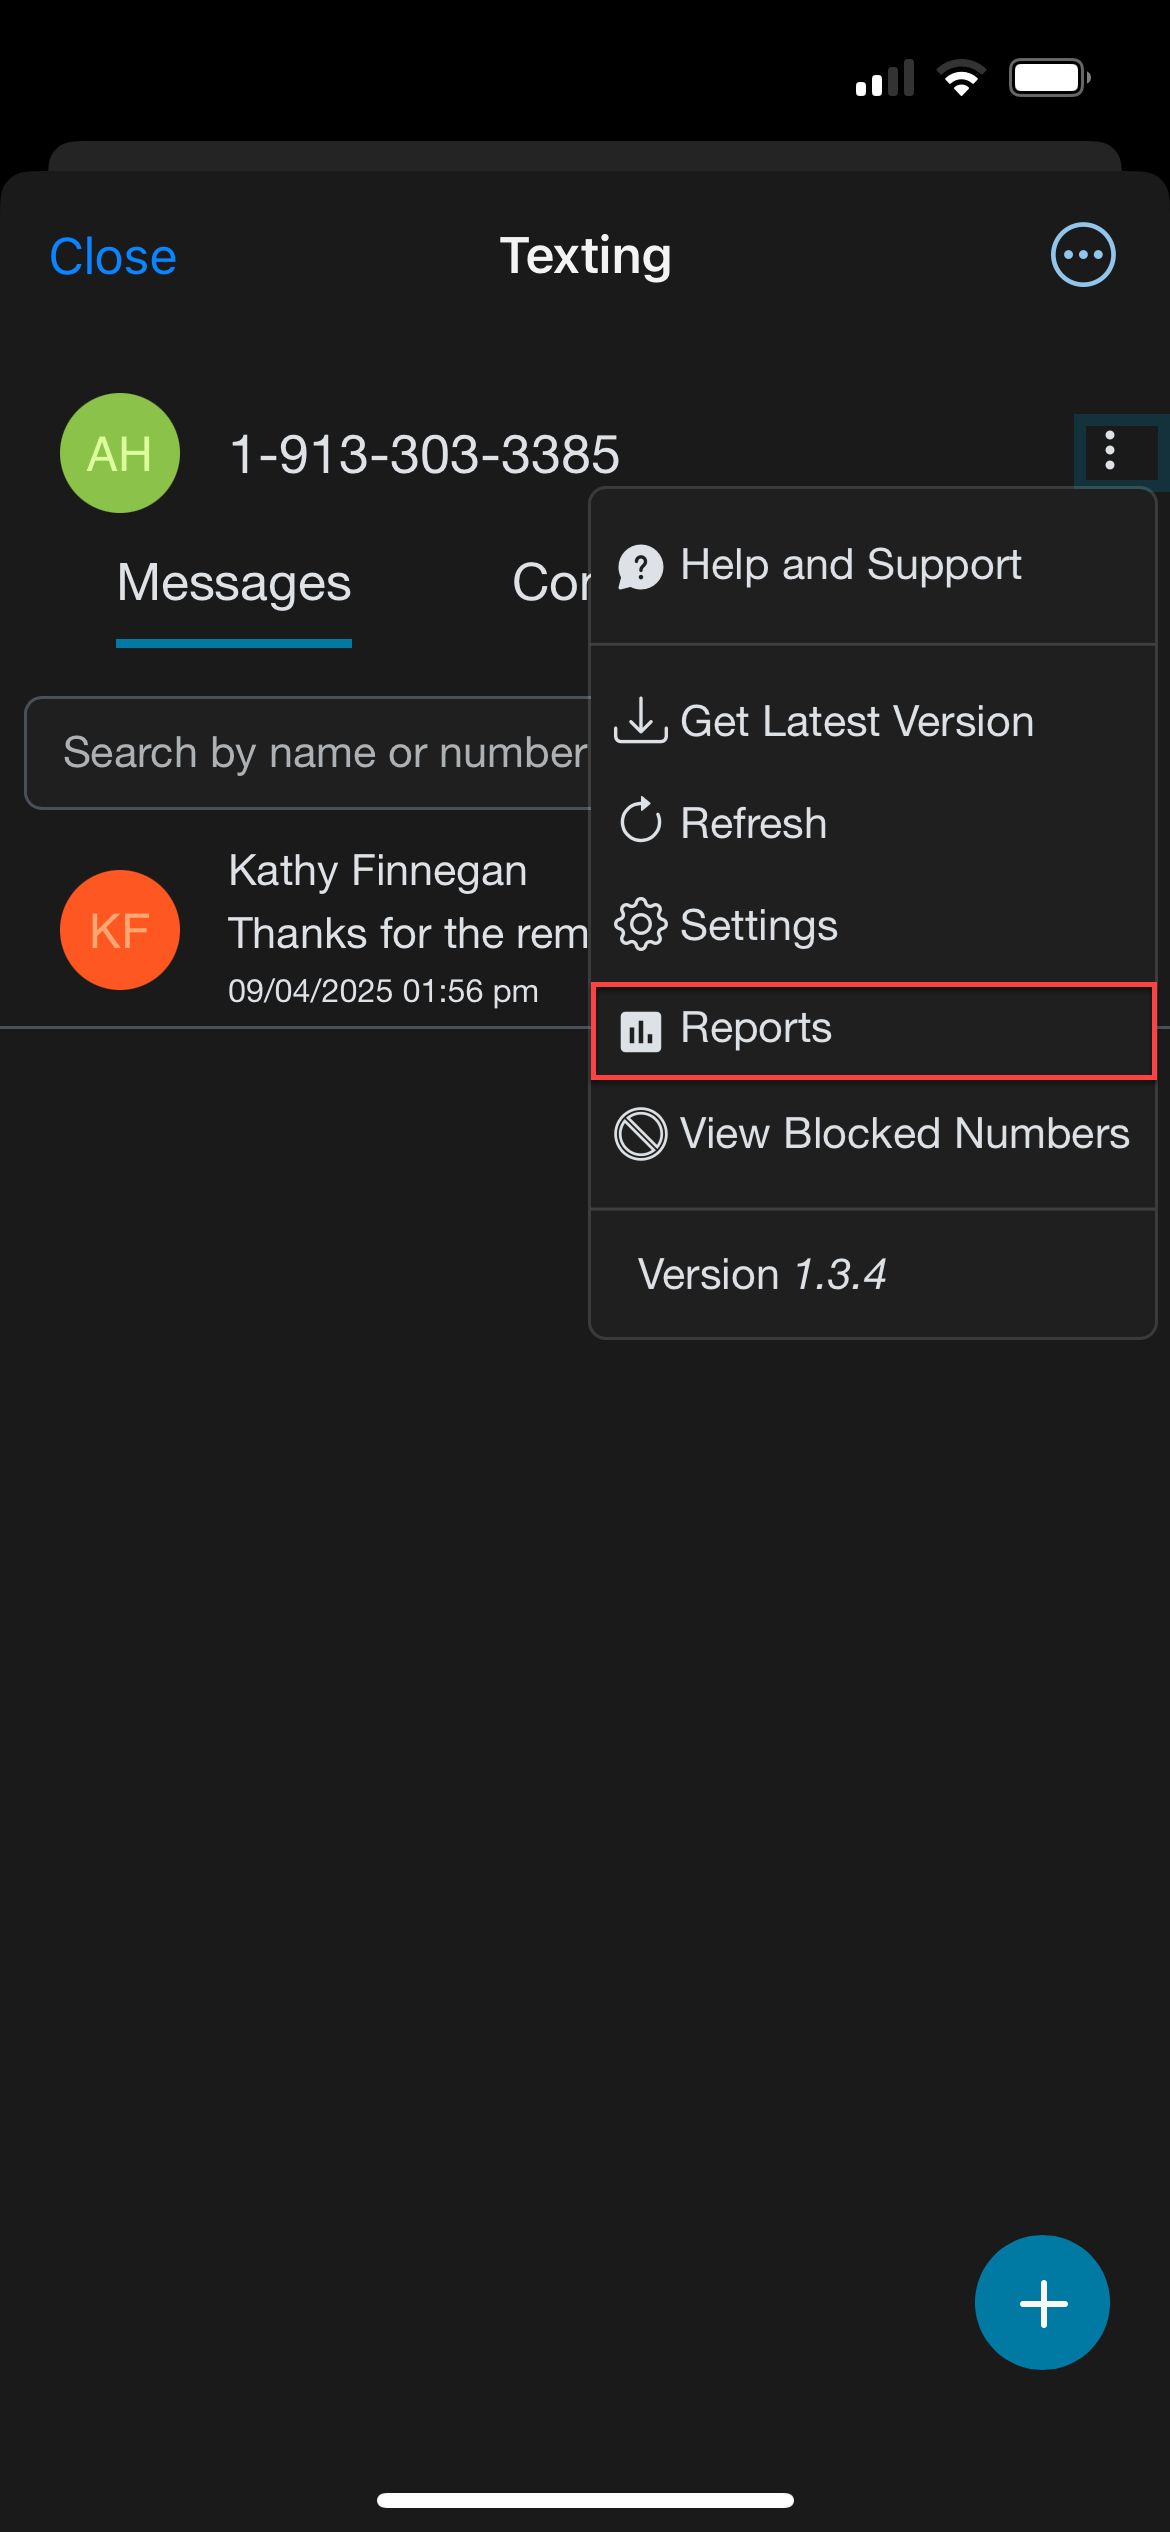
- Tap the more options icon next to the phone number you want to check.
- From the dropdown menu, tap Reports.
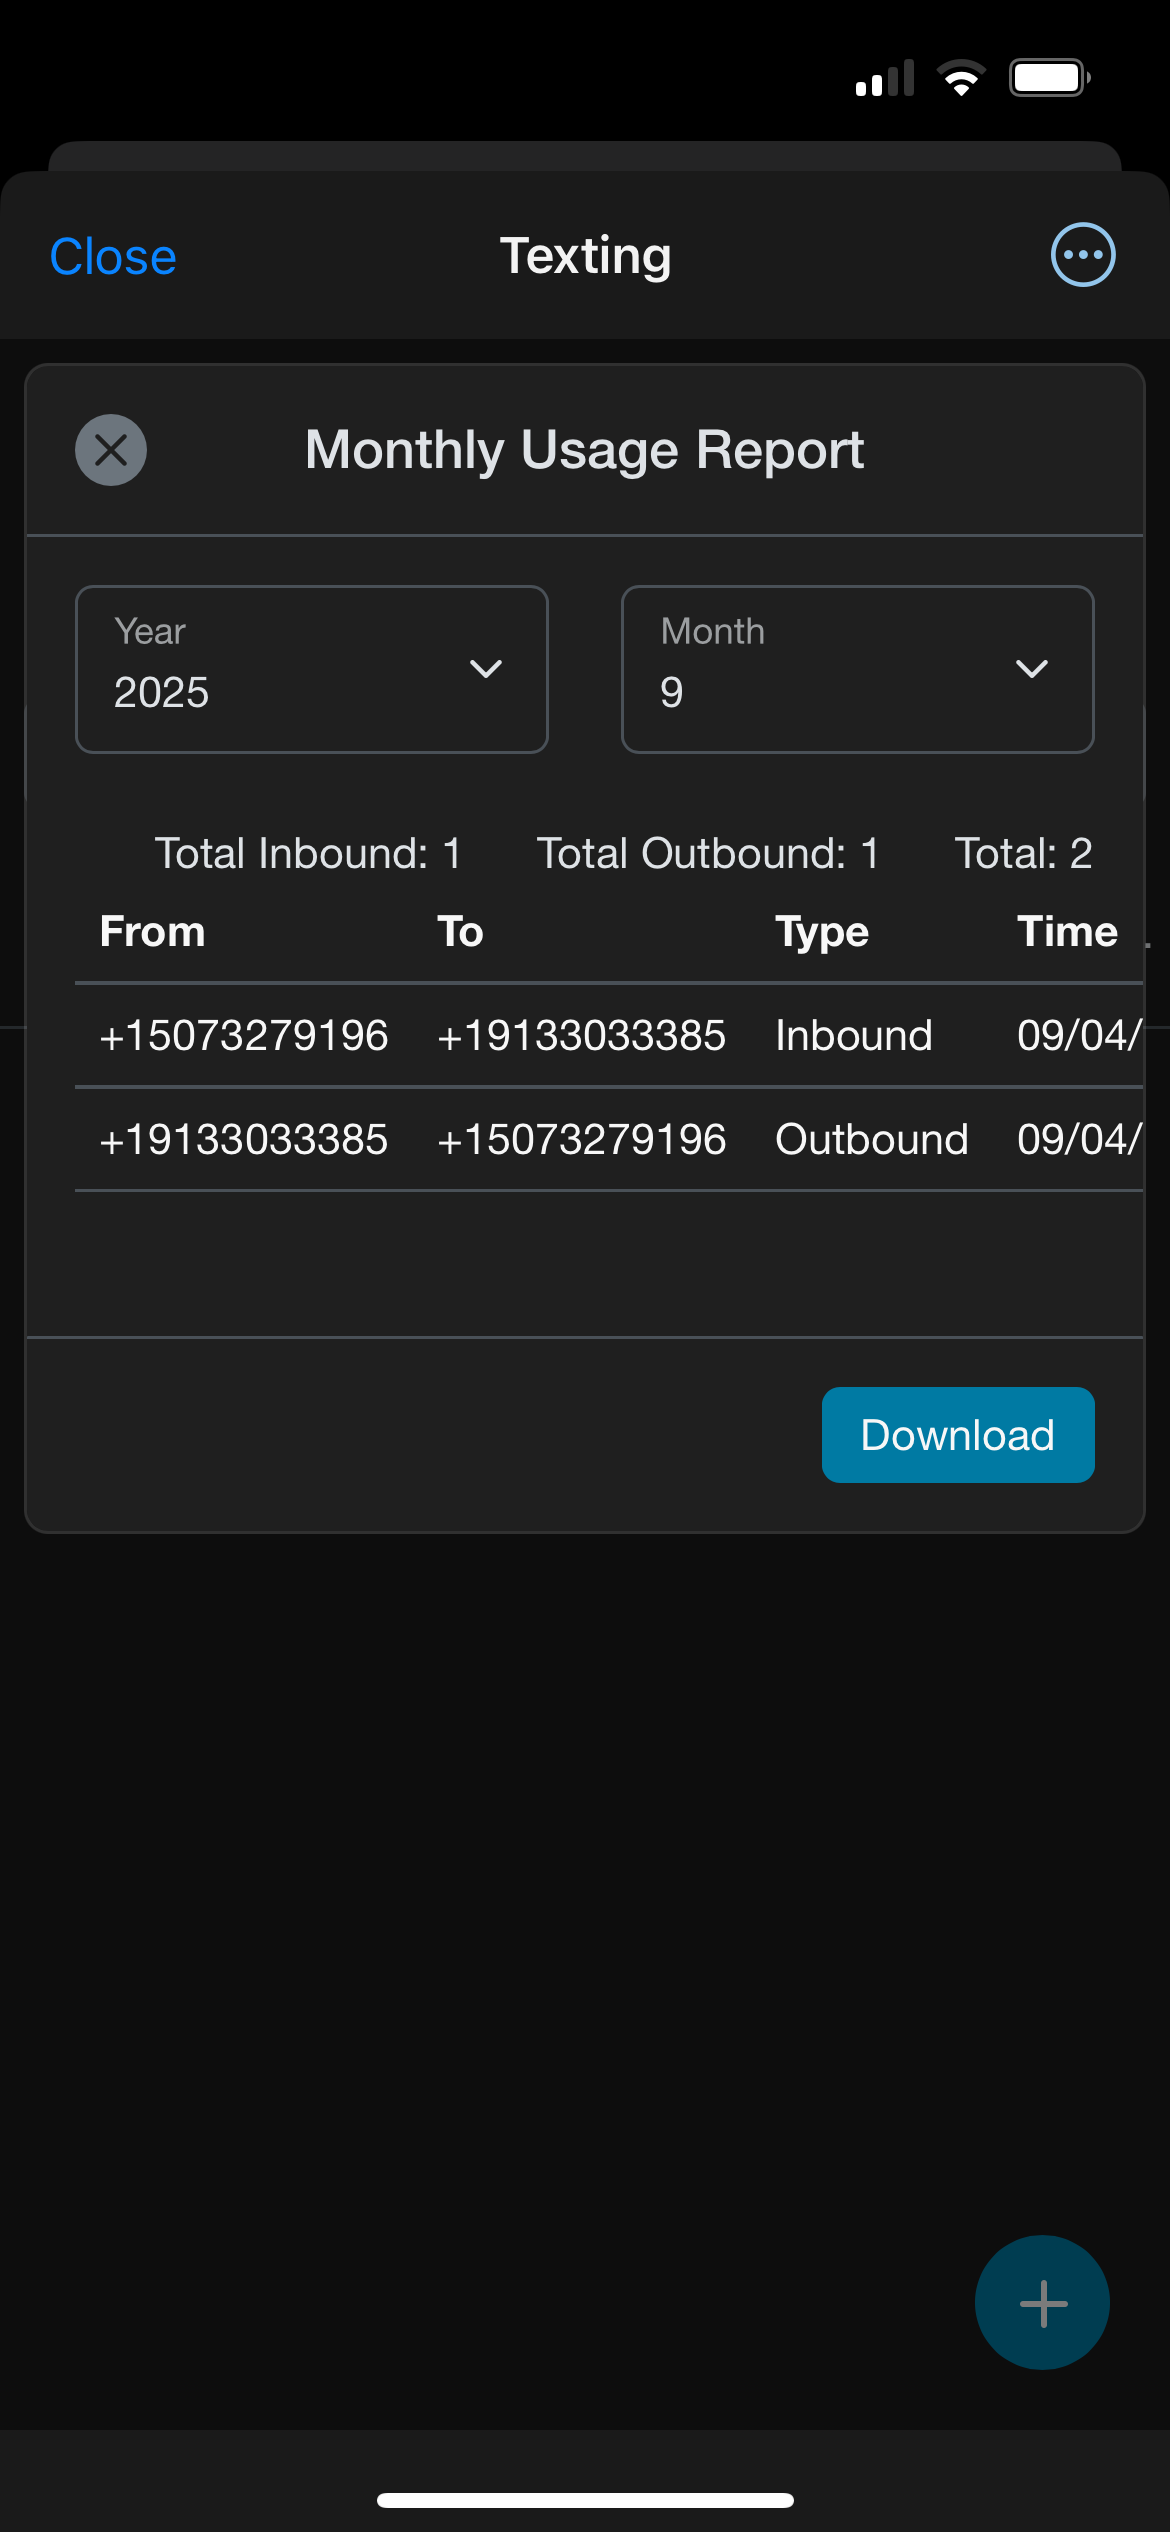
- The Monthly Usage Report opens.
- Use the dropdowns to choose the Year and Month you wish to view.
- The report shows:
- The number of messages you sent.
- The number of messages you received.
- The total number of messages.
- The phone numbers that sent or received the messages.
- The date and time each message was sent.
- Tap Download to save the report.
Note: If you don’t see usage data for your phone number, ask your administrator.