What you need to know:
This document provides guidance for users to effectively utilize their Texting app within ProConnect with Teams.
Introduction
This document guides users to effectively utilize their mobile Texting app within ProConnect with Teams.
Note: Throughout this document, phone numbers may be intentionally blocked out.
1.
Overview of Texting Using Teams
- Texting allows you to send and receive text messages from your work phone numbers.
- Creates an easy way for you to use a work number for texting instead of your personal mobile phone.
- All the features of your smartphone from your business line.
2.
The Basics
Prerequisites
Prior to utilizing Texting for ProConnect with Teams, ensure that you have:
- An active Texting subscription.
- The Texting application is installed on your Teams sidebar.
Note: Your Microsoft O365 administrator may need to authorize the app for use within Teams.
Access the Texting application
- Sign in to Teams.
- Go to More and tap Add app.
- Search for and add Texting.
- Tap on the Texting app. This may be in More if you have multiple widgets in your toolbar.
If the account is correctly configured, it should automatically populate your personal number. Please contact your administrator if the app does not appear in your Teams app hub.
Adjust notifications and settings
You can make changes to the notifications and settings specific to your account in the Texting application.
- Navigate to the Texting application in your Teams account.
- Select the more option to the right of your phone number.
A list containing several menu options populates.
- Help and Support – Access frequently asked questions and information for how to reach out for support.
- Get Latest Version – Ensure that you are on the latest version of the application. Note: While this is automated, there are circumstances that can cause your app version to fall behind. If you are experiencing something strange or if you are missing a feature that you believe to be released, this is a good option for the first step of troubleshooting.
- Refresh – Refreshes your phone number, ensuring all messages are up to date and that all your outbound texts have been sent.
- Settings – Manage settings for your phone number.
Teams notifications are defaulted and toggled on allowing the utilization of the Teams notification bot installed locally on your instance.
- Notifications - App notifications for Teams have a global/org setting that needs to be enabled. Check the Texting app’s global settings if no one is receiving notifications. Contact your Teams tenant administrator for assistance.
- Enable Sound
- Enable Microsoft Teams - When enabled, a Notification Name must be assigned.
- Auto Response - Allows you to set an automatic text response any time you get a message. On new messages only allows you to auto respond to only new messages, meaning no one would receive this auto-response twice. This feature is only available for A2P accounts (marketing campaigns) and will not work for person-to-person texting.
- Multiple Numbers - When enabled, you can choose from multiple configured numbers.
- Reports – See both your inbound/outbound messaging volume and messaging specifics on a month-by-month basis.
- View Blocked Numbers – View and search blocked messages and contacts.
Run reports
-
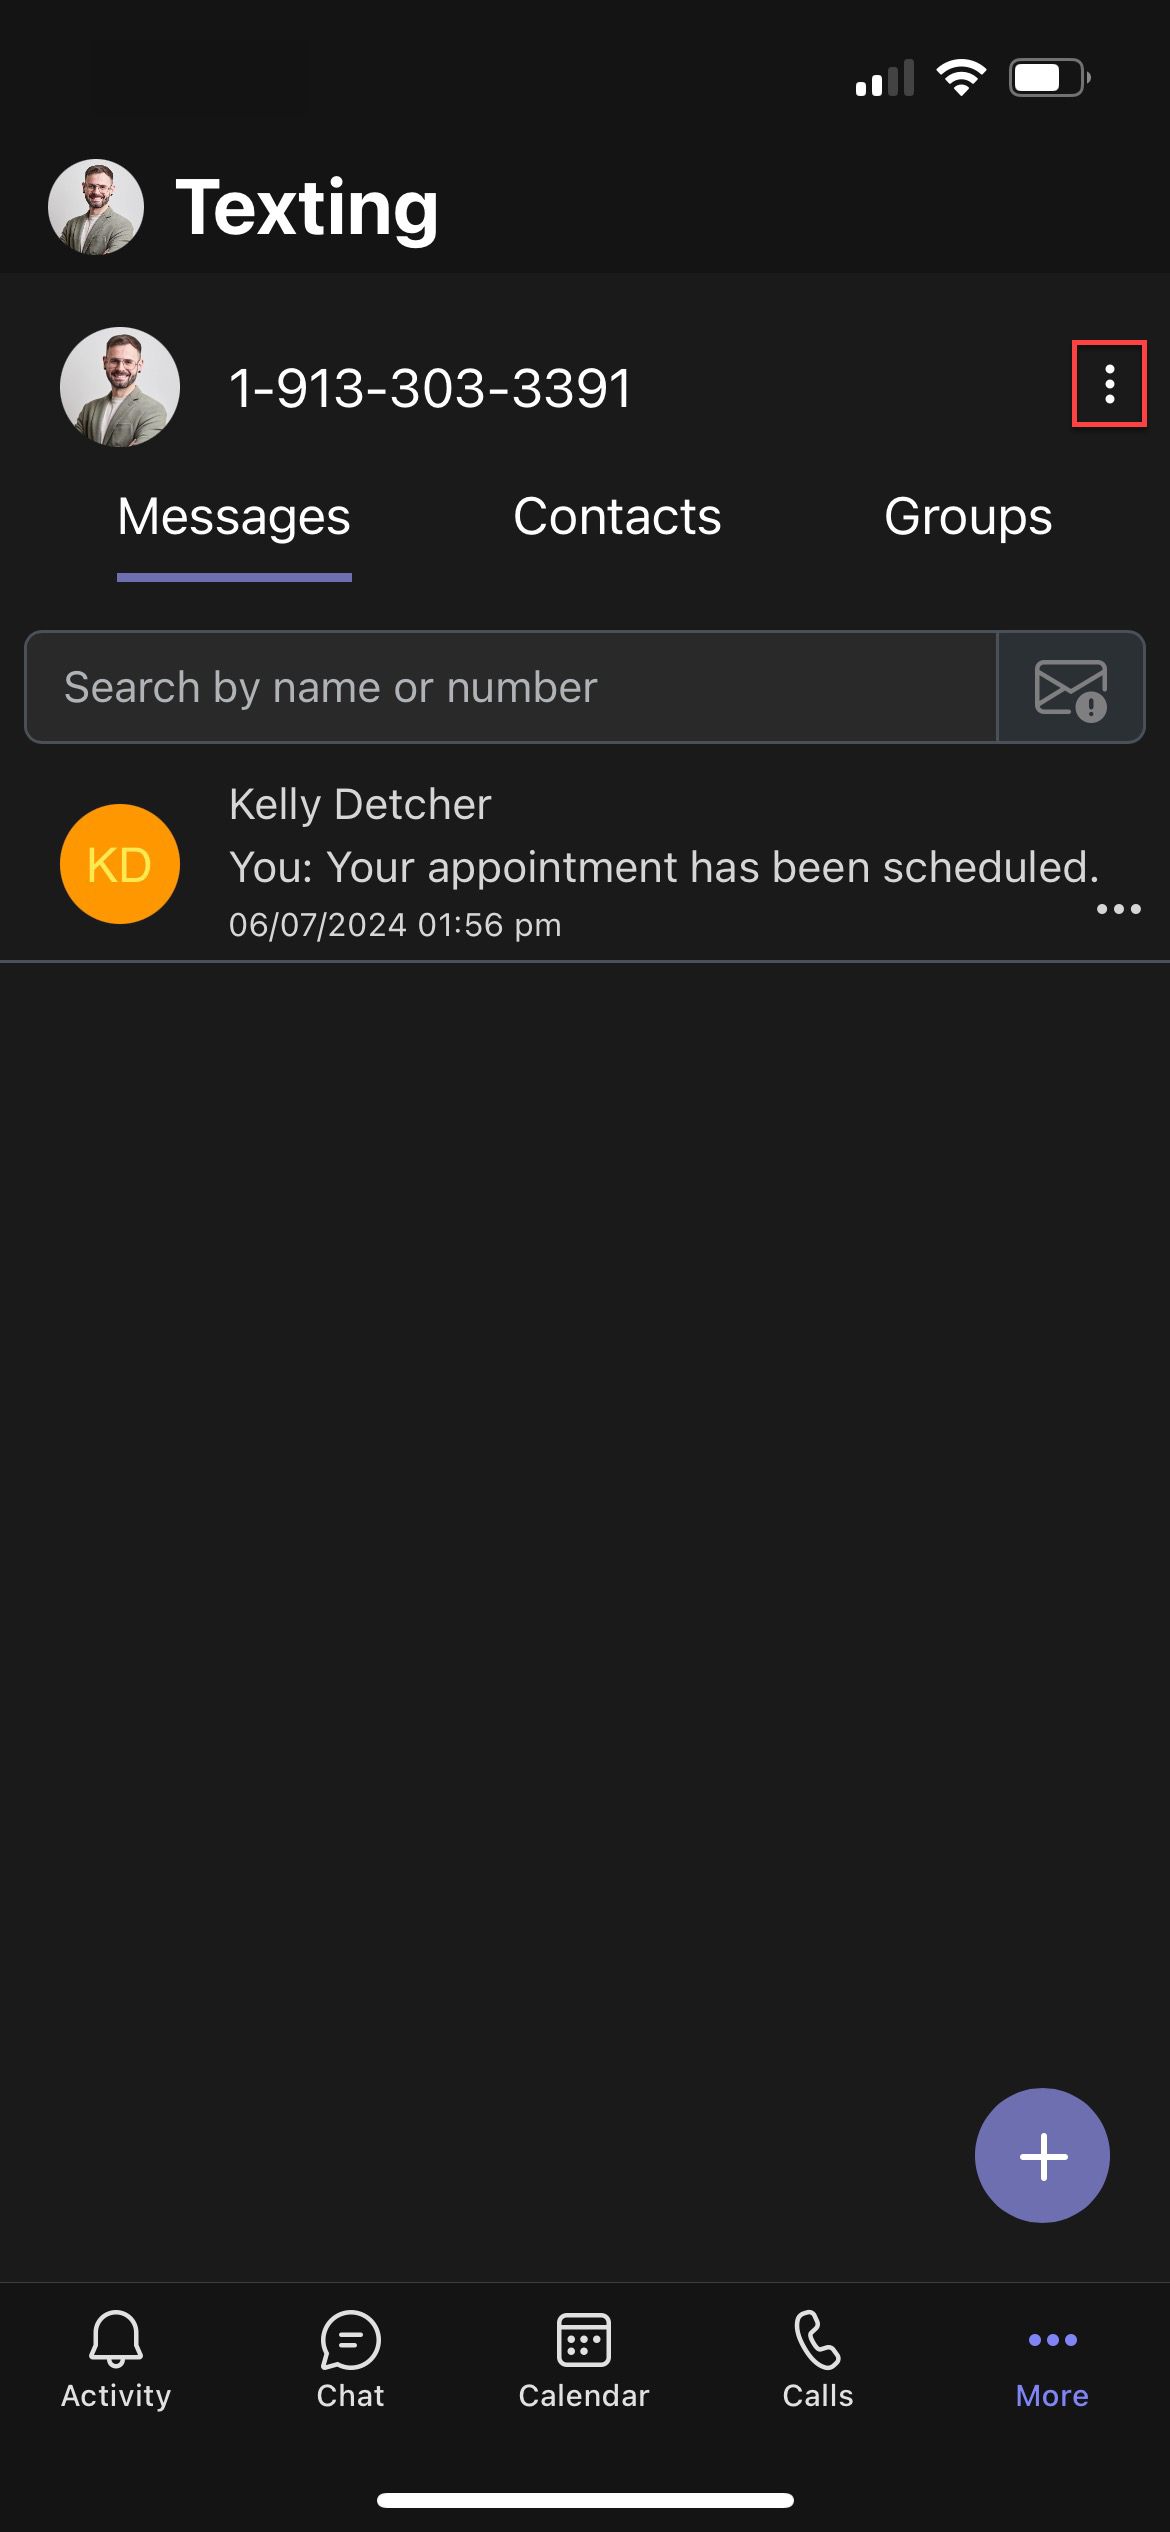
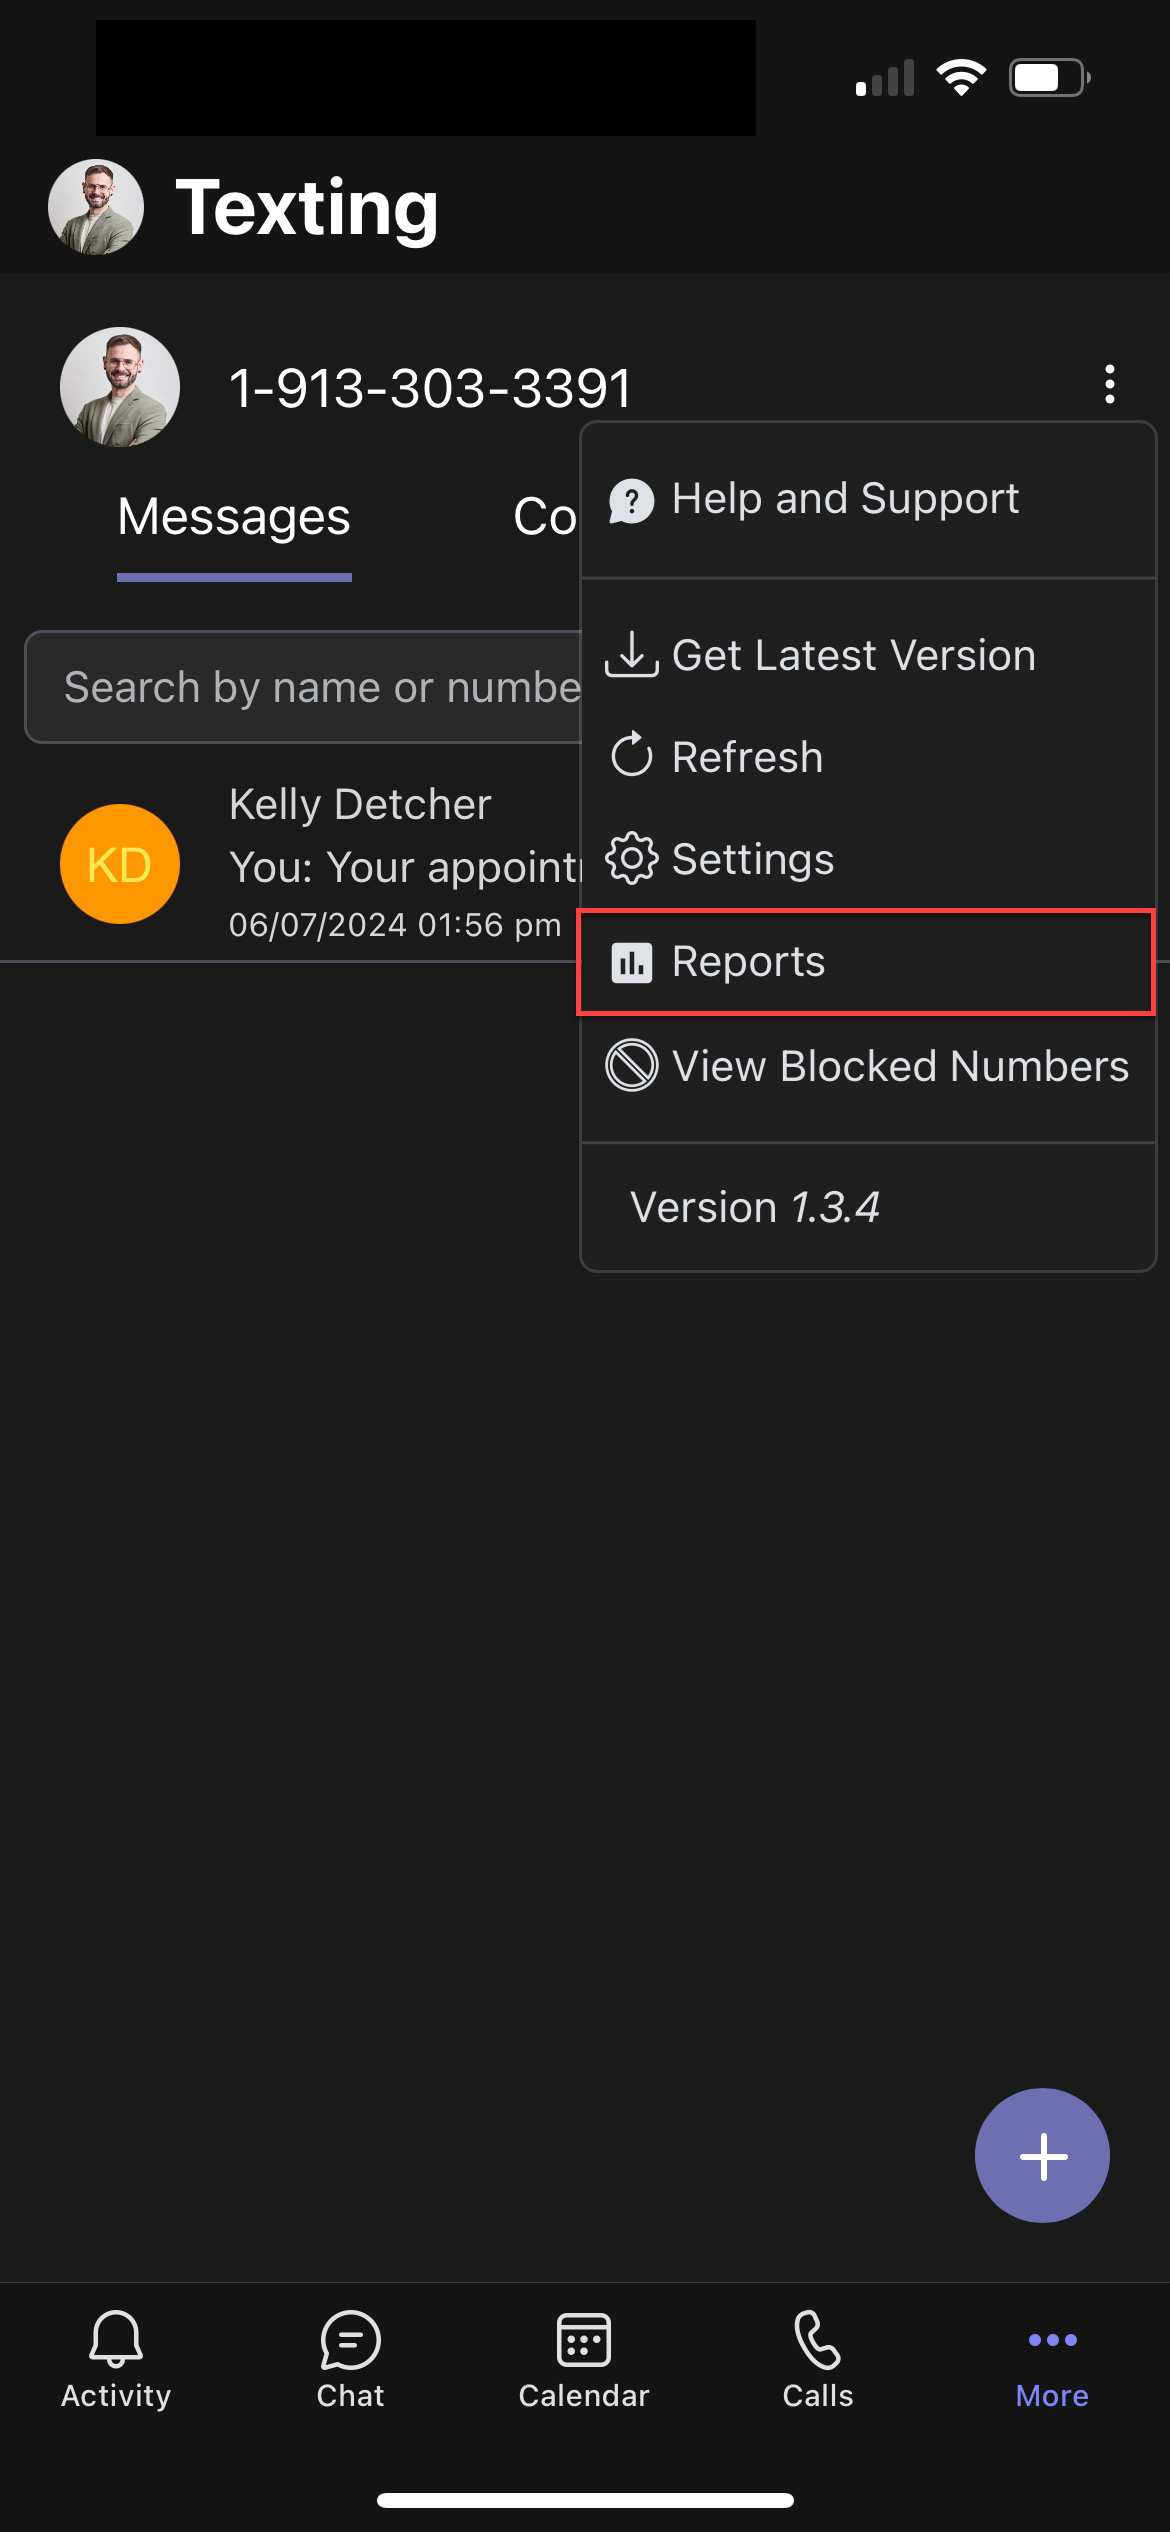
- Navigate to the more option next to your phone number and select Reports.
-
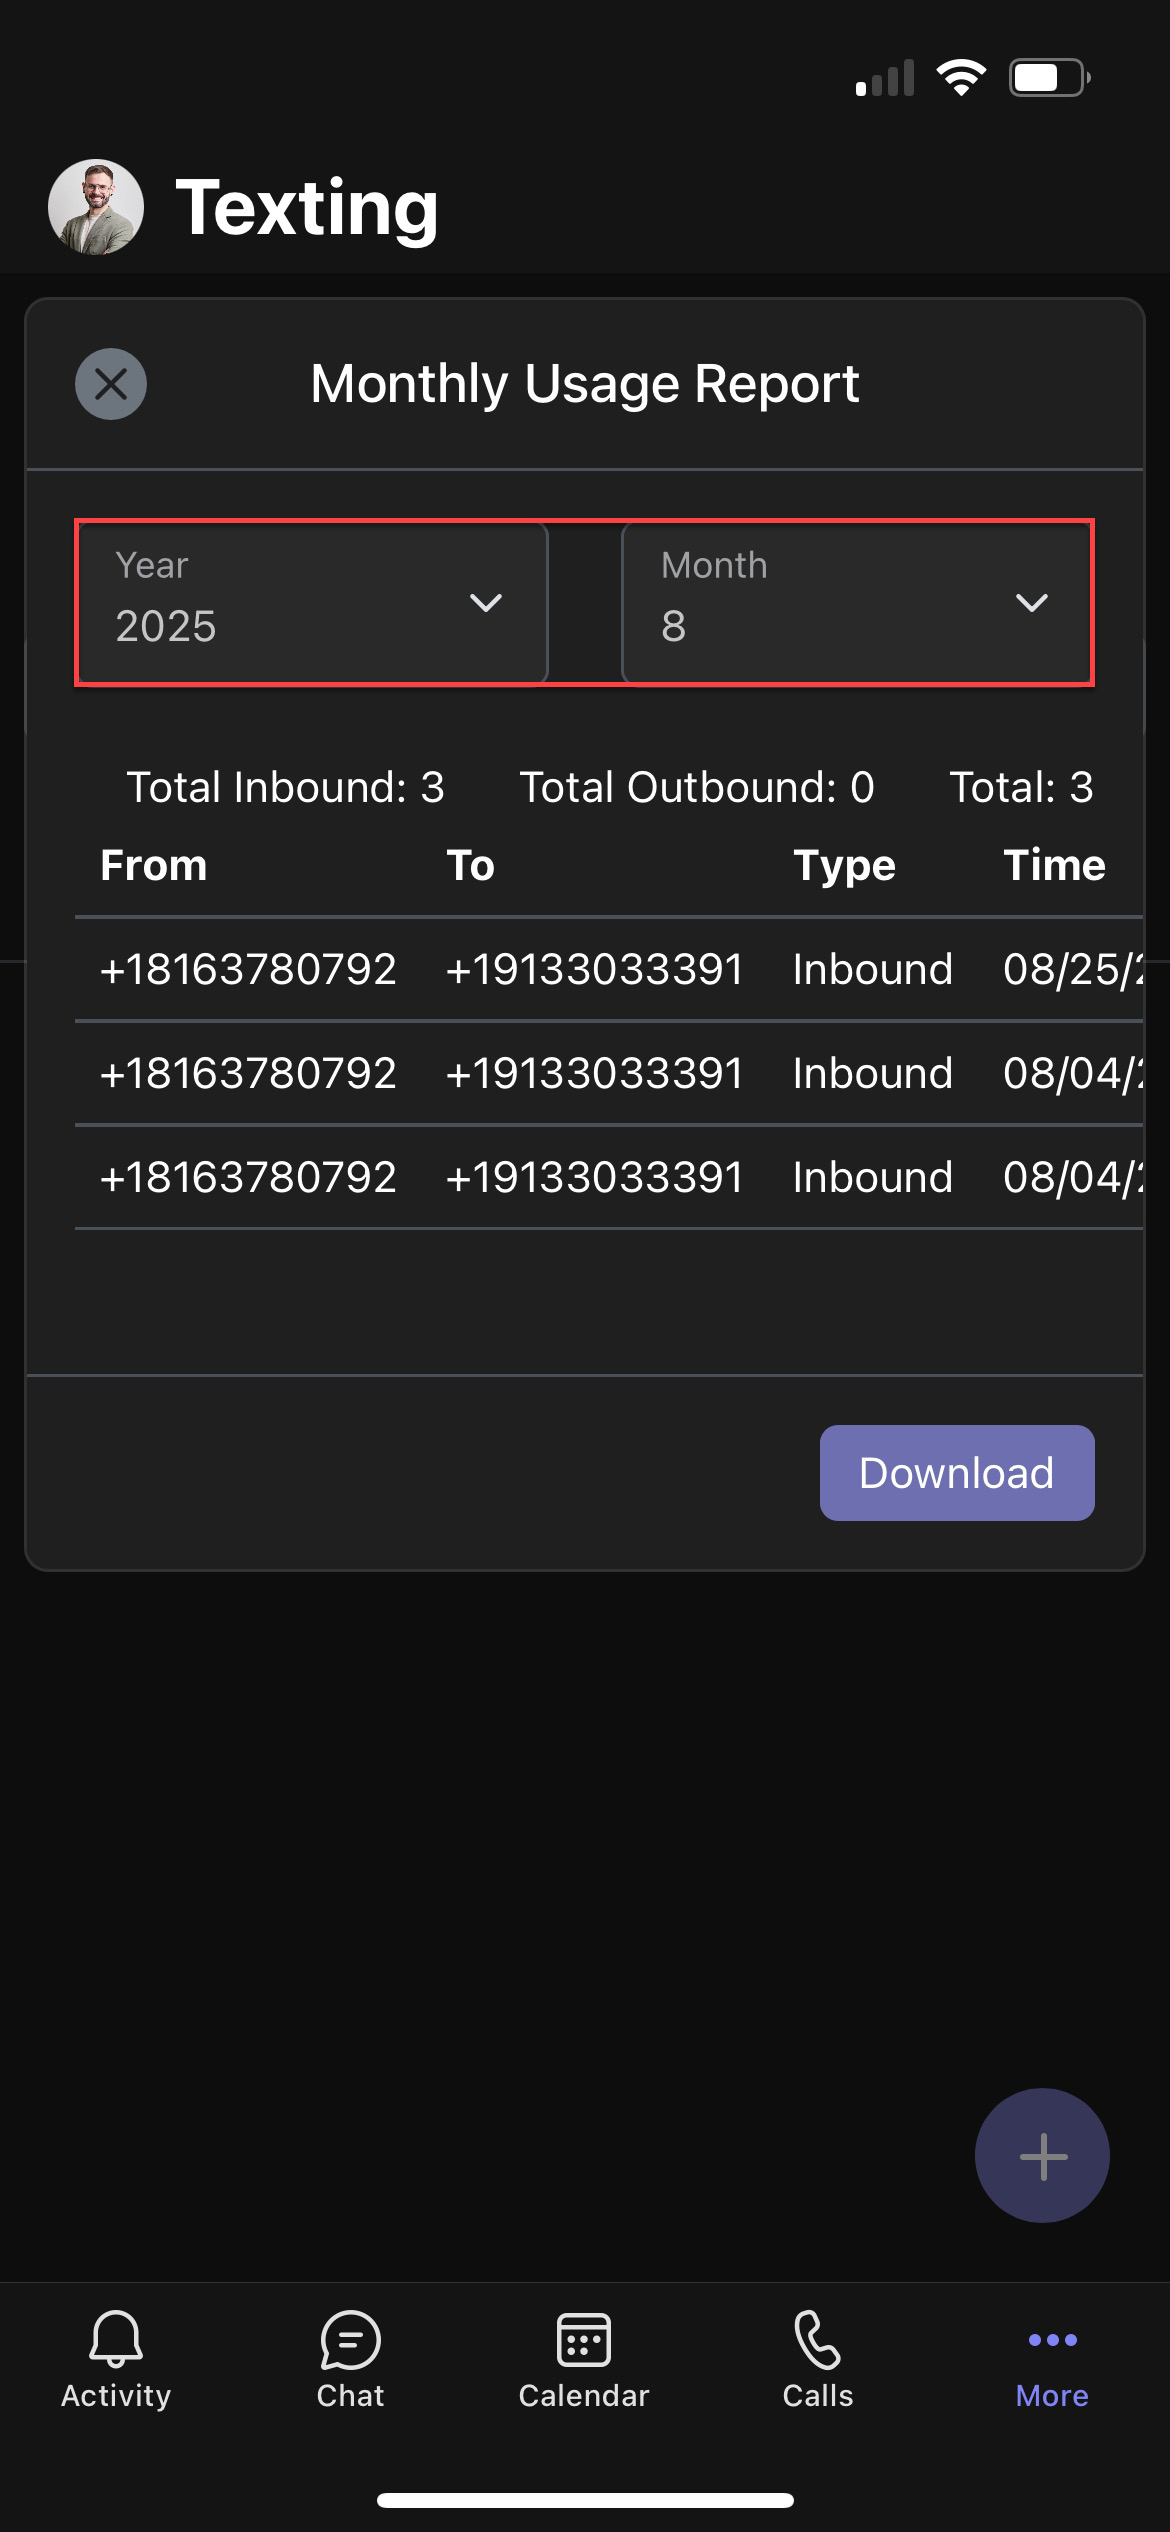
- Choose the Year and Month to review.
-
- Based on your selection, the Total Inbound, Total Outbound, and Total overall messaging count appears. You can also view data regarding From, To, Type, and Time related to your messaging.
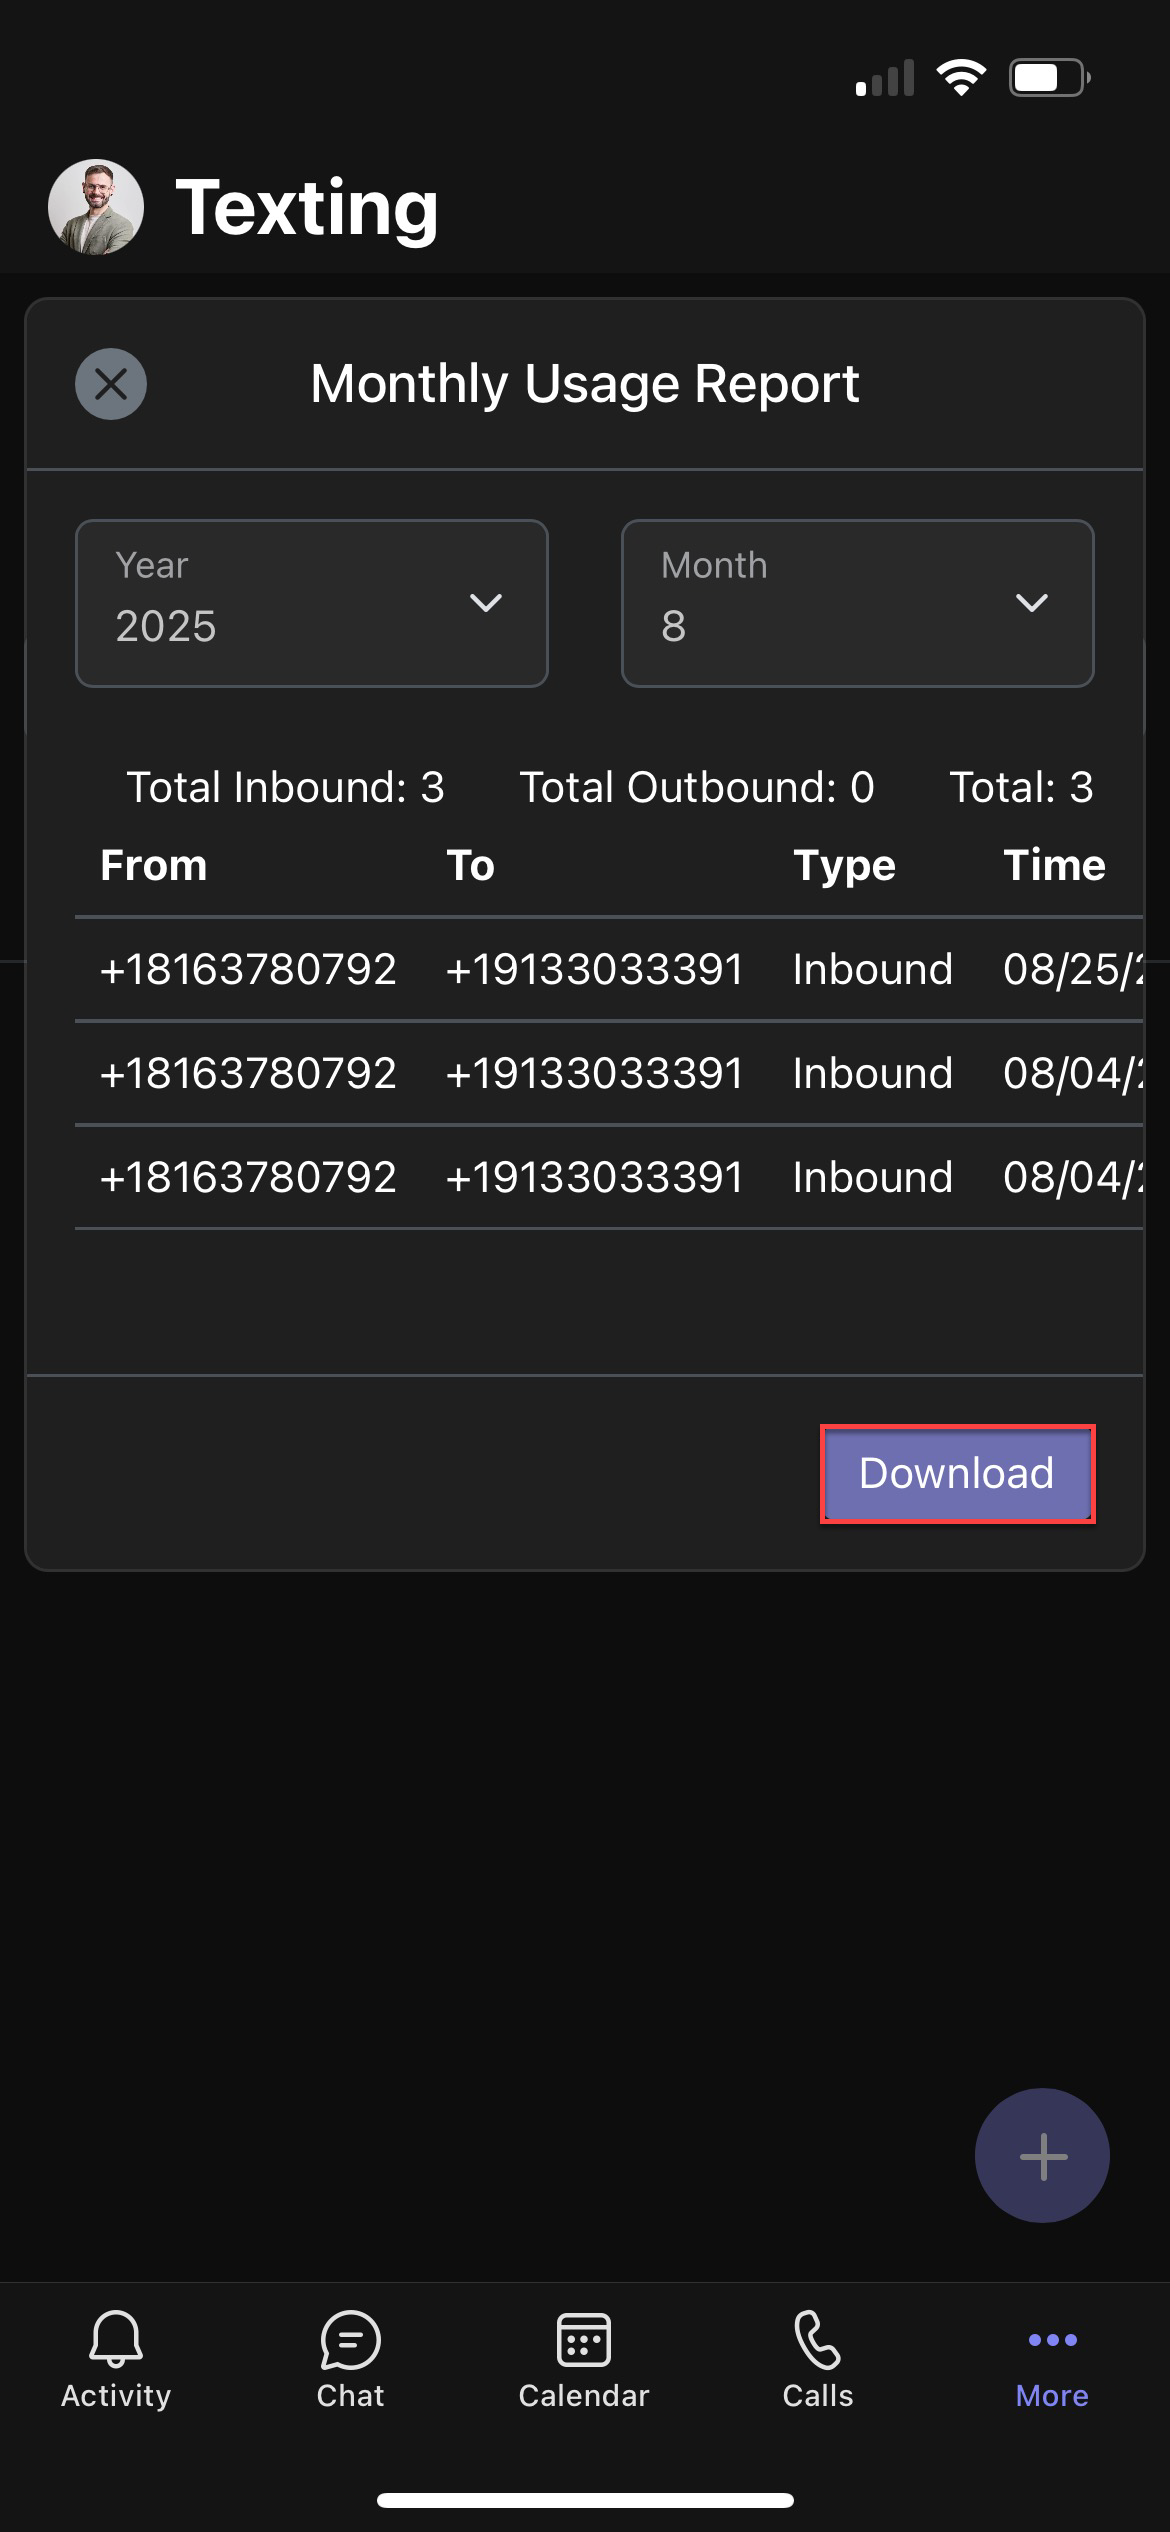
- Select Download to export the report.
Set Teams notifications
-
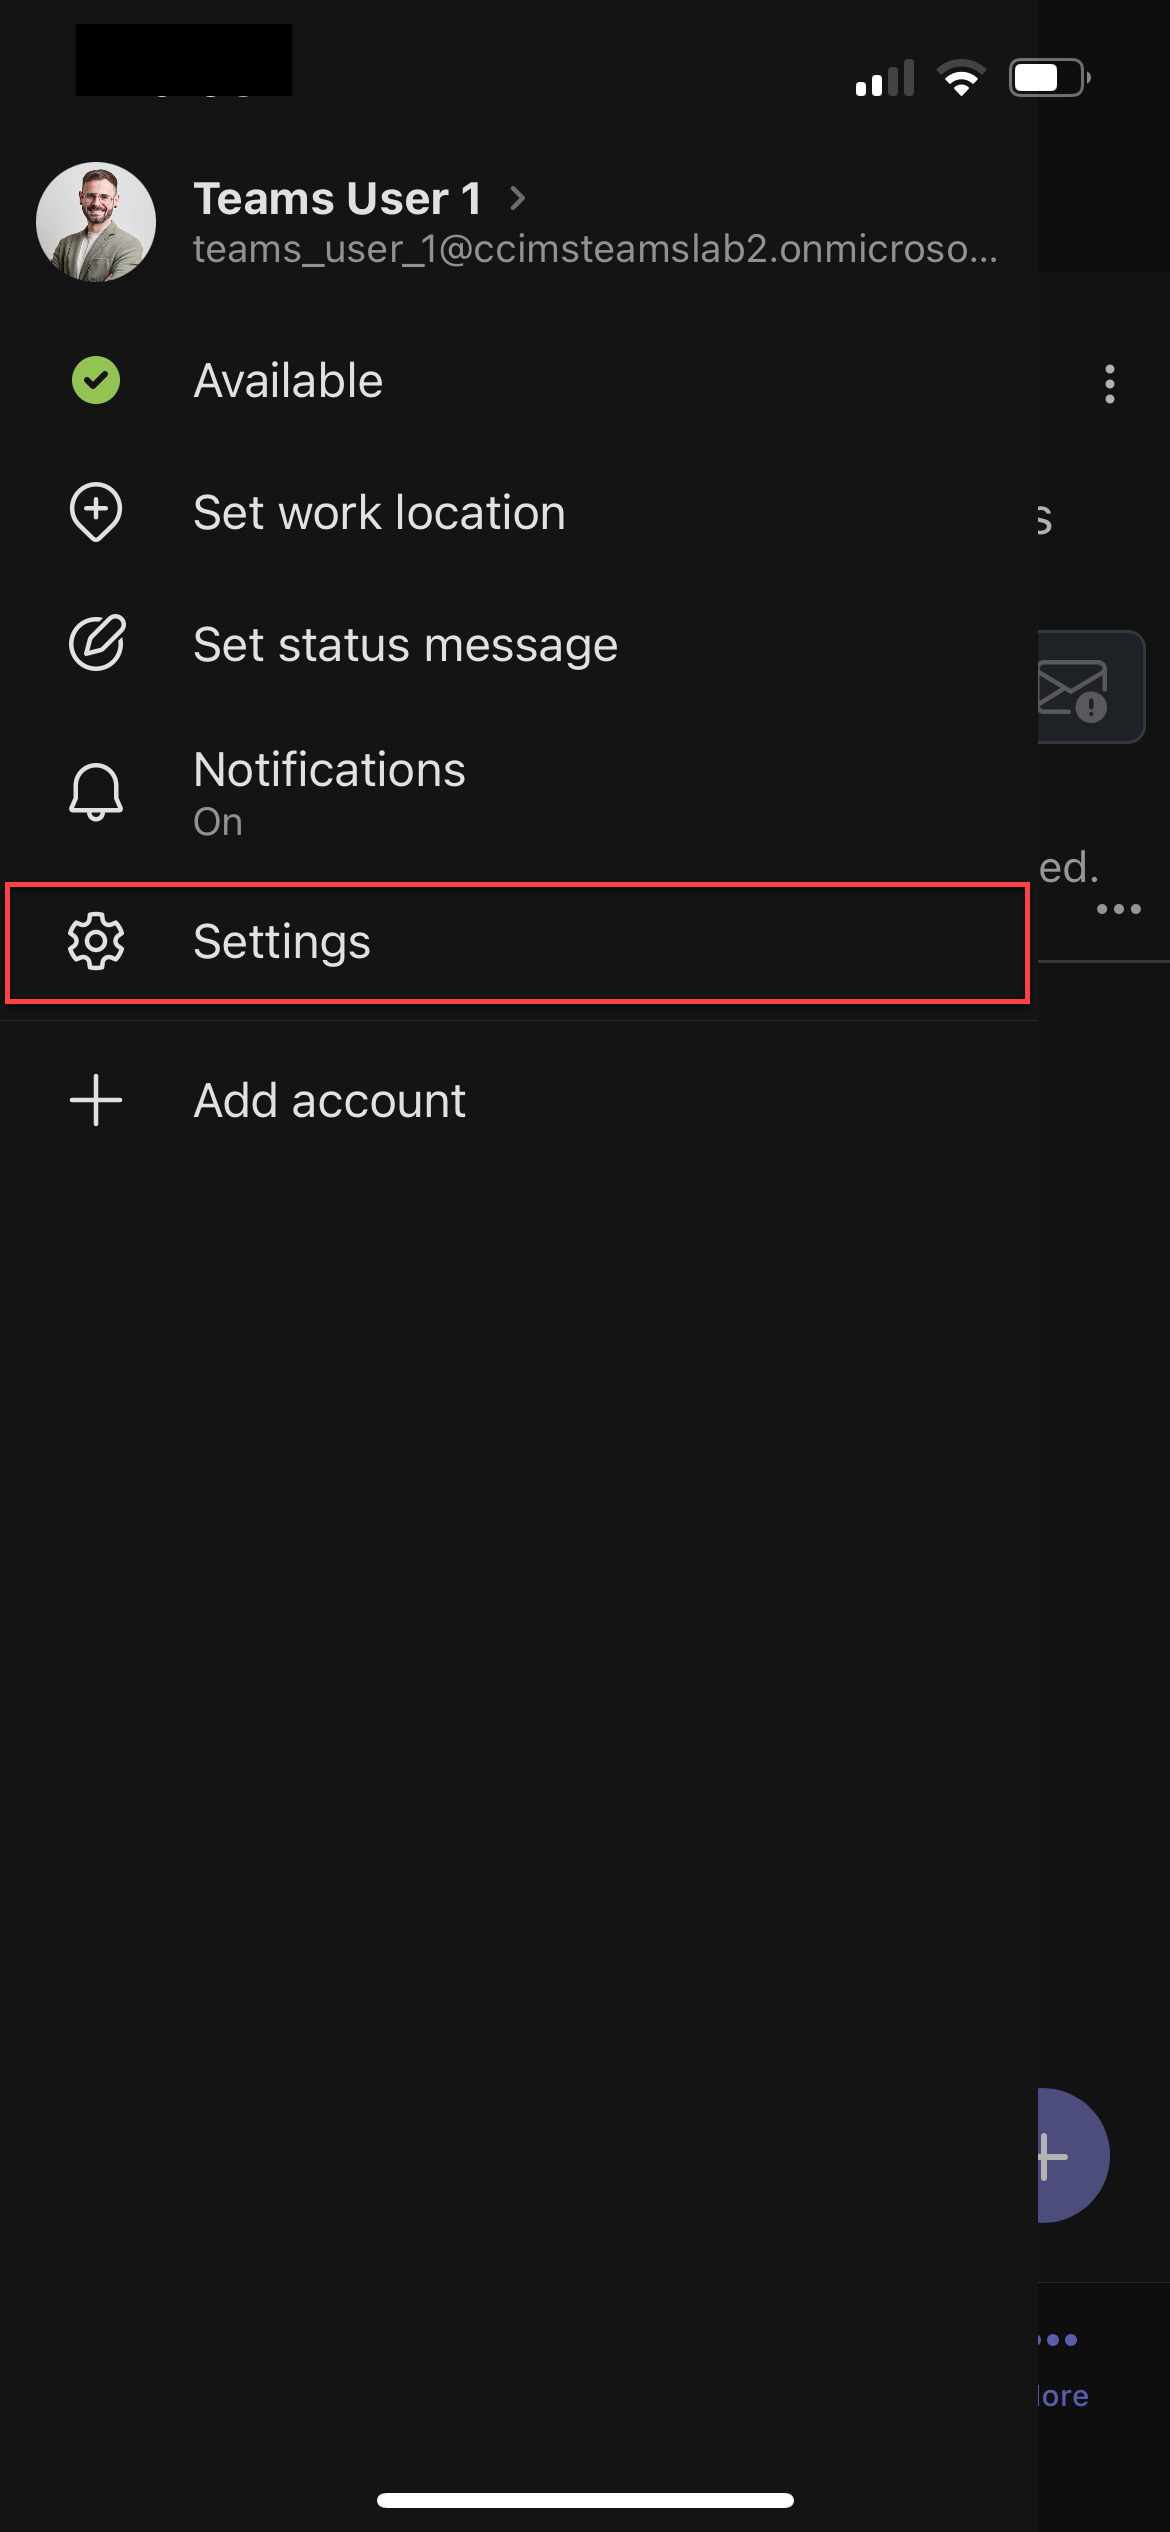
- Click your profile icon.
-
- Select Settings.
- Ensure that your general notifications are configured. Note: If you are getting other Teams notifications, this is likely correctly configured.
Set system notifications
It’s important to ensure that your device has the proper notifications turned on. This process is different but similar across Android and iOS devices.
- Open your device’s system settings.
- Select notifications and choose the Microsoft Teams application.
- Turn notifications on or off depending on your preference.
Ensure that your notifications are on for the Teams app on each device you use to access your account.
Send an SMS or MMS Text Message
-
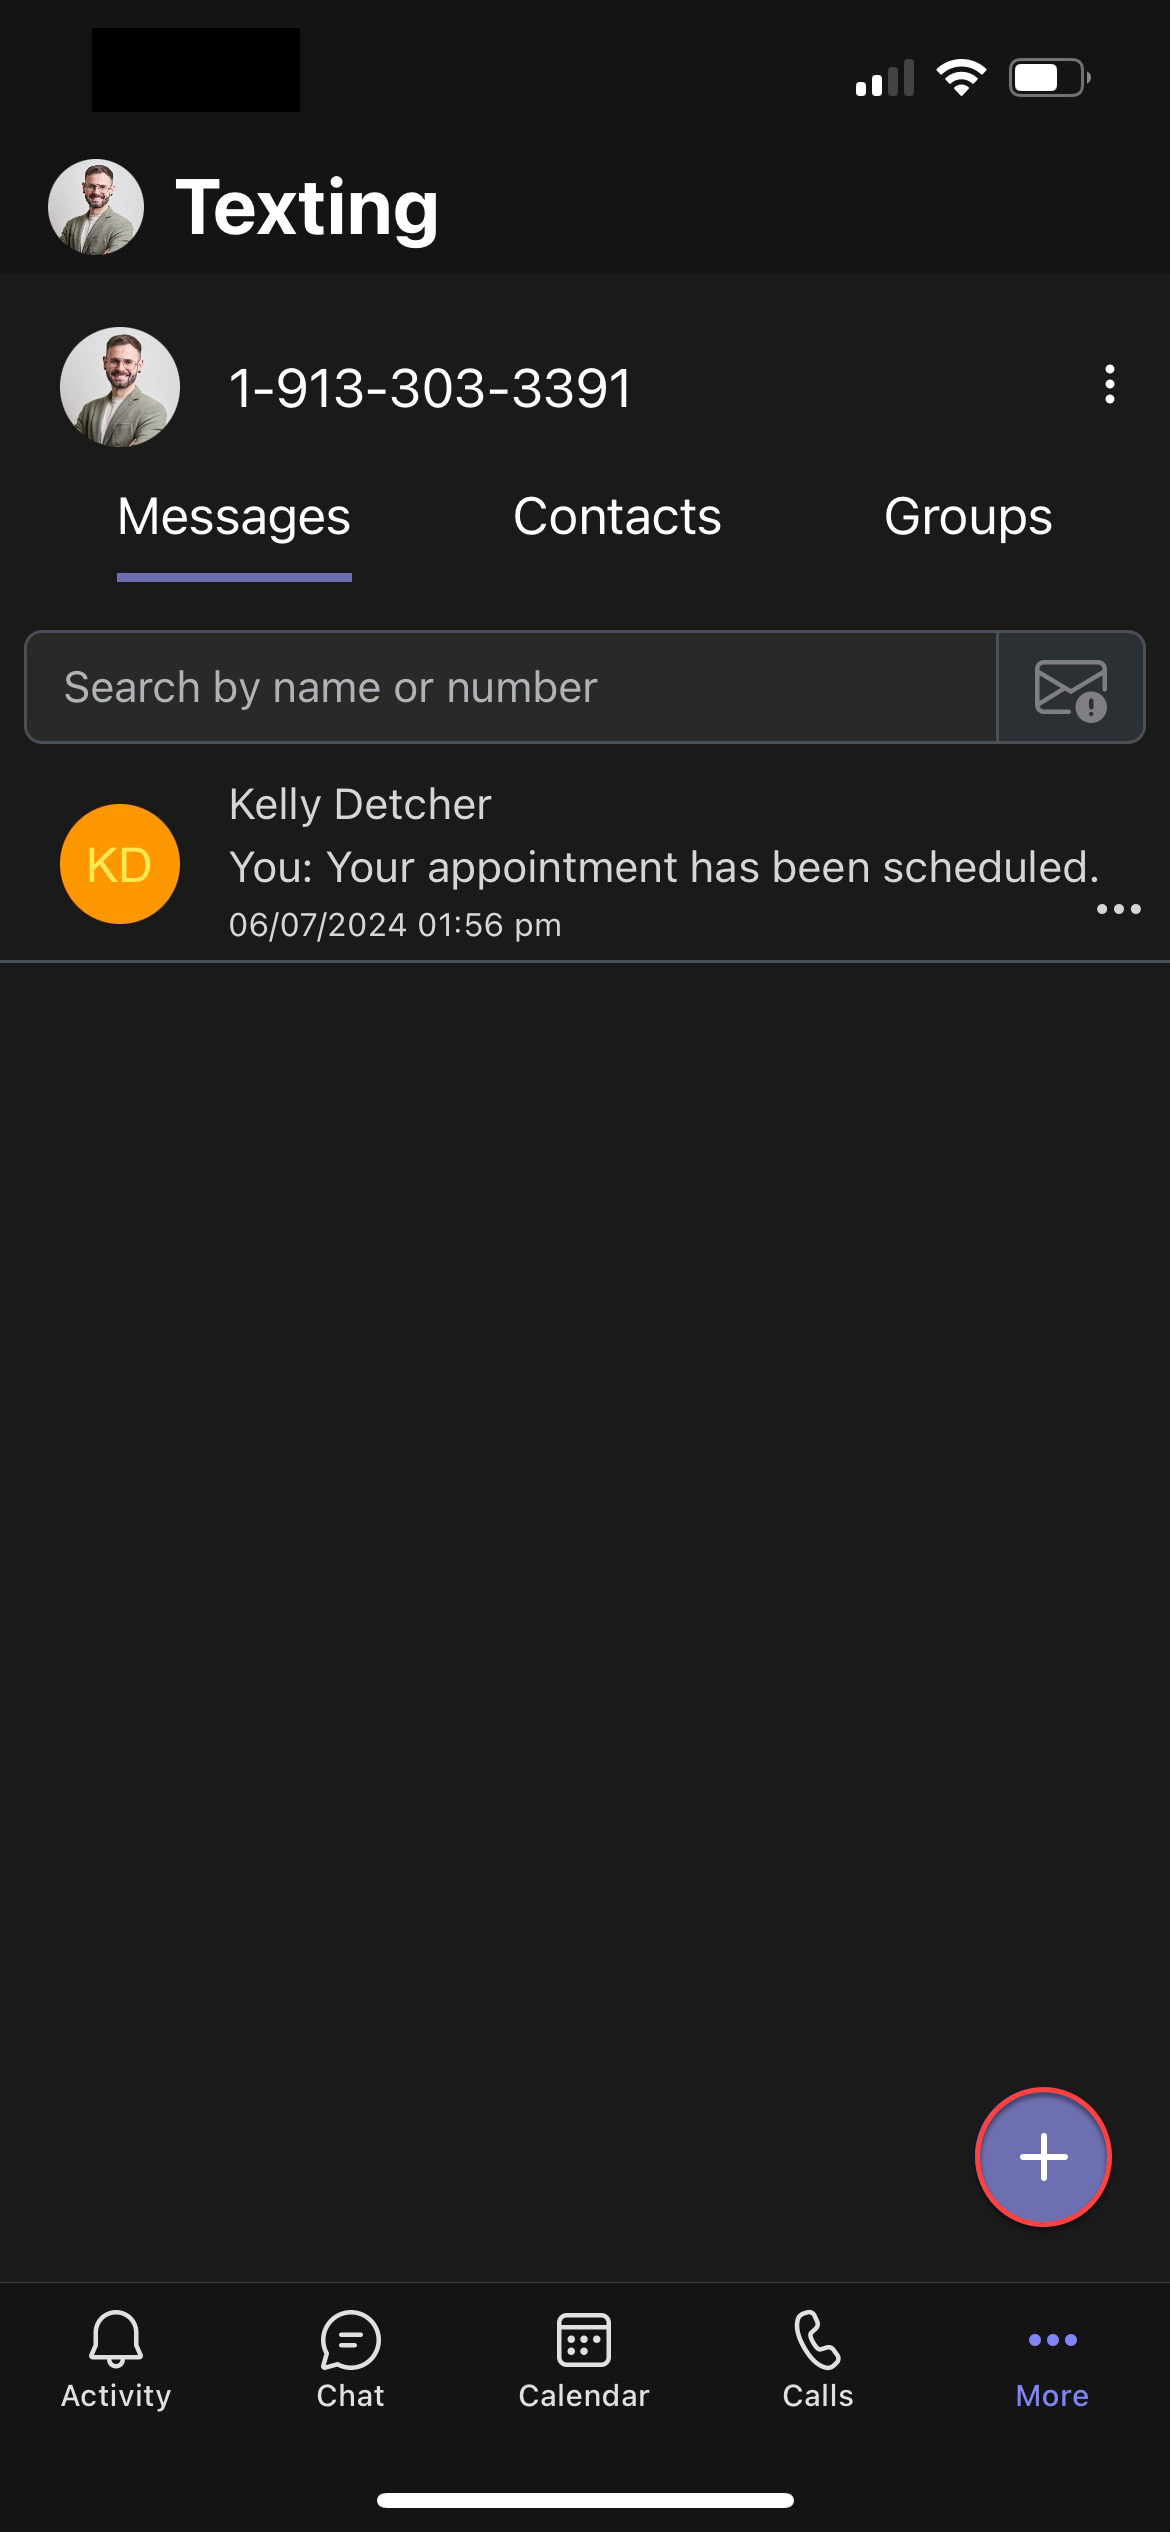
- On the Messages tab, select +. A Send a New Message window appears.
-
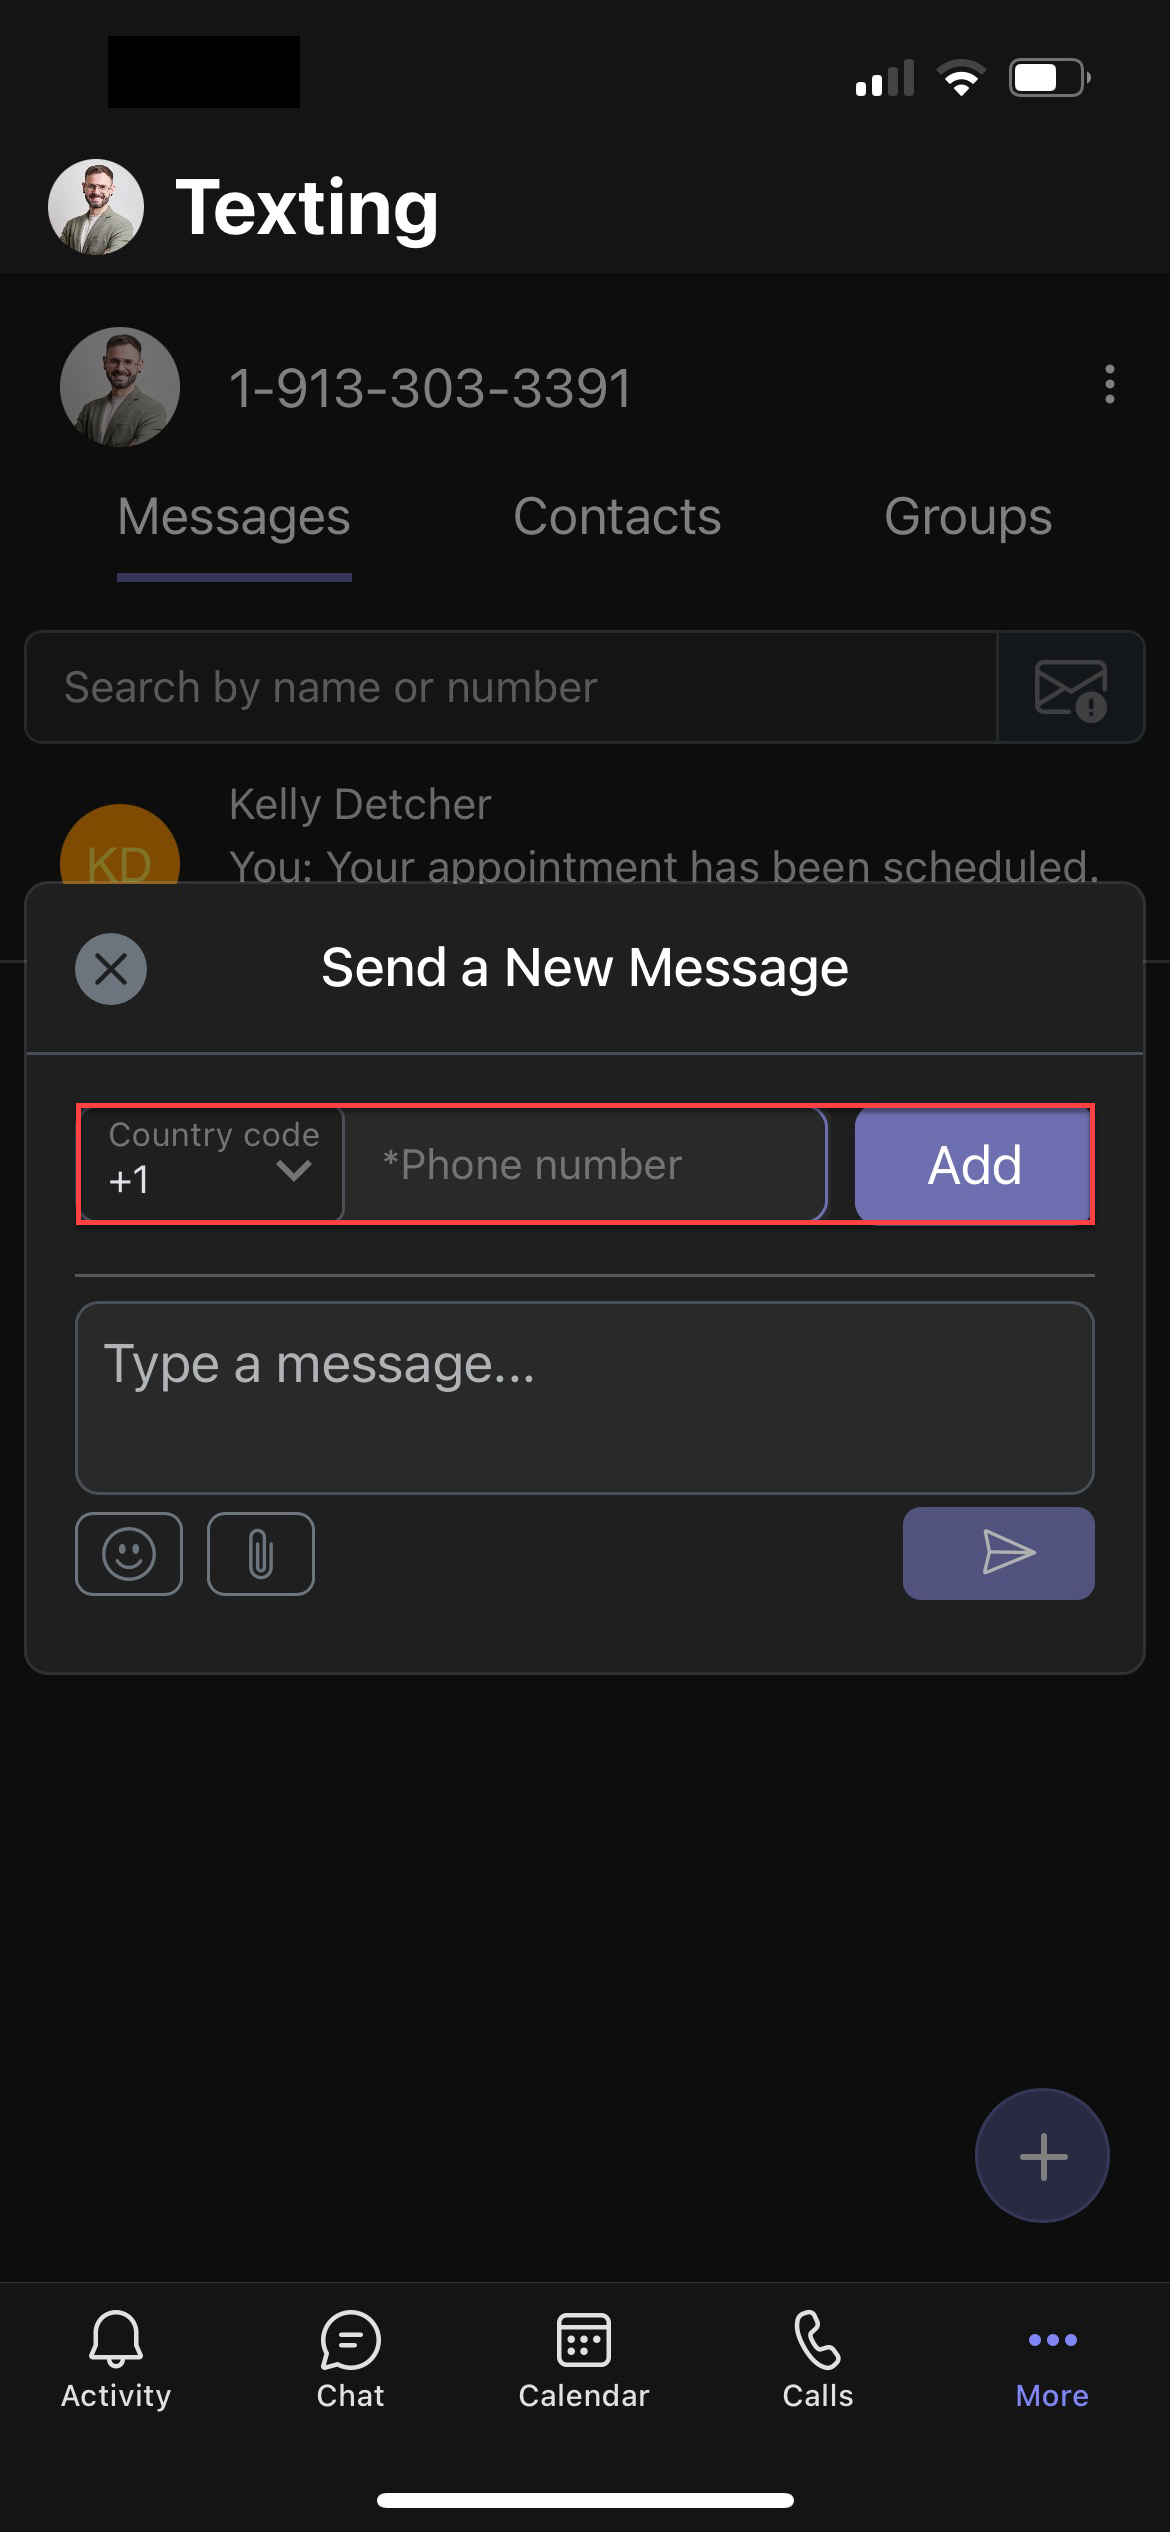
- Enter the phone number of the recipient and click Add.
-
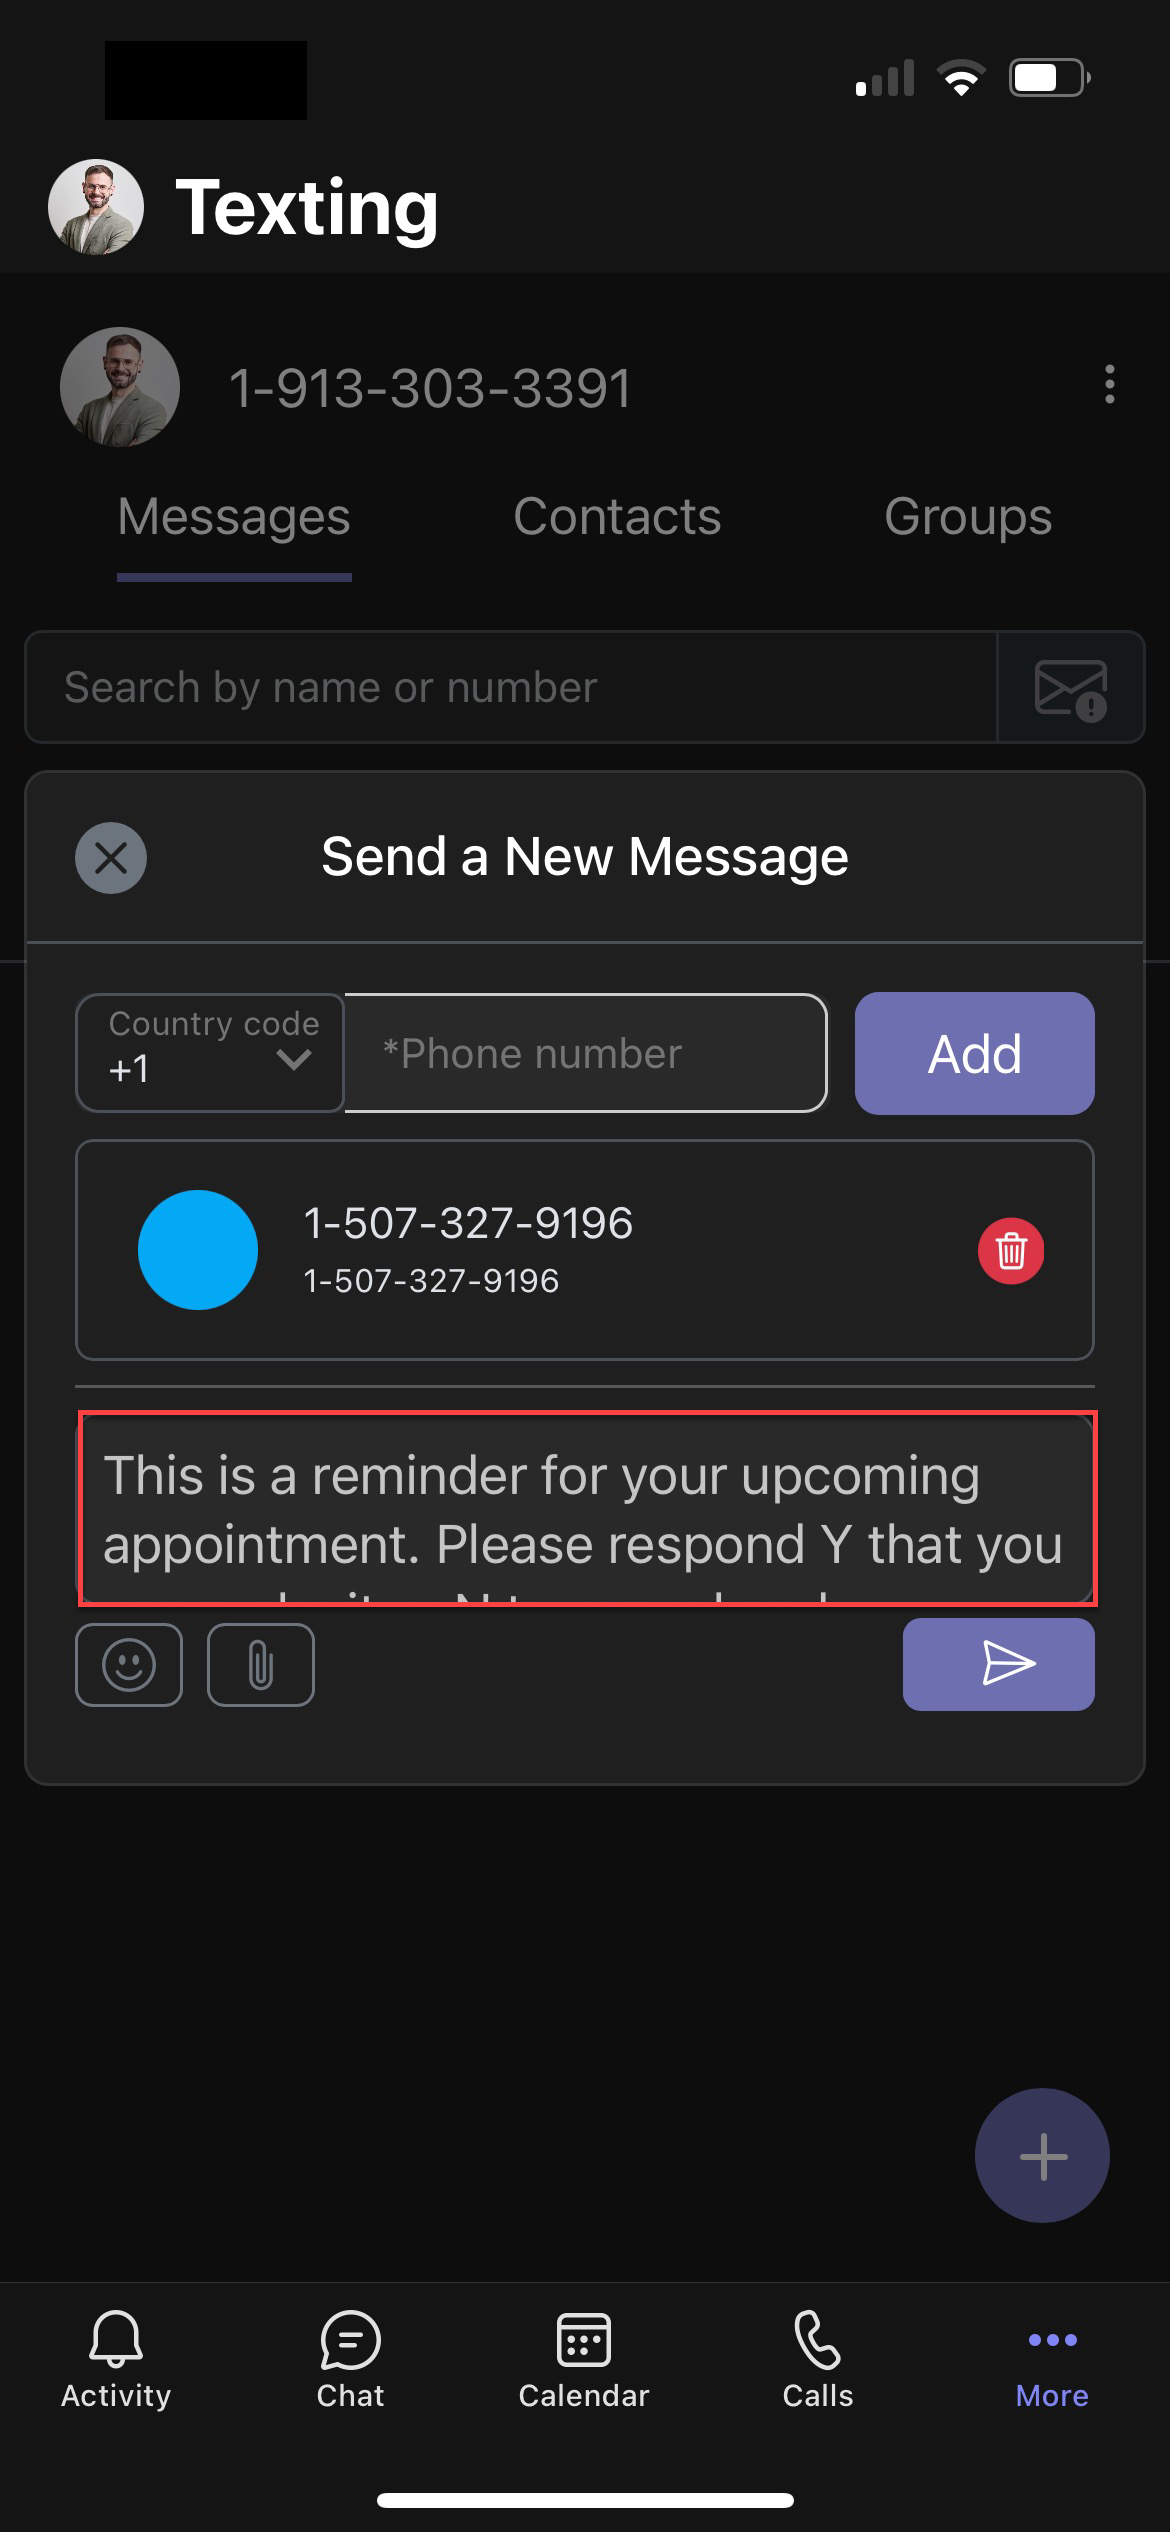
- Type your message in the Type a message field. If desired, you can add emojis or attachments. Note: Only certain attachment types are supported by carriers. Make sure your type is supported by your carrier before sending.
-
- Select the arrow to send your message.
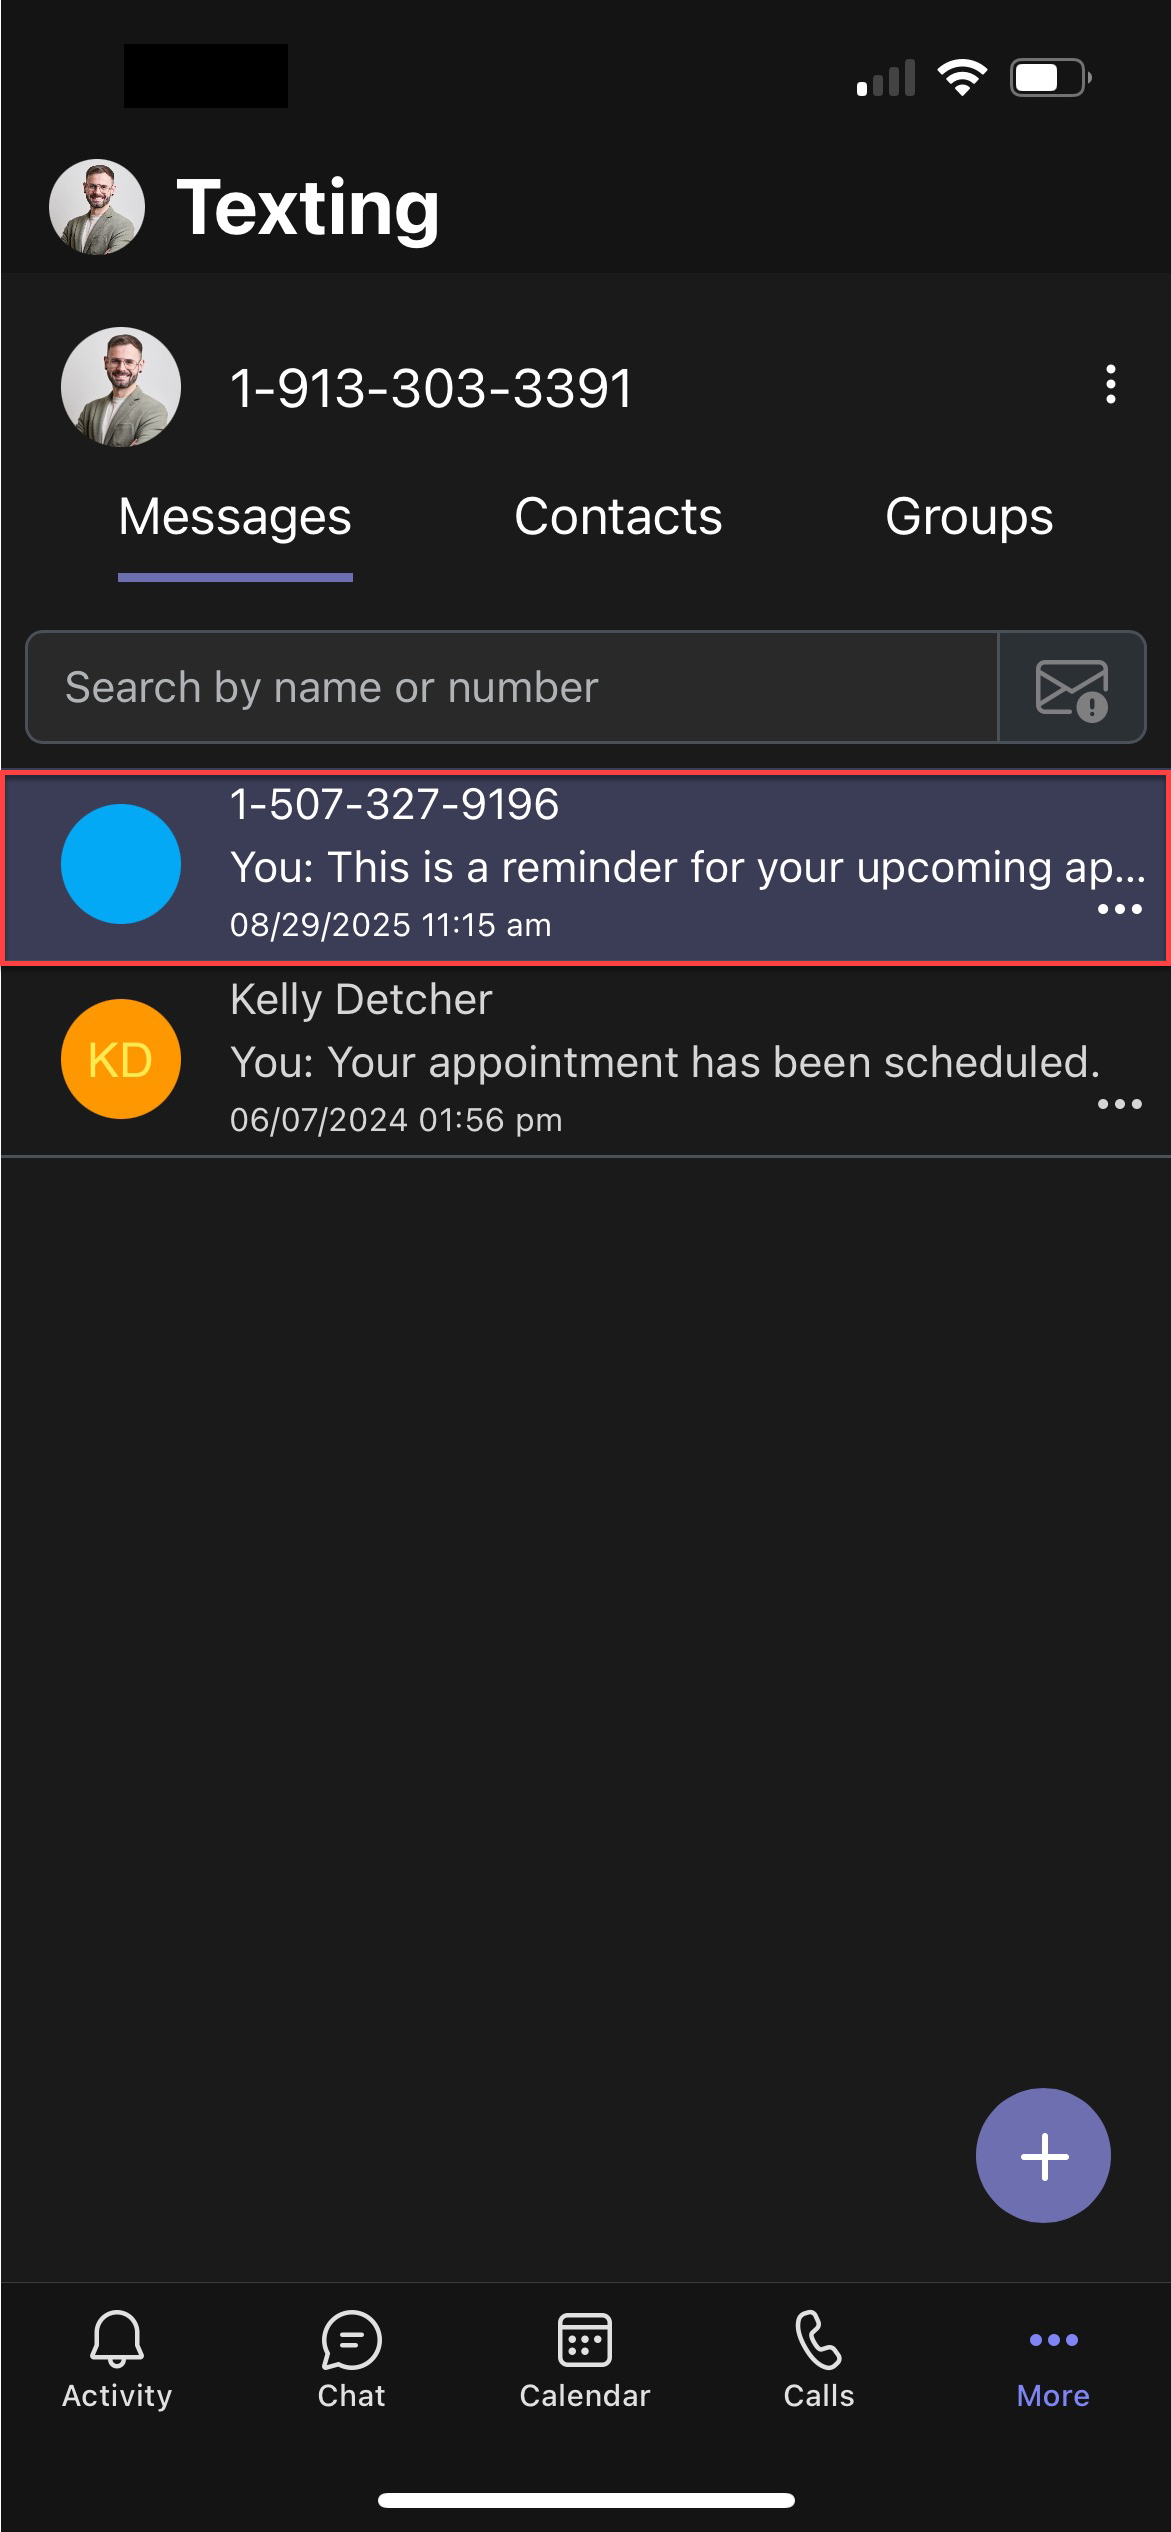
- Your sent text is now populated with the first line in the Messages list.
Receive a Text Message
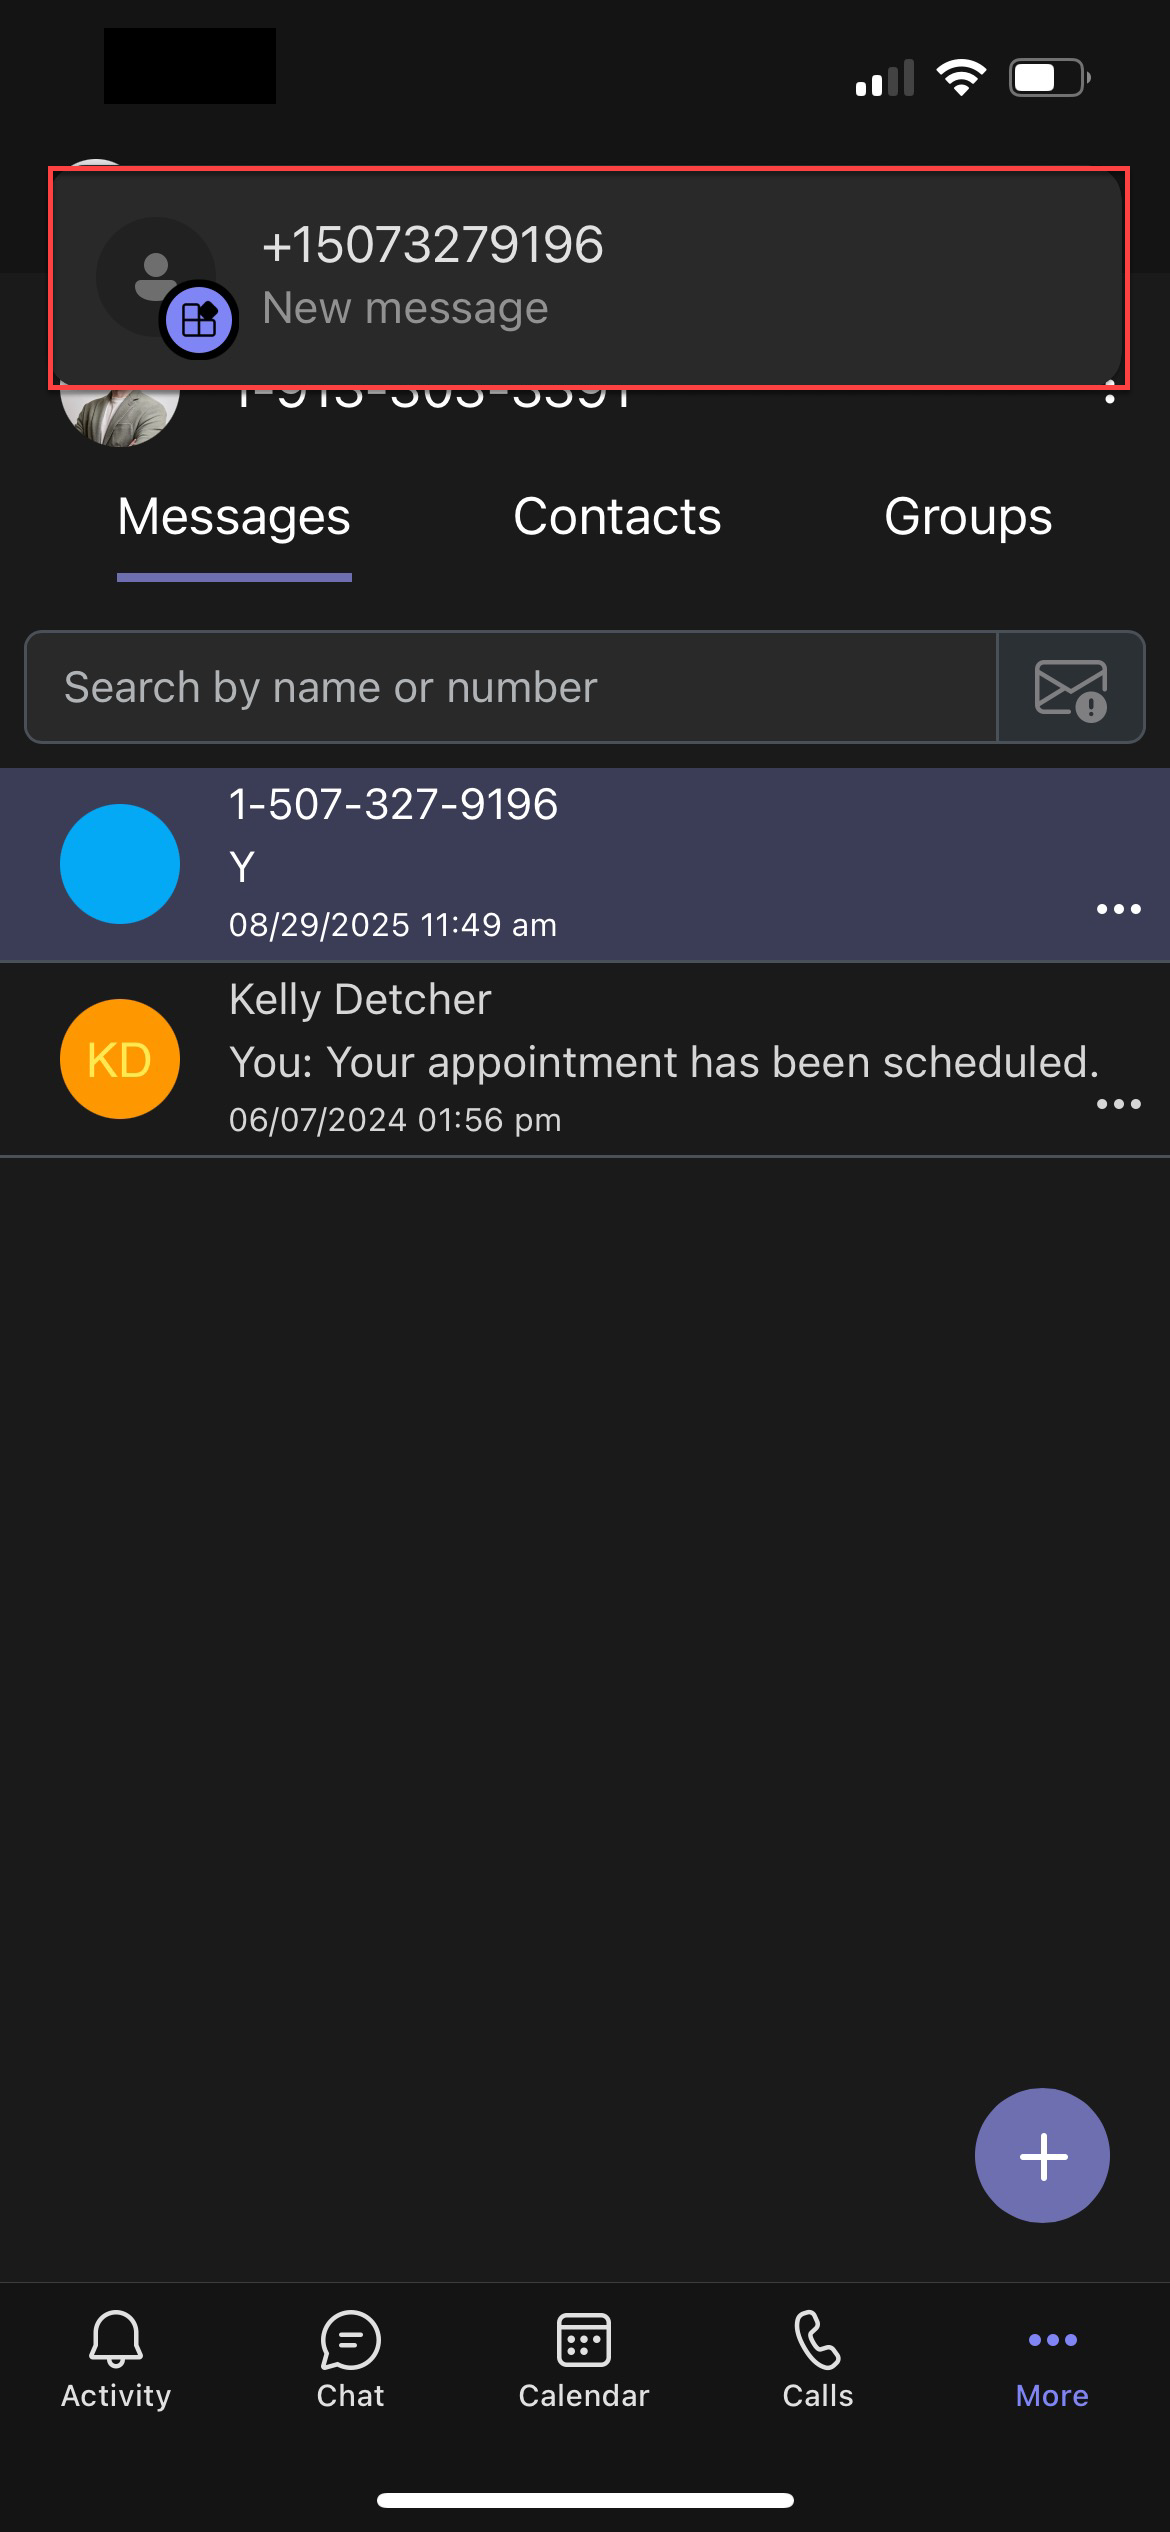
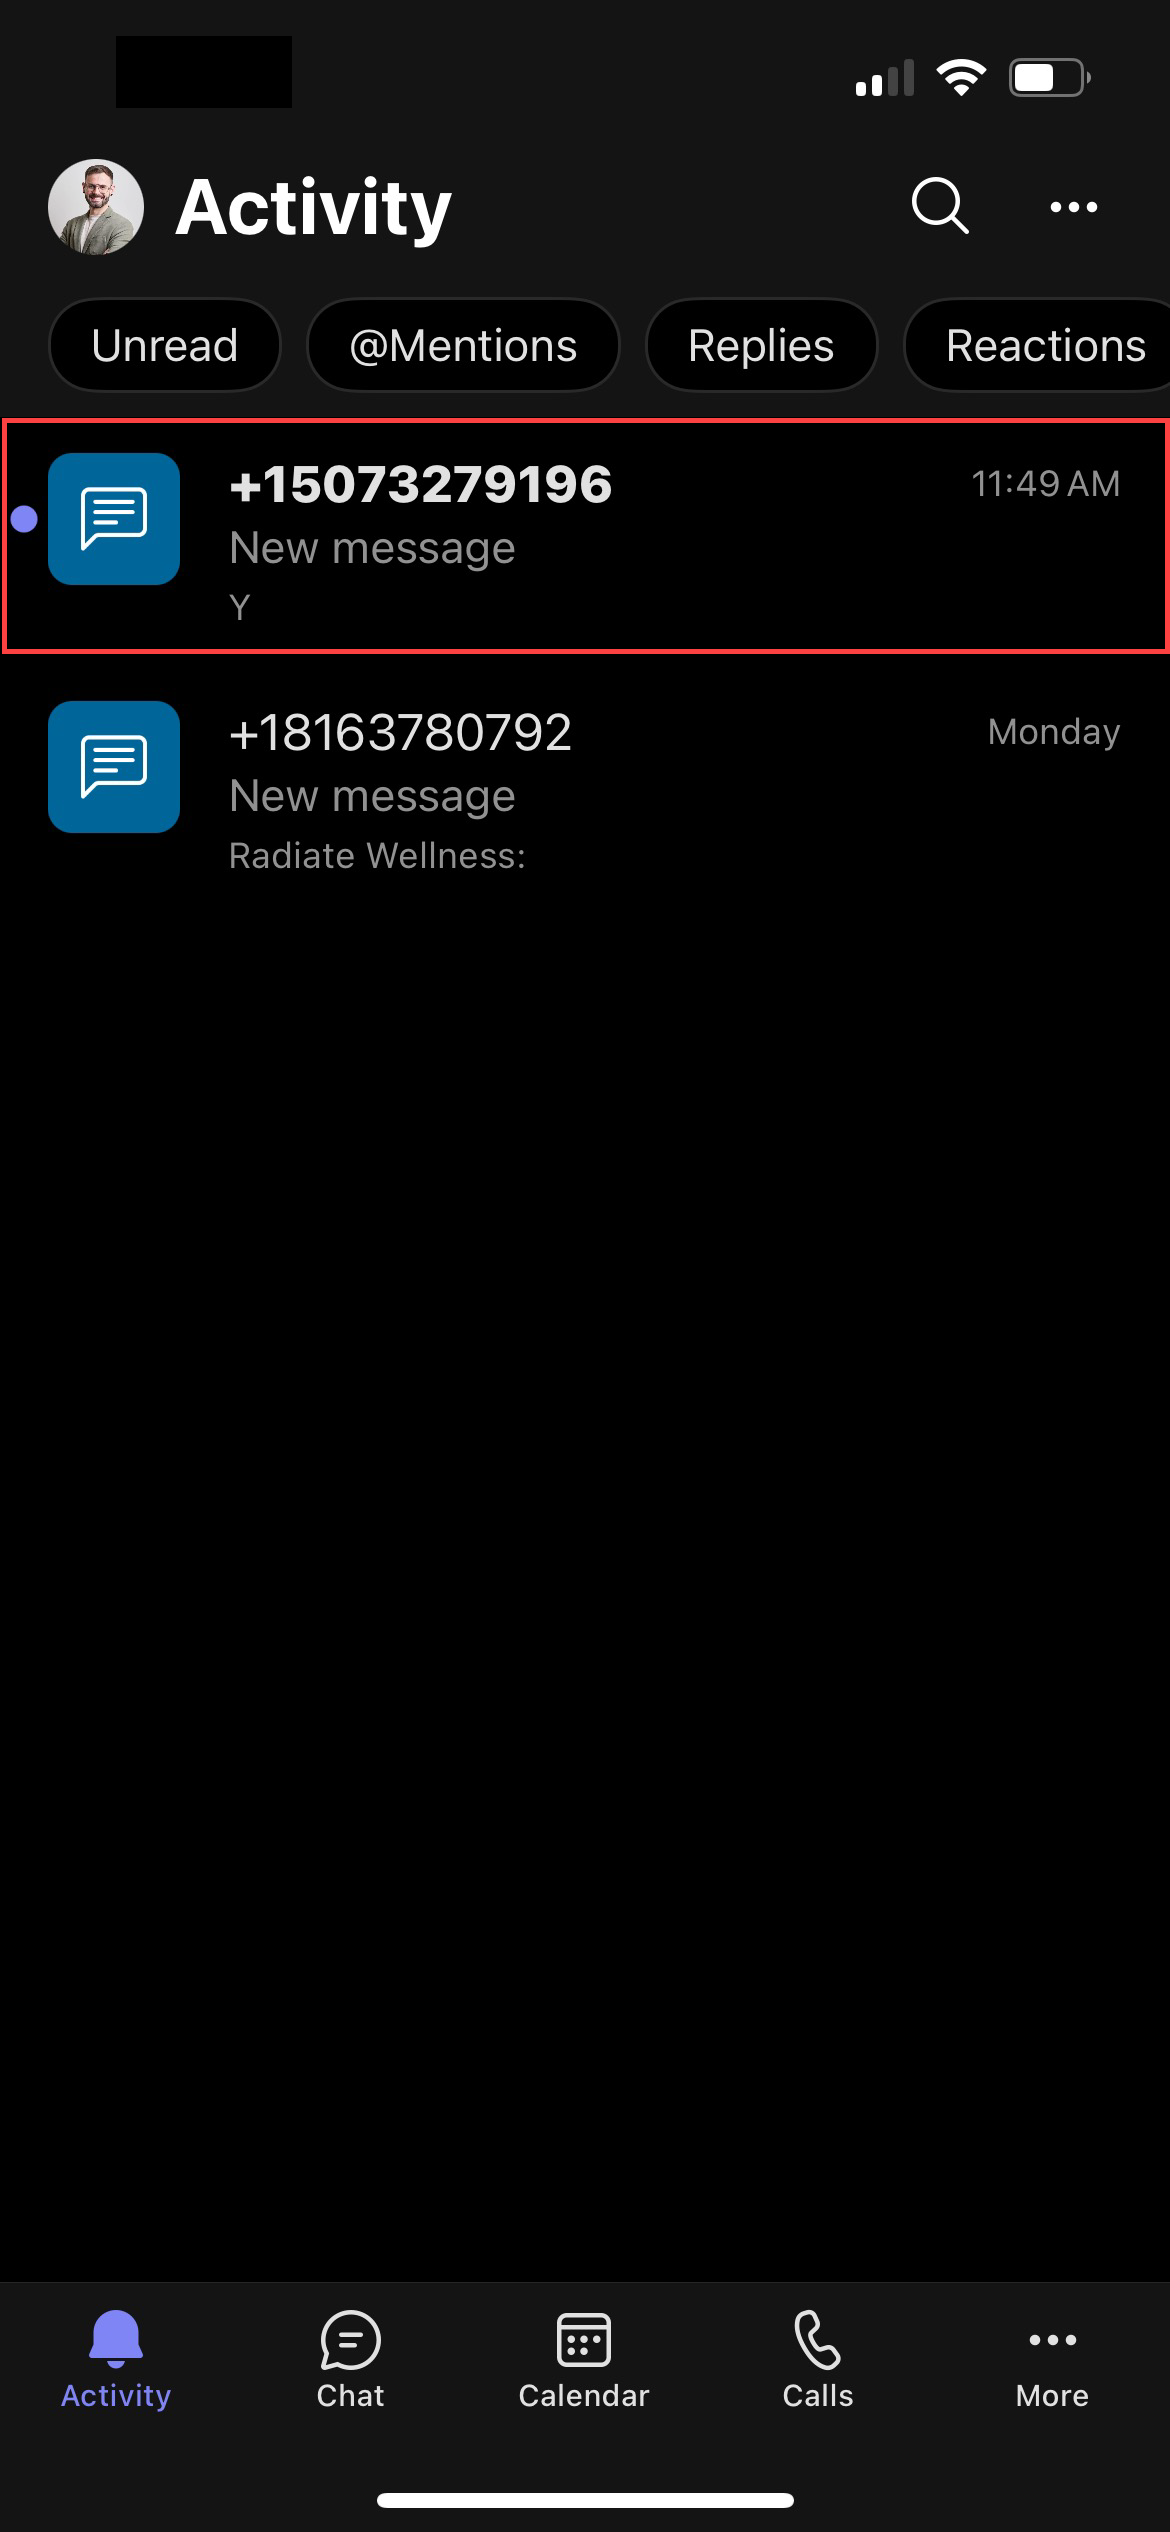
When you receive a new text message, a pop-up notification appears. Additionally, the message notification is indicated under the Activity icon in the Microsoft Teams application.
Manage Text Messages
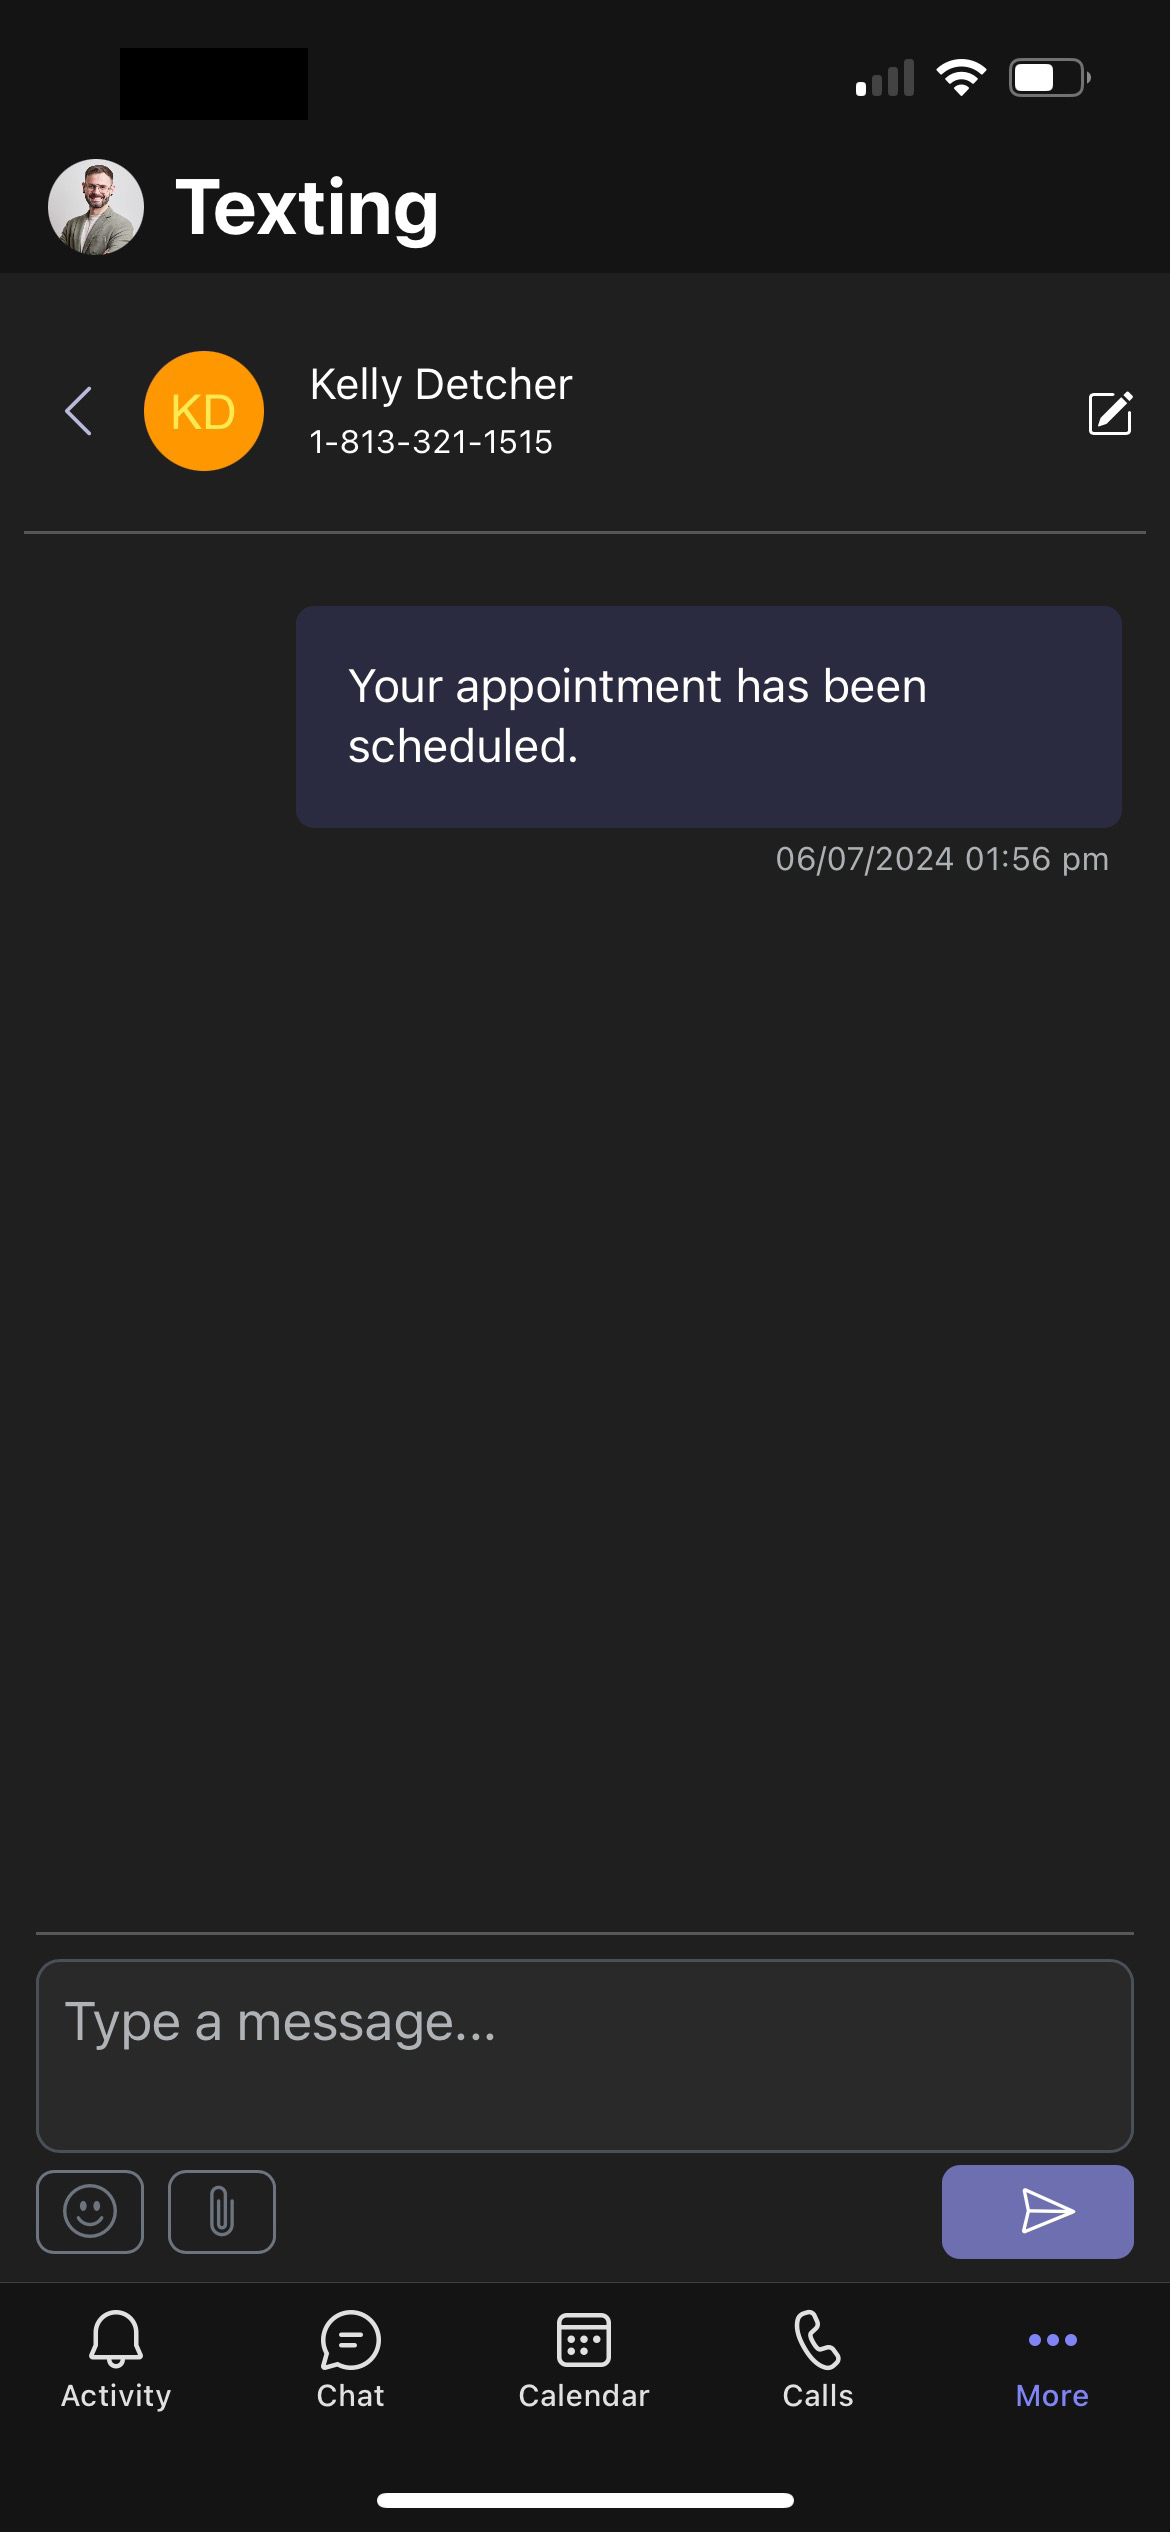
Select any of your messages to open the message view. You can view message history with that specific phone number or send a new message.
Manage contacts and groups
The Contacts tab populates a list of your current contacts. The following actions can be completed within the Contacts tab.
- Search for a contact.
- Select a contact to view text message history.
- Add, import, and delete contacts.
Currently, contacts are only collected and edited at the individual application level. No one else can see or edit your contacts.
Add a Contact from Messages
-
- Navigate to Messages.
- Select the message you wish to view.
- Click the pencil icon.
-
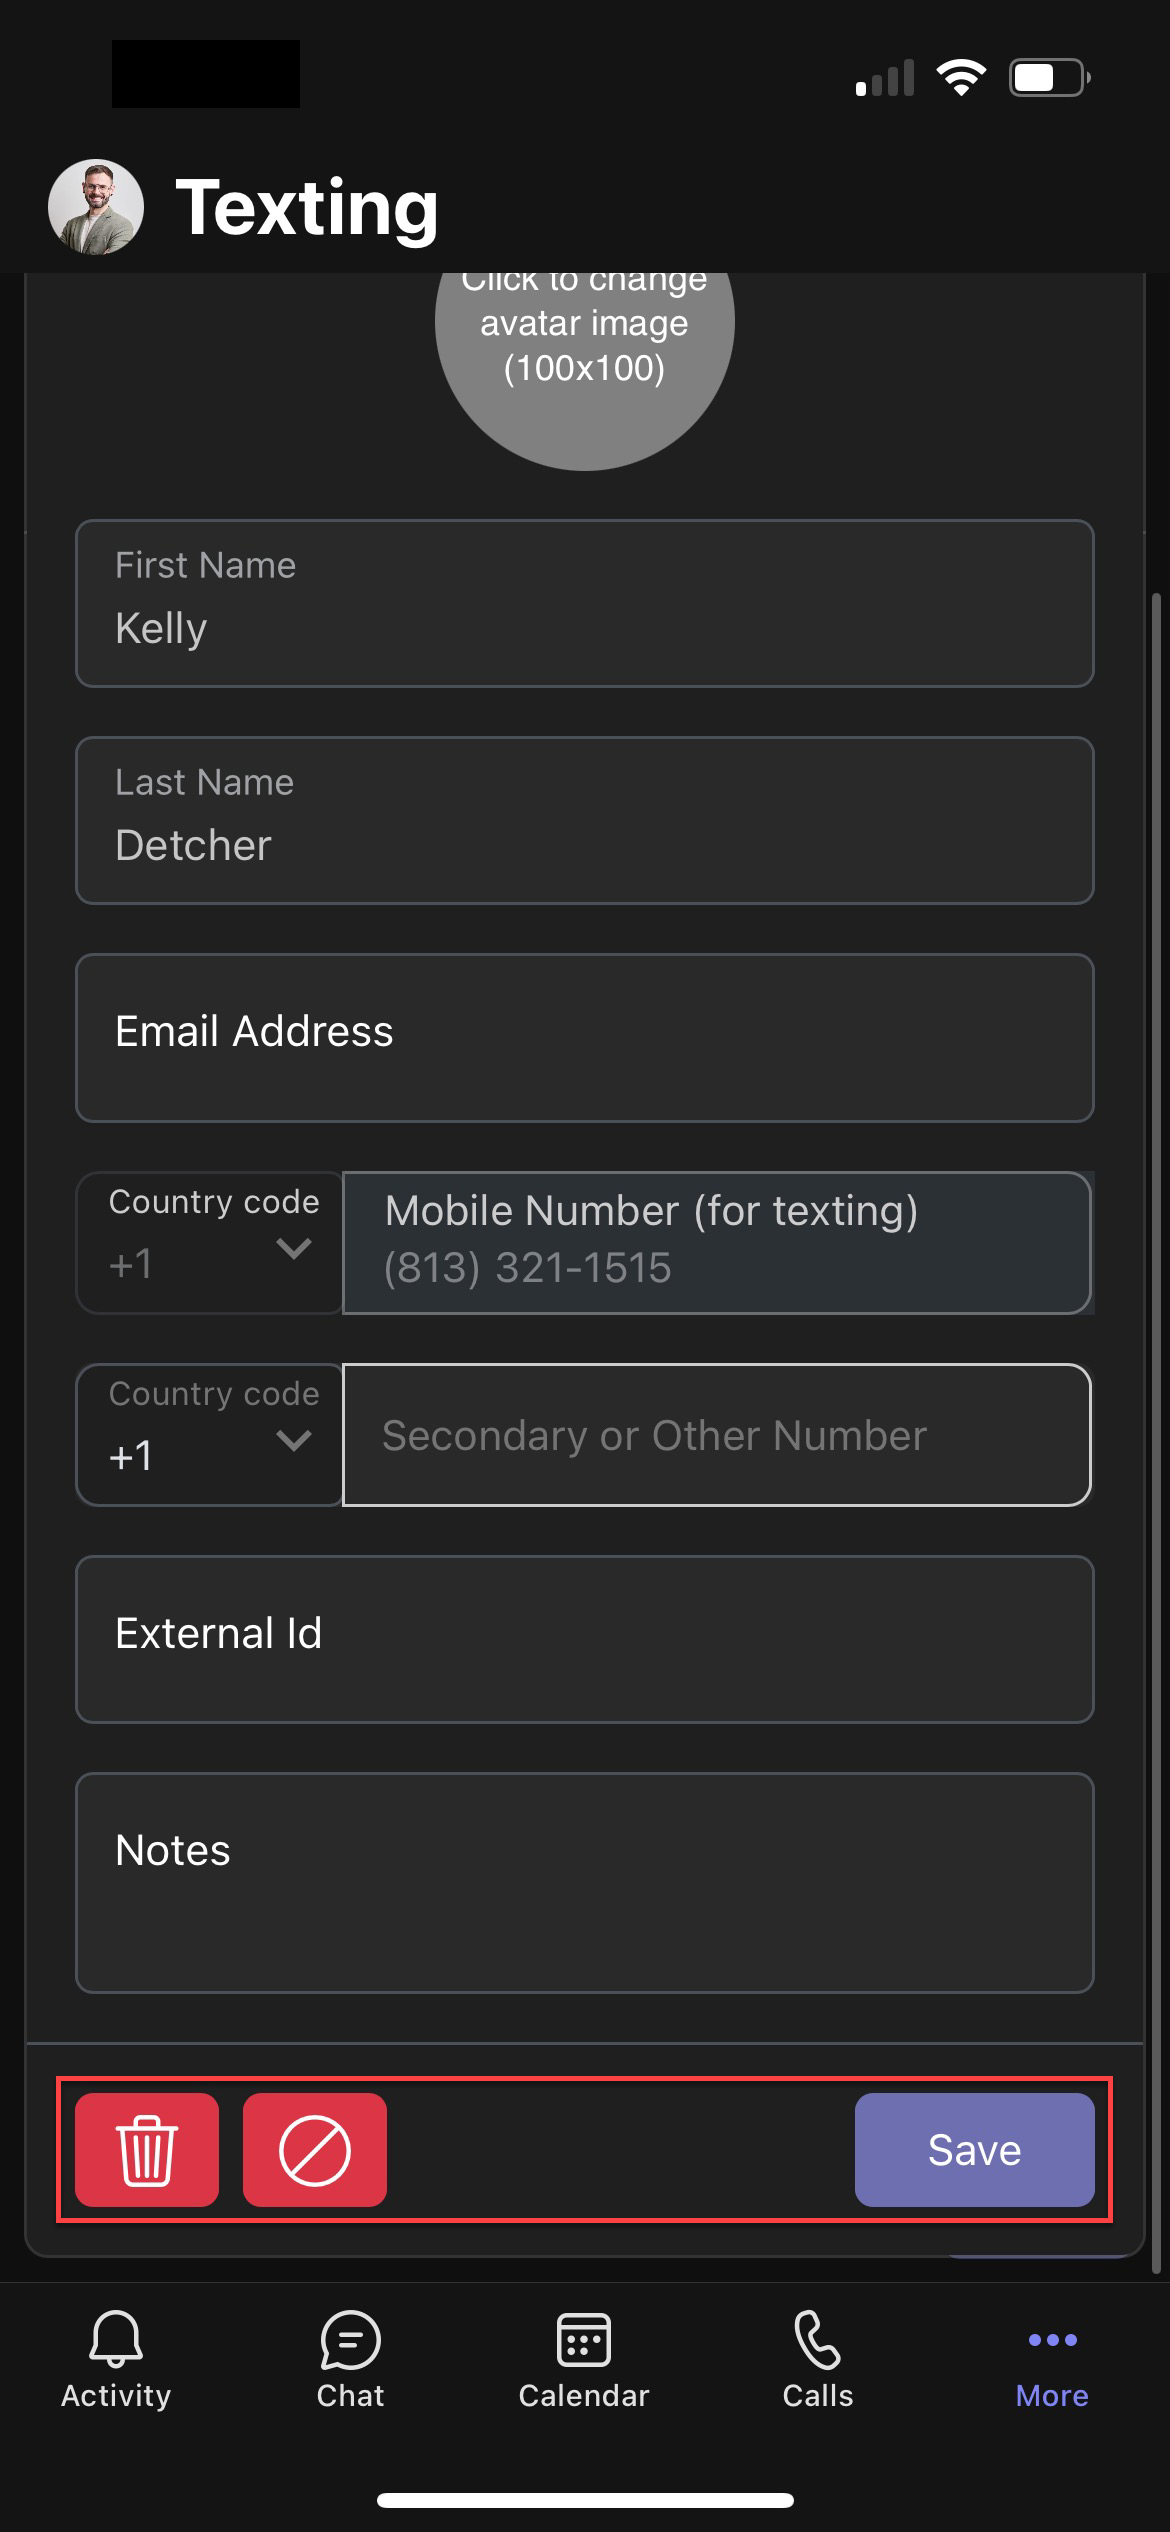
- Add desired contact information. Note: Only a mobile number is required.
- Select Save to save the contact, the trash icon to delete the contact, or the block icon to block the contact. Note: If deleted, the app only displays the phone number unless you re-add the contact information.
Add a New Contact (Single)
-
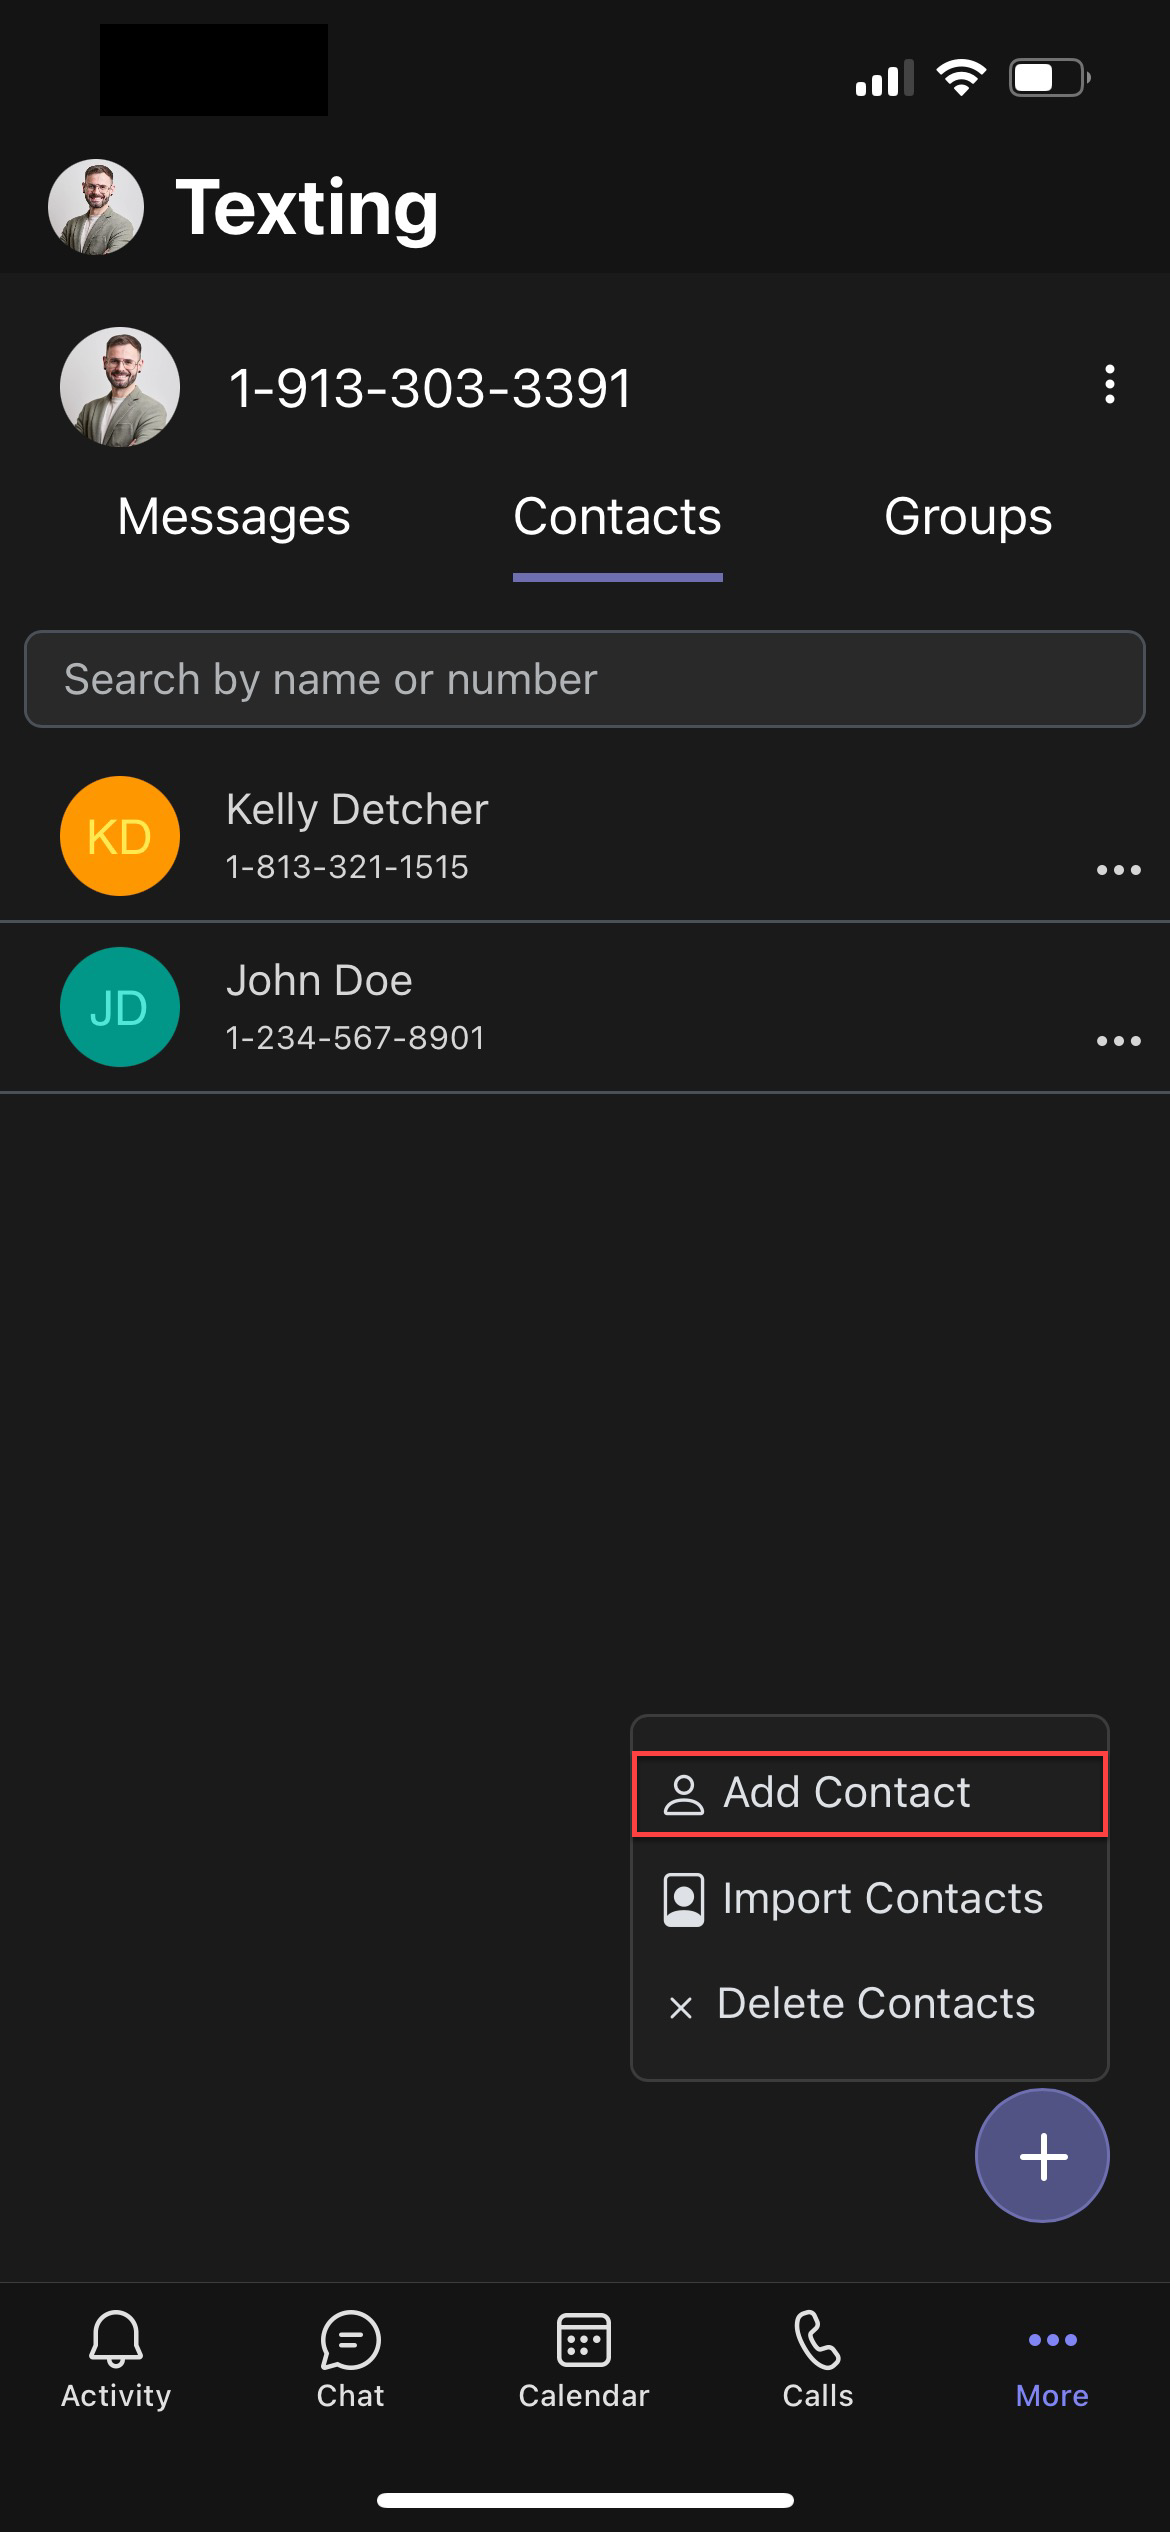
- On the Contacts tab, select +.
- Choose Add Contact.
-
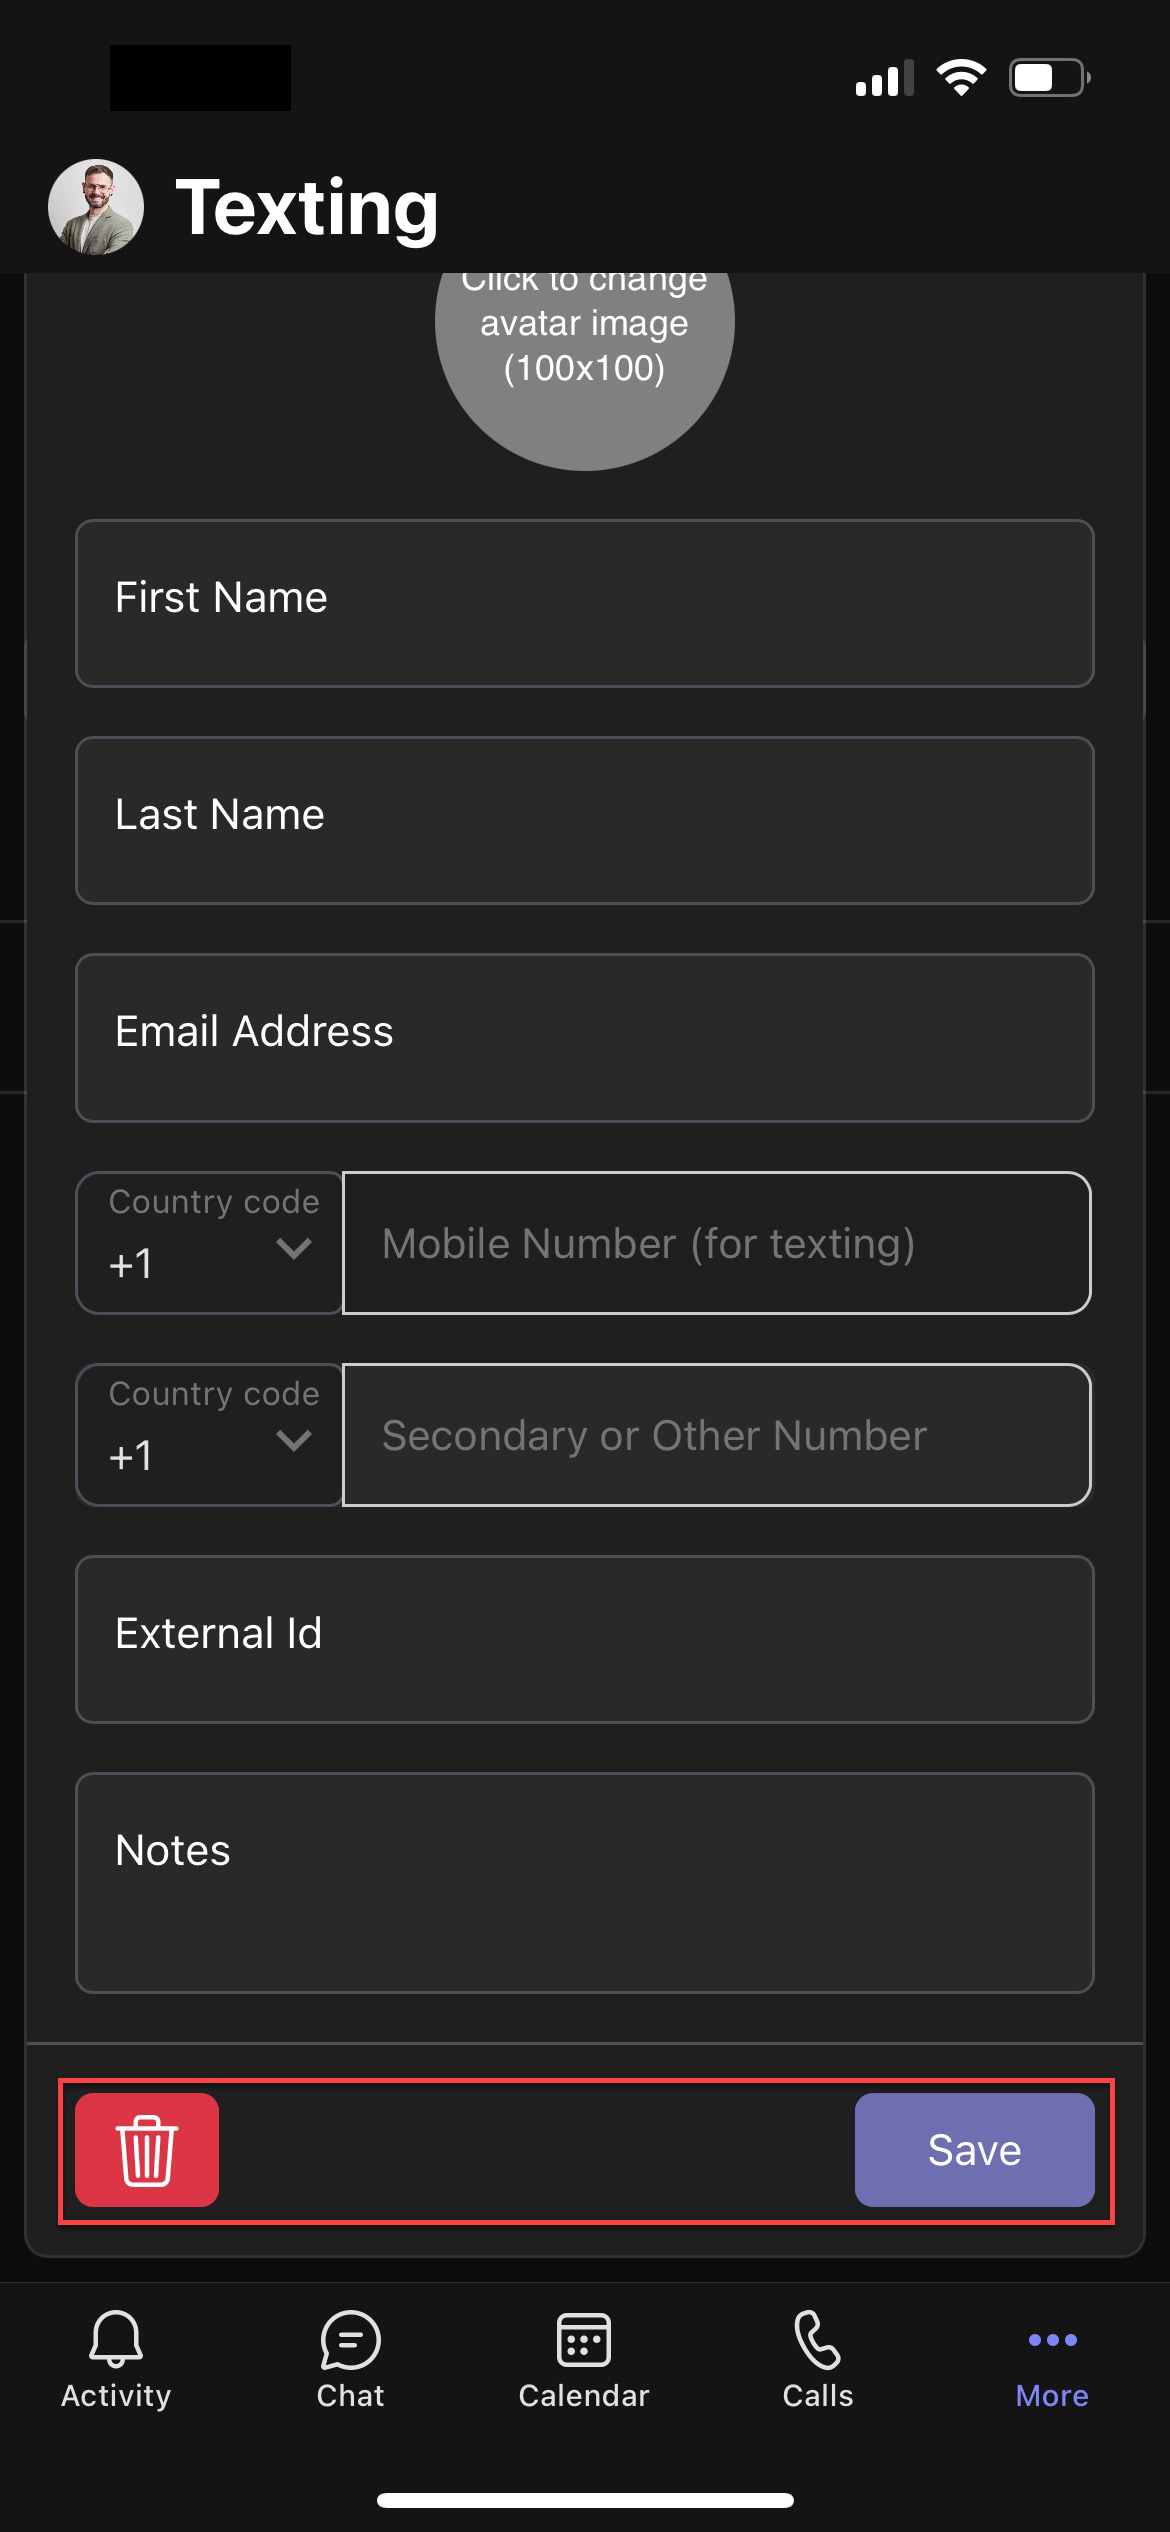
- Enter desired contact information. A mobile number must be entered.
- Select Save to save the contact or the trash icon to delete the contact.
Add a New Contact (Bulk)
-
- On the Contacts tab, select +.
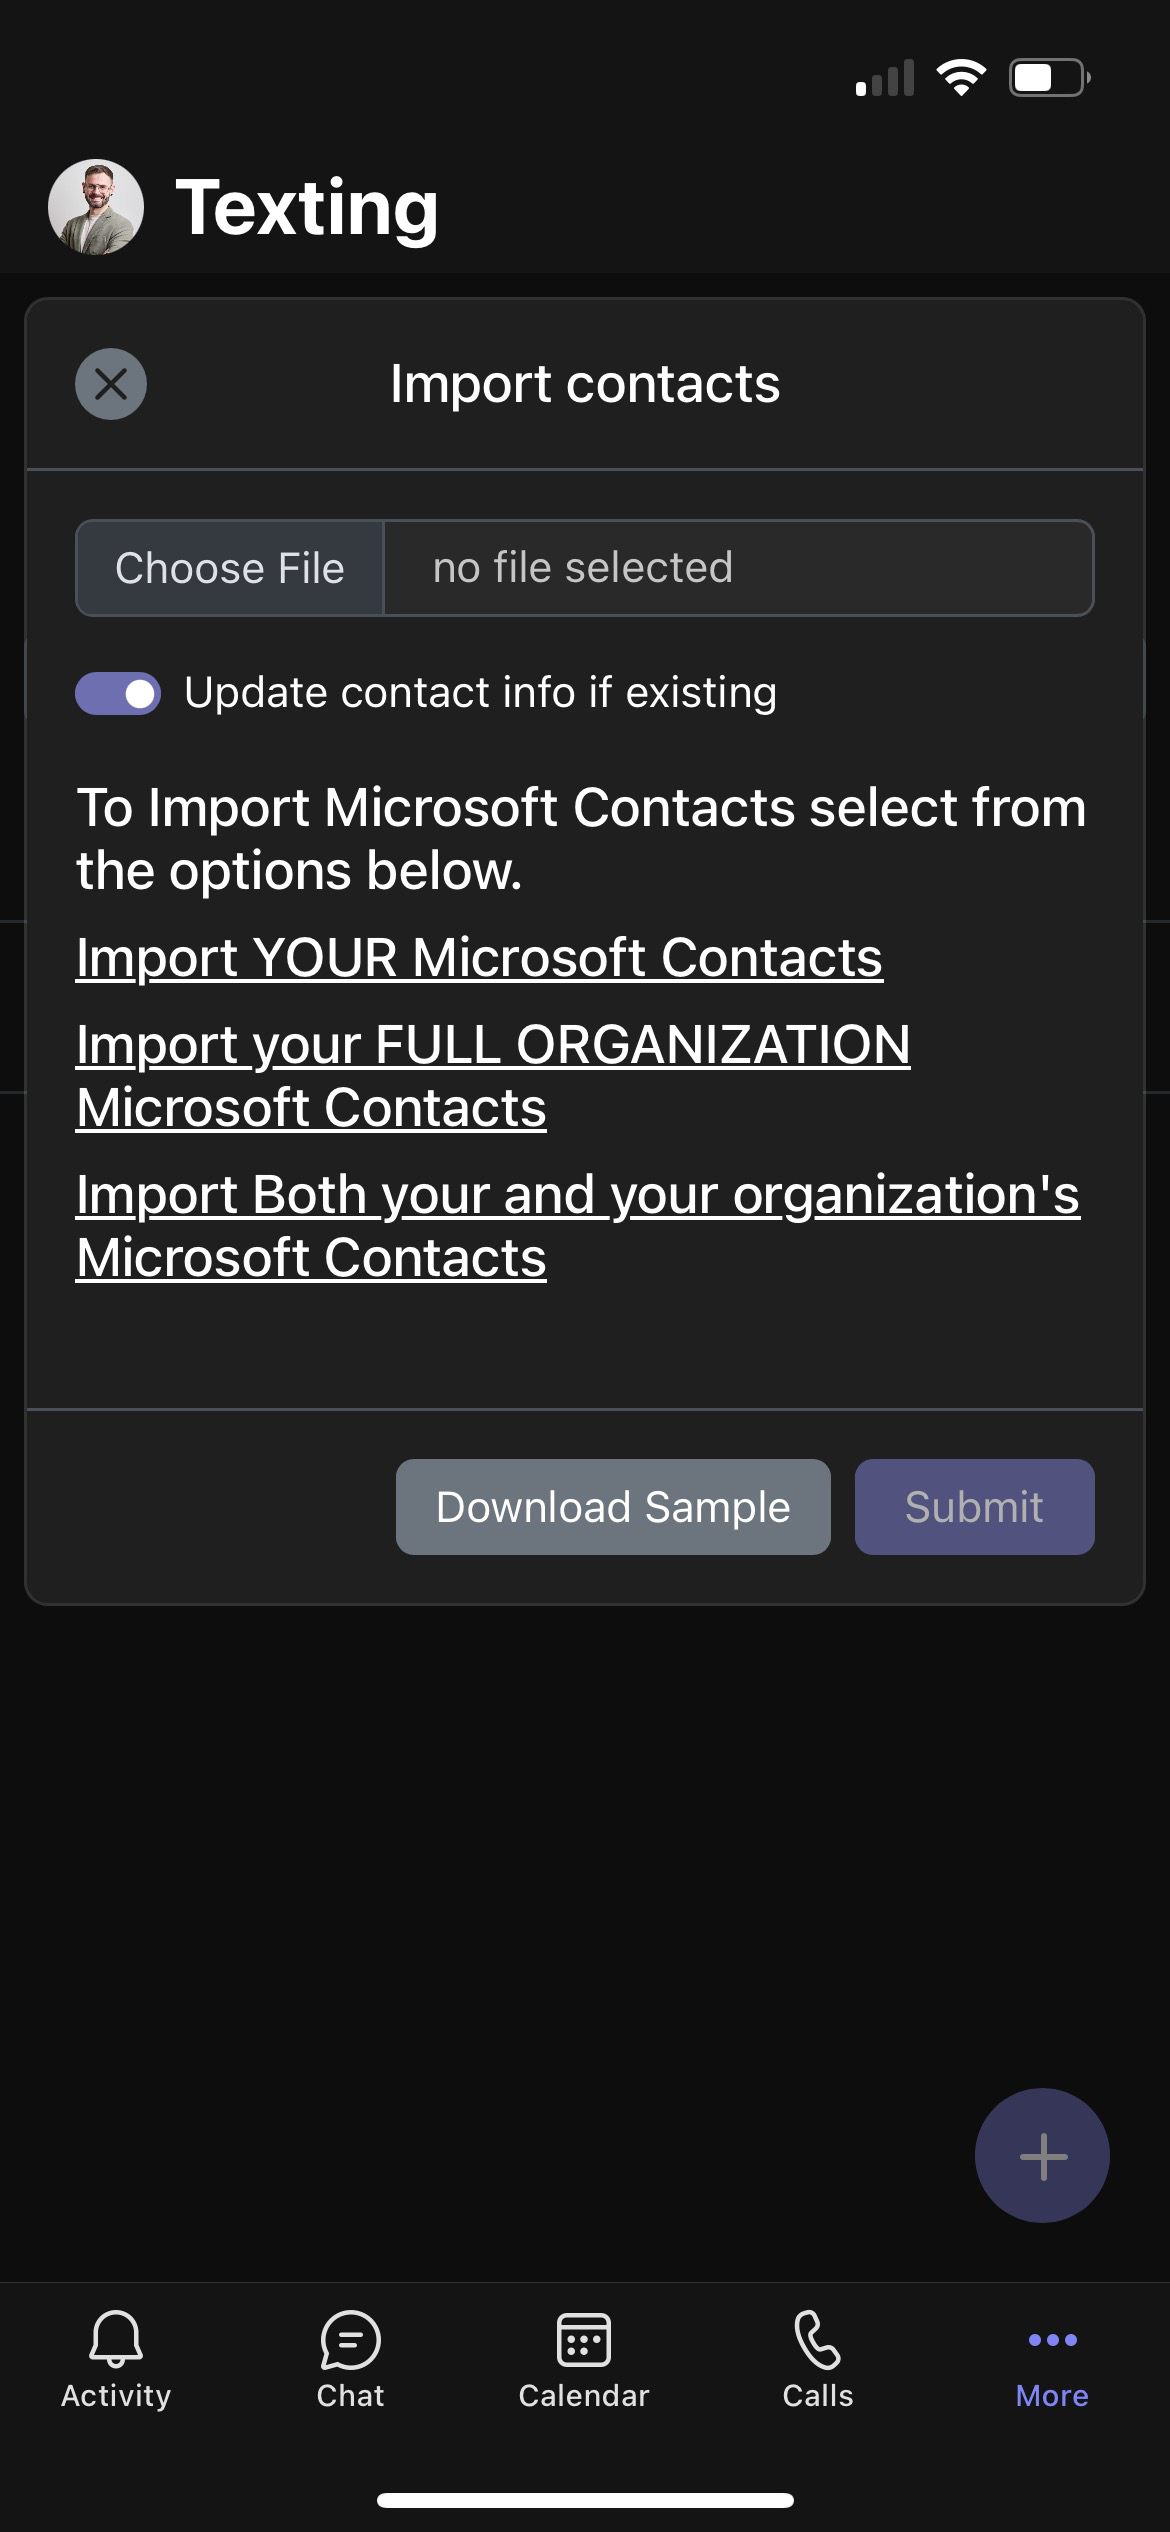
- Choose Import Contacts.
-
- Upload a file.
Note: It is highly recommended to use the Download Sample to ensure your data is formatted properly.
-
- If desired, toggle on to Update contact info if existing.
- The file name, list of contacts, and number of contact imports appear.
- You can also choose to import your Microsoft Contacts from the following options:
- Import YOUR Microsoft Contacts
- Import your FULL ORGANIZATION Microsoft Contacts
- Import Both your and your organization’s Microsoft Contacts
-
- Select Submit.
- When complete, the contacts appear in the Contacts tab.
If you are using the Download Sample:
-
- Add your data to the columns, ensuring that you clear the data points provided in the sample.
- The Mobile column must be completed with just a 10-digit string of numbers. Note: Do not reformat the Mobile column in any way; the system automatically adds a “1”.
- All the other data points are optional.
- The External ID allows the contact to be tied to your existing internal application. This may be useful in the future if you plan to pull data into a CRM or to tie your information to any other data systems.


