MENU

Introduction
A paging group is an instance of the Group Paging service, assigned a list of targets, originators, and a phone number or extension. When an originator dials the paging group number, all targets are paged and joined in an n-way conference with the originator. Paging groups appear in the phone directory based on privacy settings. The maximum number of targets is controlled at the service provider, enterprise, and group levels, with a system limit of 1,000 targets per paging group.
Create a paging group
Administrators can set the paging number, choose the recipients, and assign who can originate pages. To configure and modify Group Paging, follow these steps:
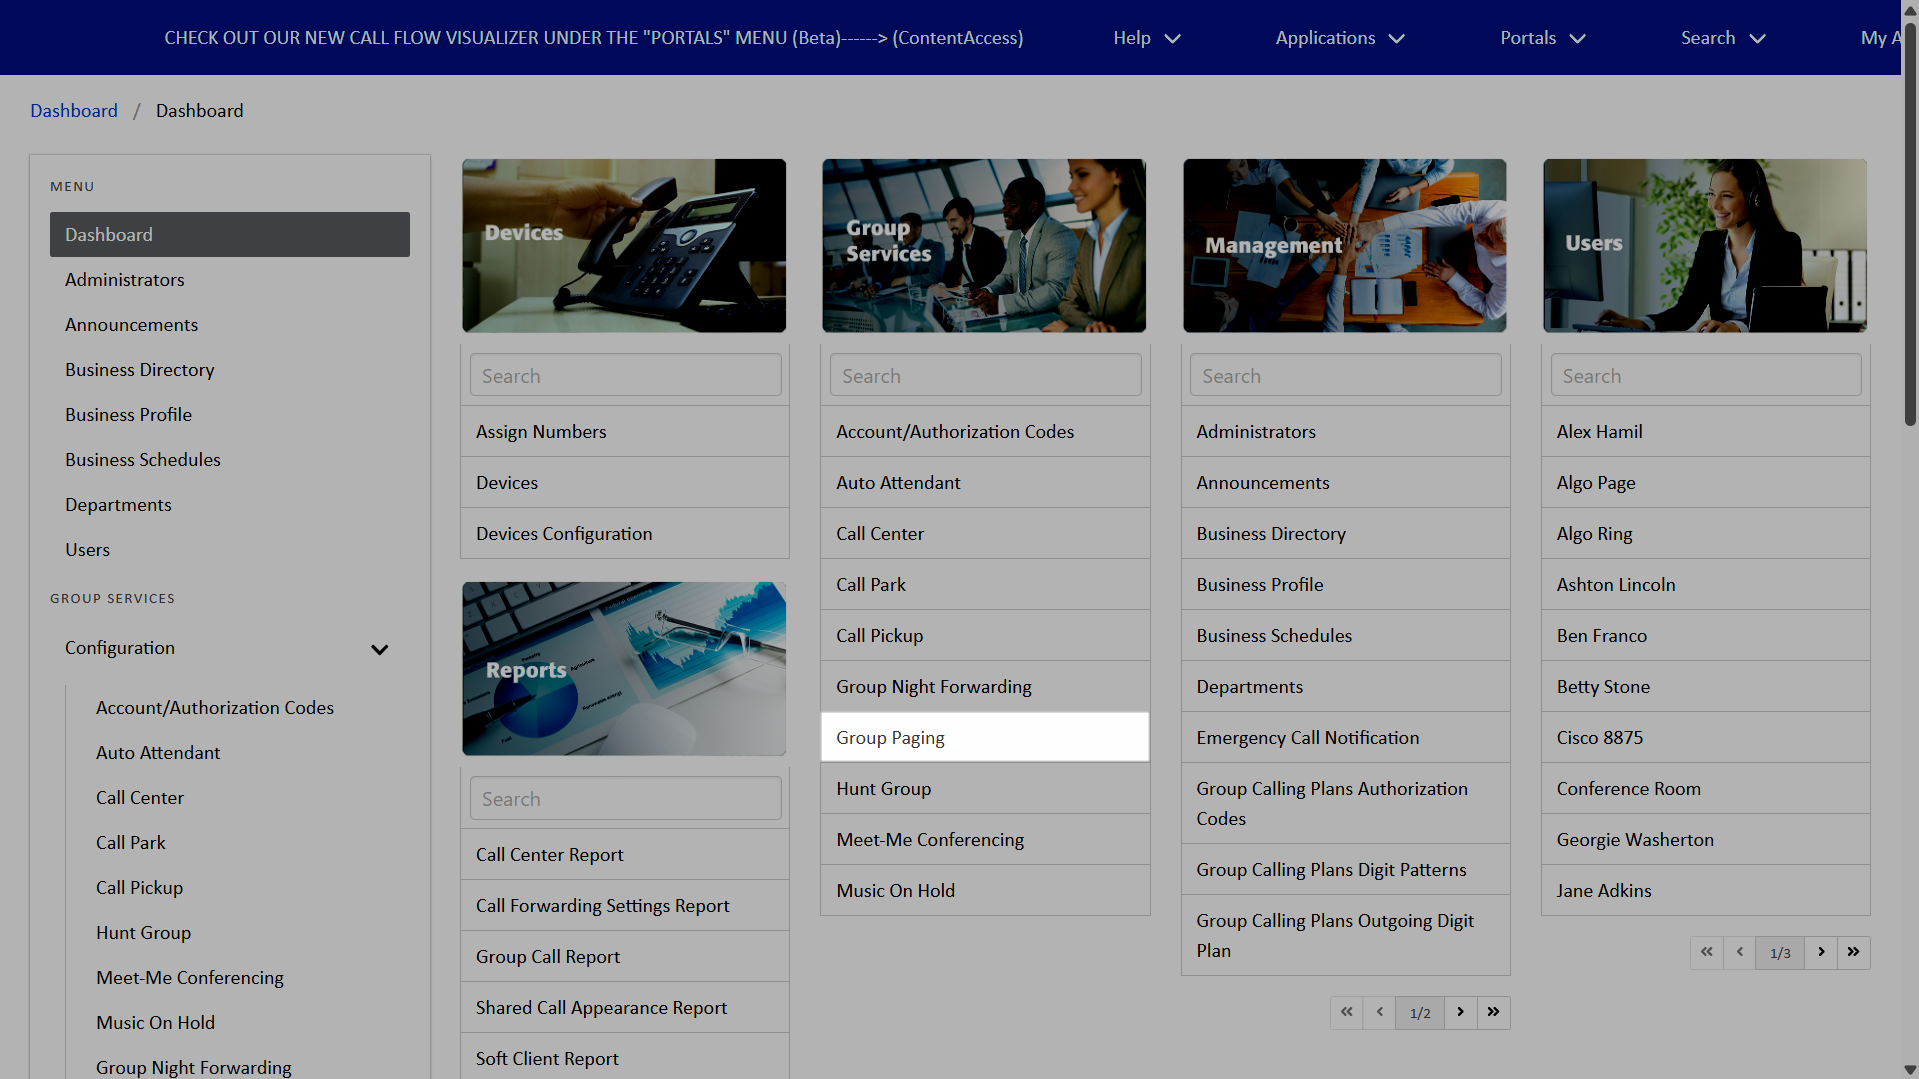
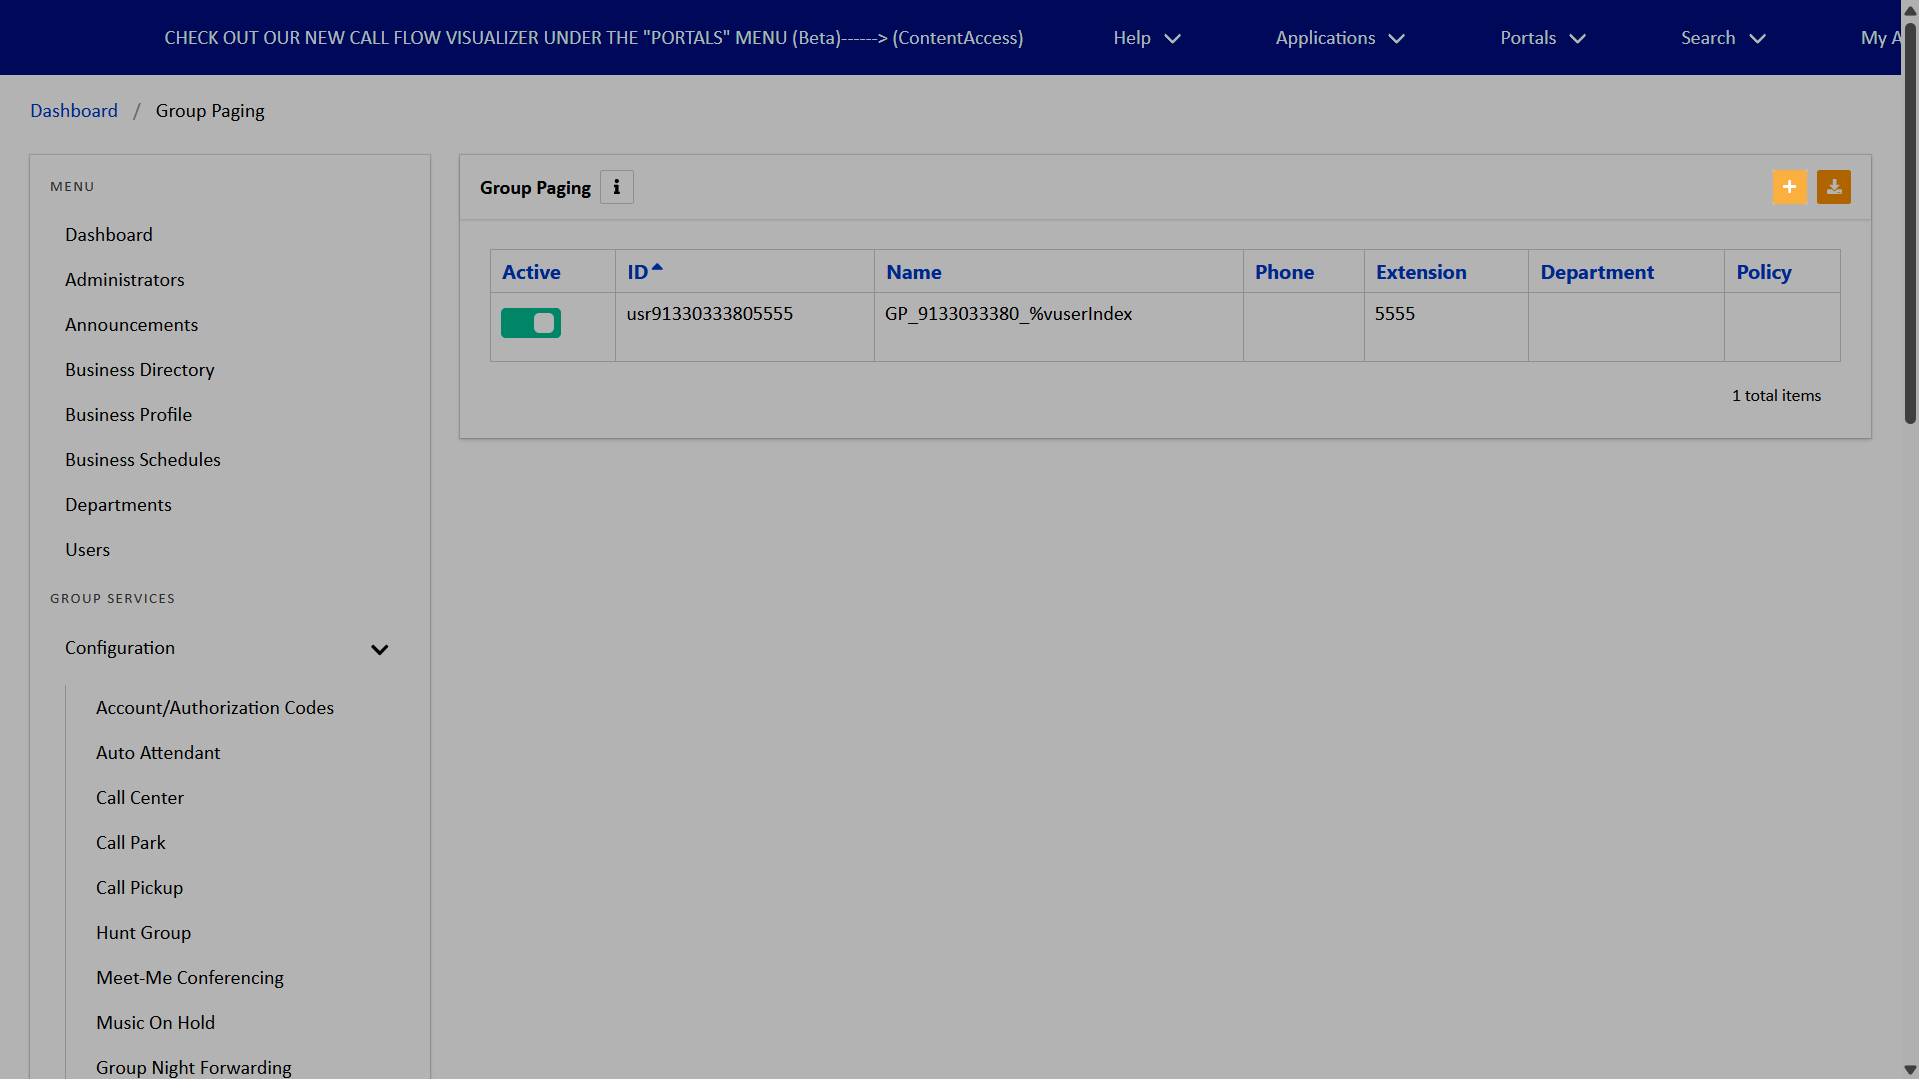
- From the dashboard, select Group Paging under Group Services.
- A list of paging groups is displayed.
- To add a paging group, click the Add “+” icon.
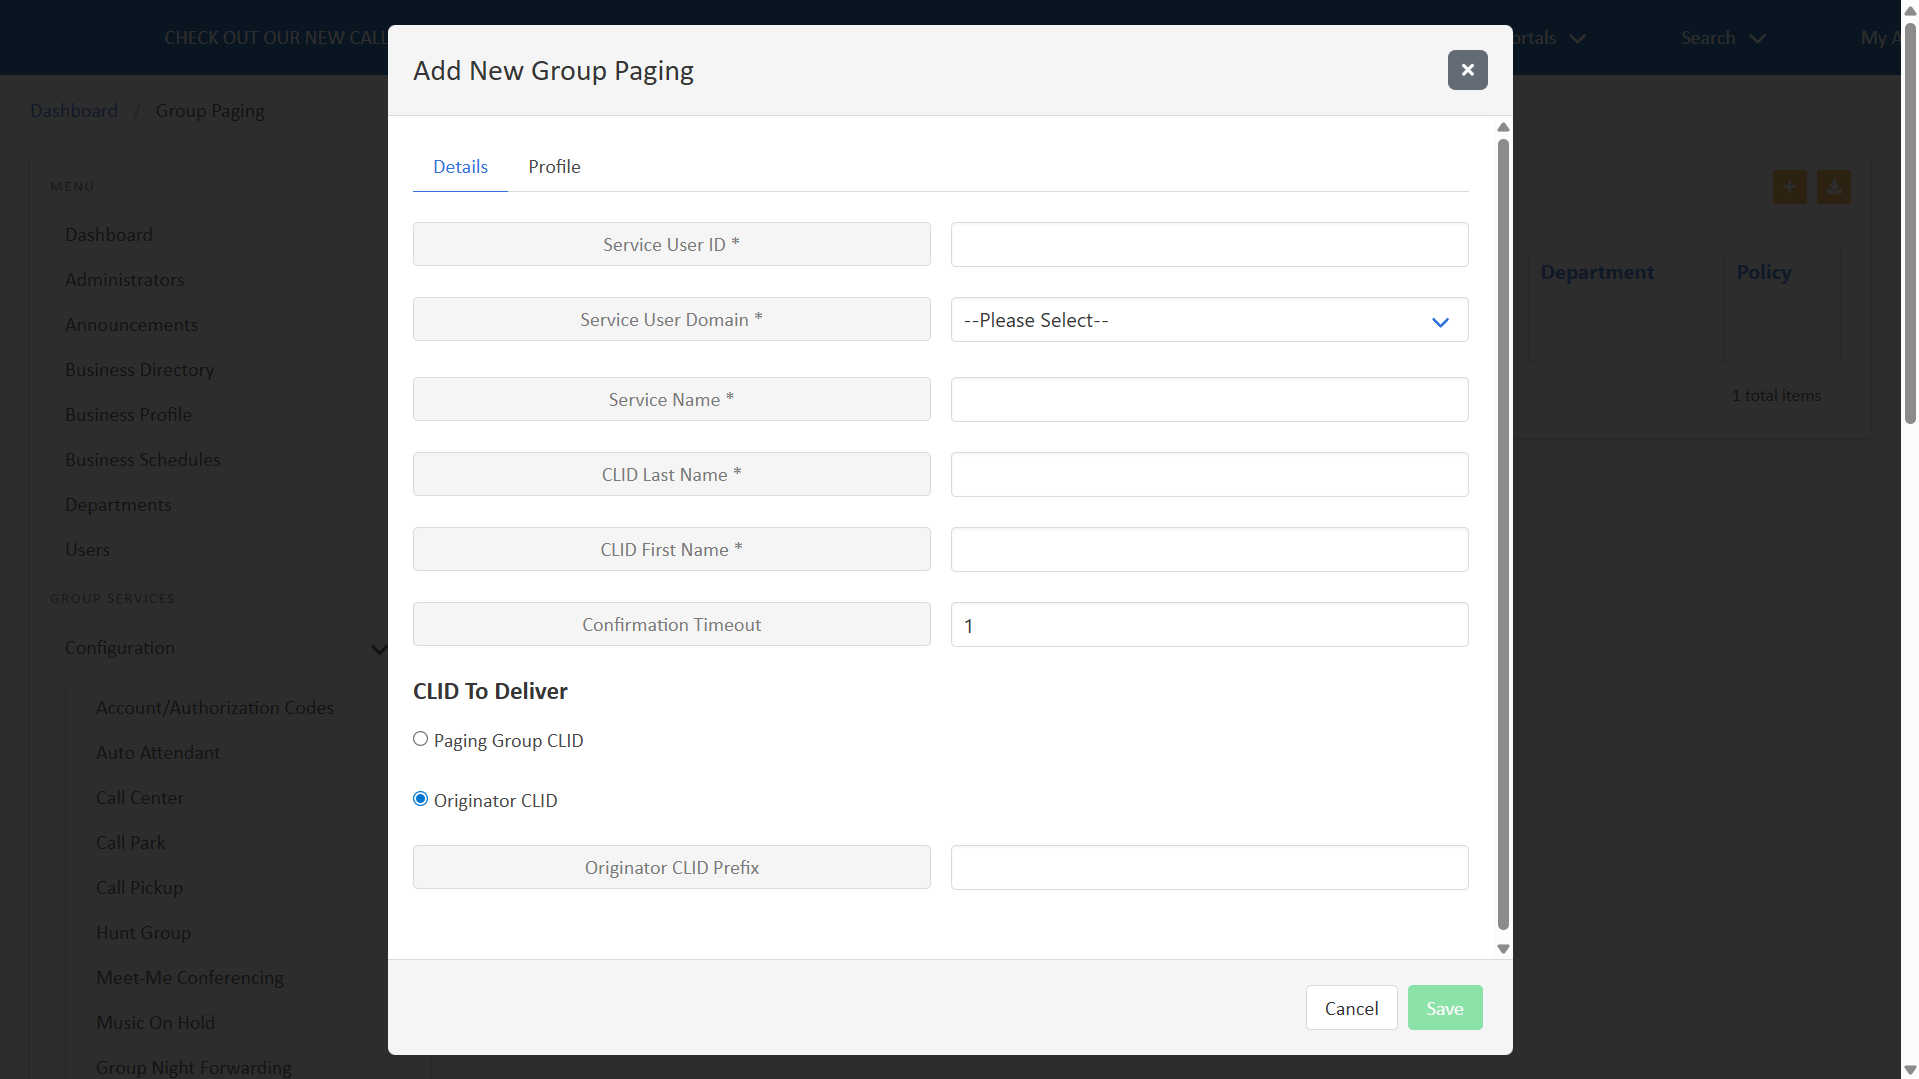
- Complete the following Details:
- Service User ID* - Enter a service ID for the Paging Group. This ID must be unique in the system. The preferred format for an extension-only paging group is usrGroupIDExtension without the dash in the group ID. e.g., “usrZZZ19000007019999” or “usrPRS11000999019999”. The ID cannot be changed once the paging group is set up. Paging groups are generally not set up with a 10-digit phone number, as we don’t want outside callers getting into the paging group.
- Service User Domain* - This is always voicecci.net.
- Service Name* - Name of the paging group you want showing in the group list. Be descriptive.
- CLID Last Name* - “Last name” of the paging group.
- CLID First Name* - “First name” of the paging group.
- Confirmation Timeout - The time (in seconds) before the system plays a confirmation tone to the originator to indicate the page is active.
- Select the applicable CLID to Deliver: either Paging Group CLID or Original CLID. If Original CLID is selected, you must also enter an Originator CLID Prefix.
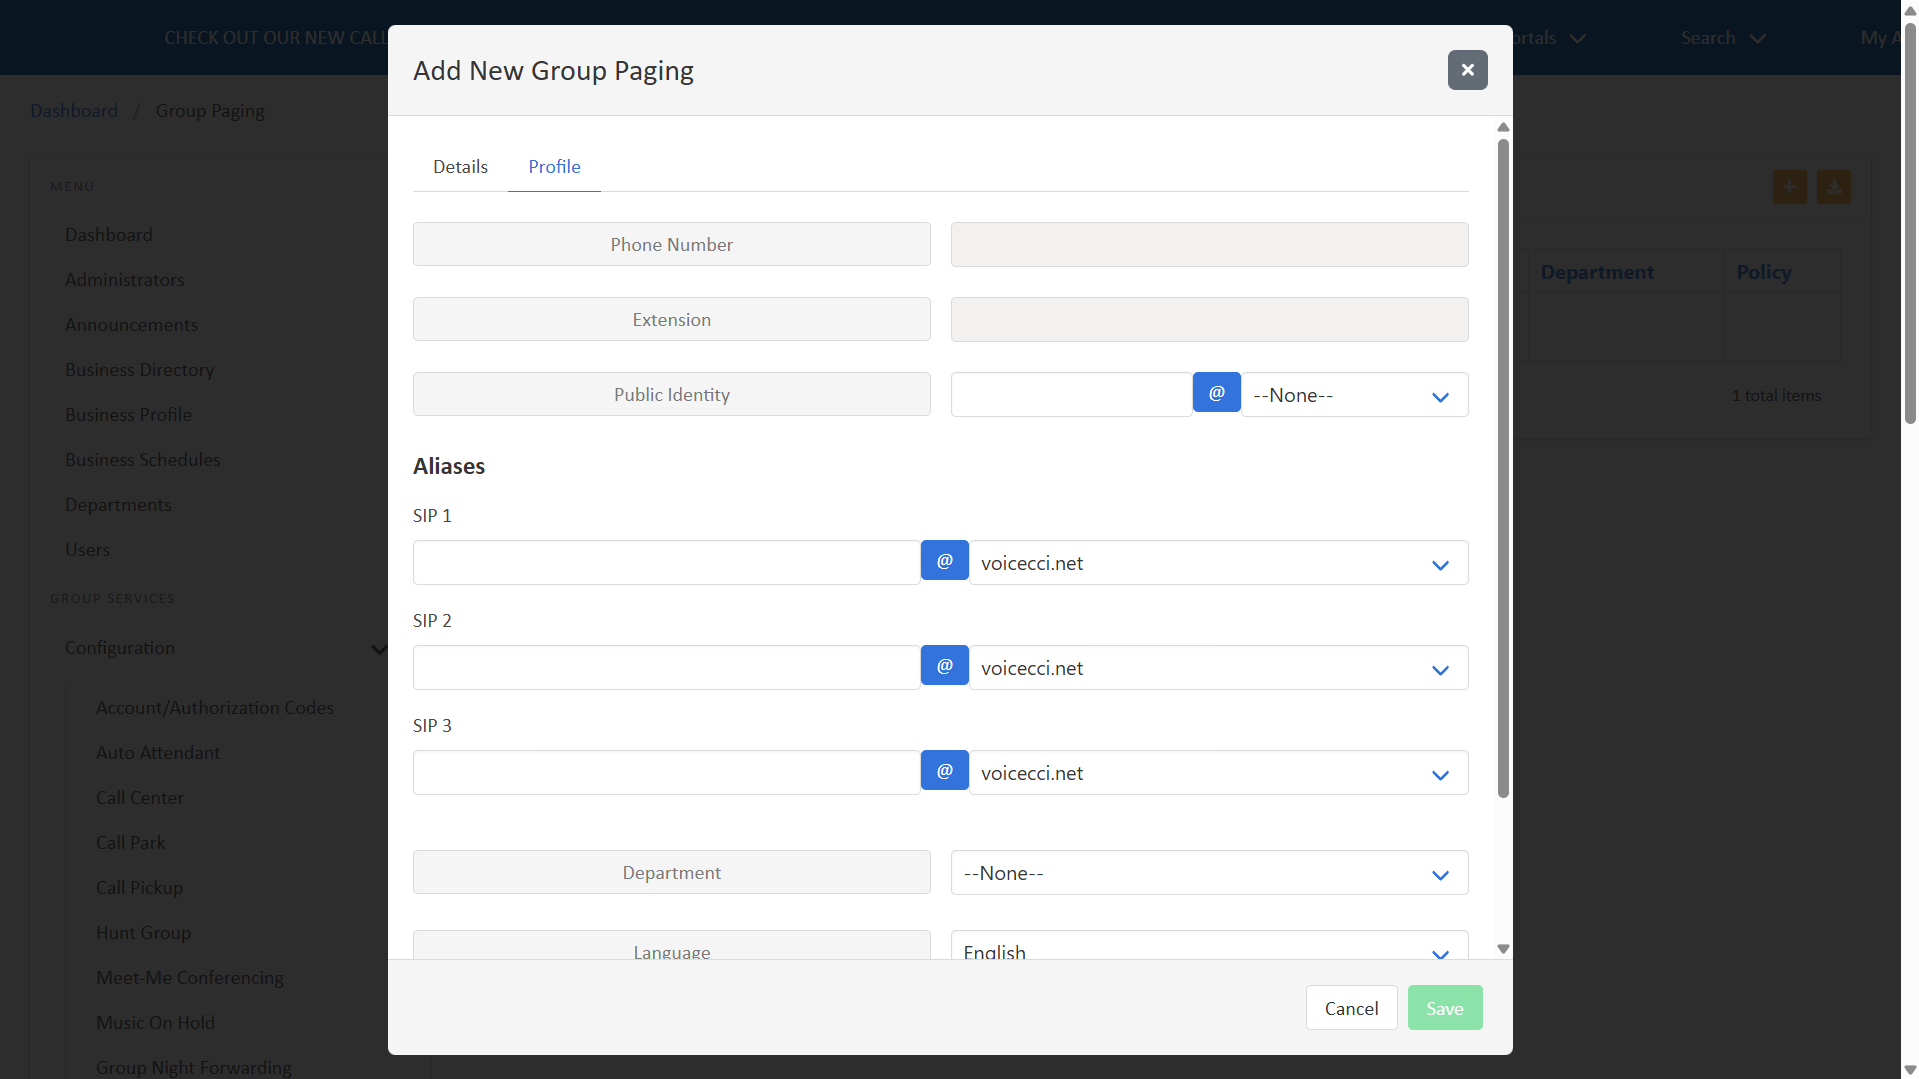
- Complete the following Profile information as desired:
- Phone Number - Select a phone number from your available numbers. Note: It is highly recommended not to assign a number to avoid external callers from accidentally calling this number and initiating a page.
- Extension - Enter the extension you want to use to initiate the page. The extension must be unique in your Enterprise.
- Public Identity - Not required.
- Aliases - Not required.
- Department - Not required. If desired, you can assign a department.
- Language - Not required. Defaults to English.
- Time Zone - Not required. Defaults to the group time zone.
 Click image for large view
- When all required and desired fields are complete, click Save. The paging group now appears in your list and is set to Active.
Note: Required fields are indicated with an asterisk (*).
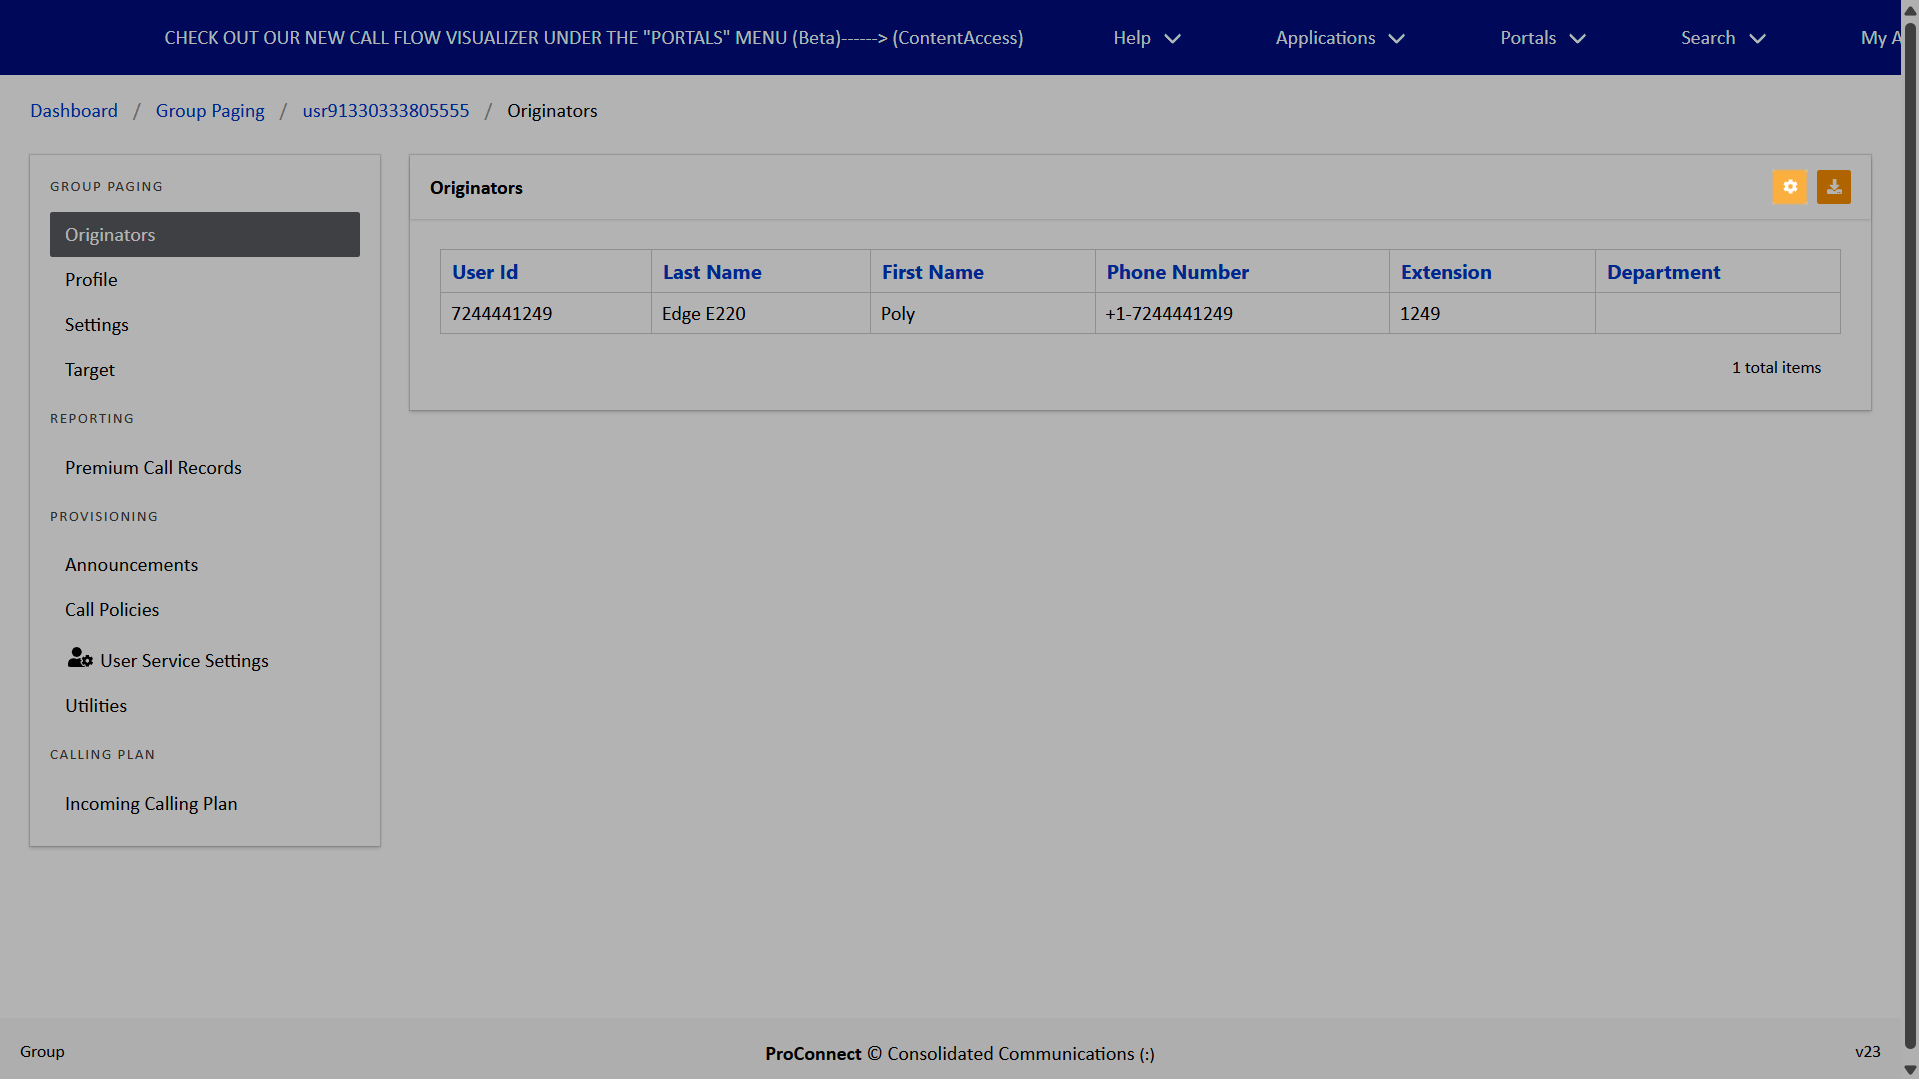
Configure and modify originators
Originators are the users who have permissions to initiate a one-way page to a group of users.
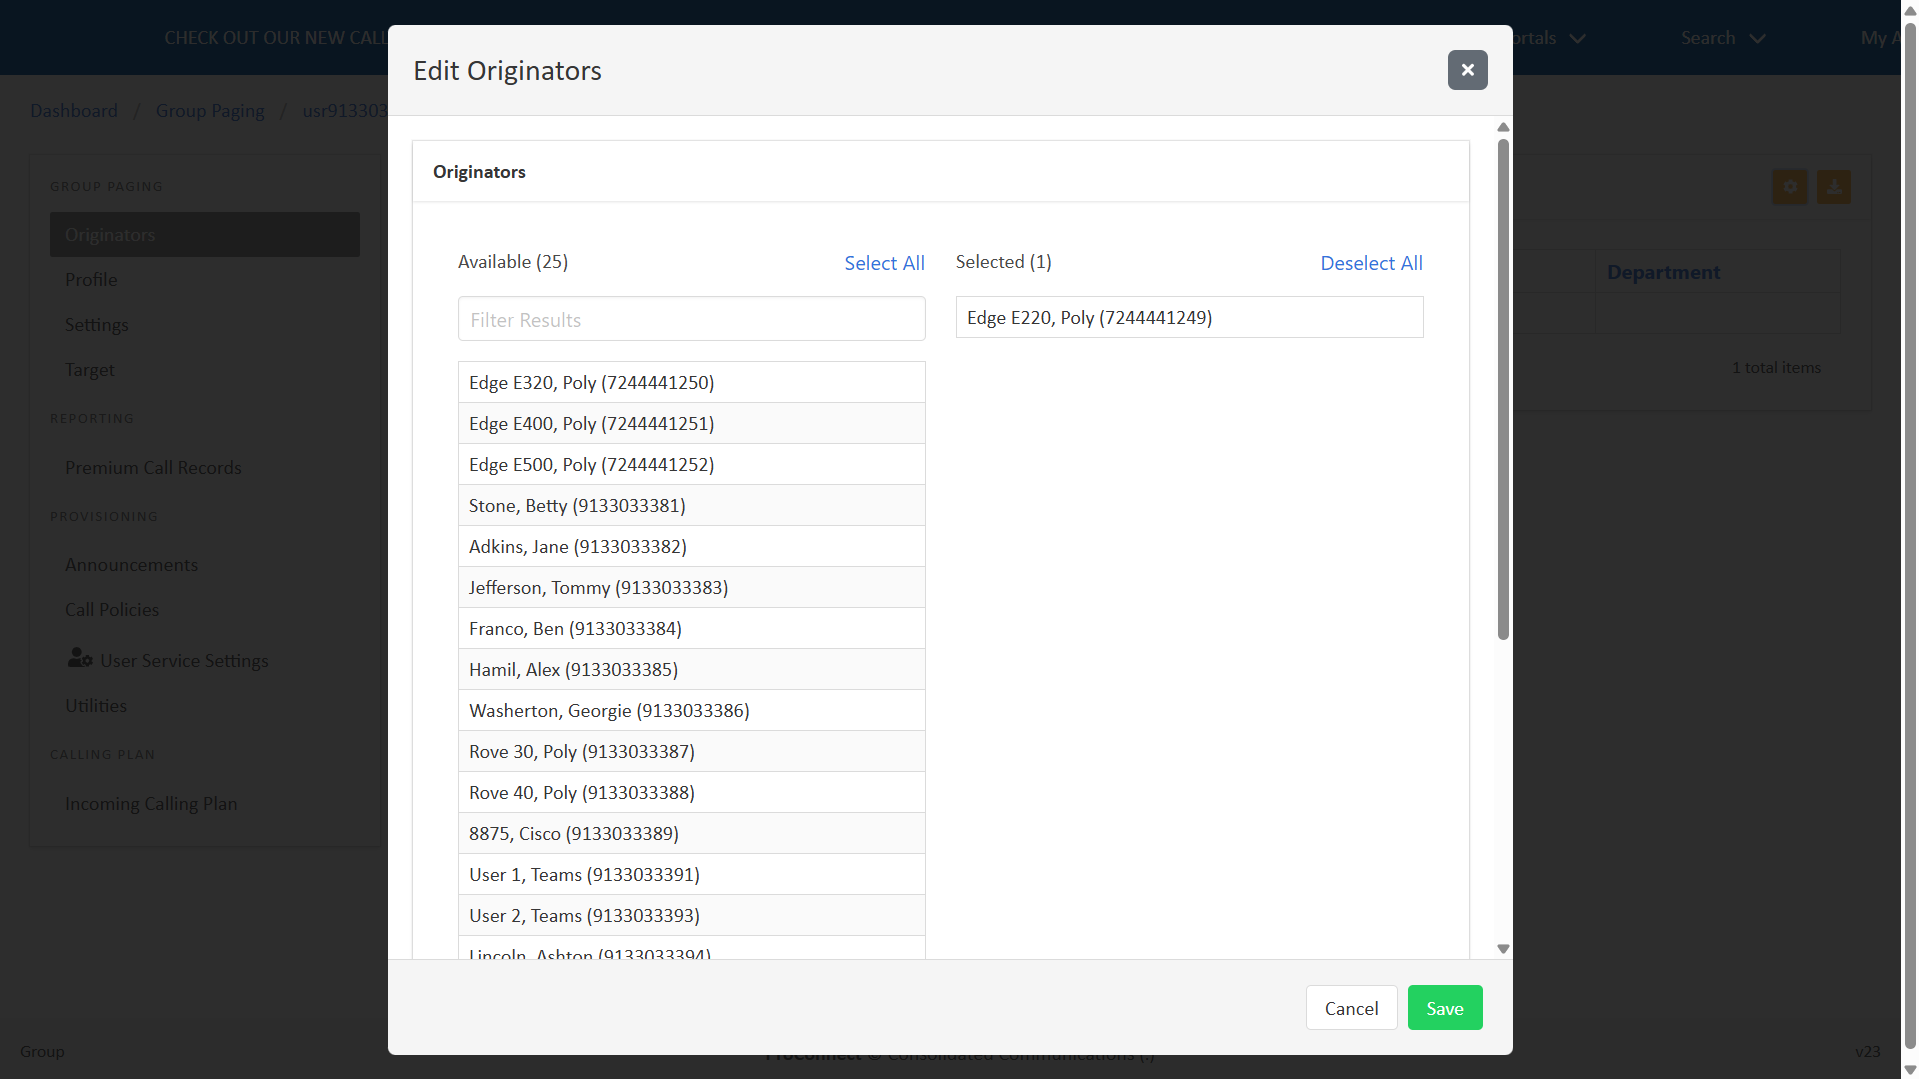
To add or modify originators, follow these steps:
- From the Group Paging list, select your desired paging group.
- Click the Edit icon.
- Add Originators by selecting them from the Available list. To move all originators, click Select All. To remove selected originators, click their name within the Selected list. To remove all selected originators, click Deselect all.
- Click Save.
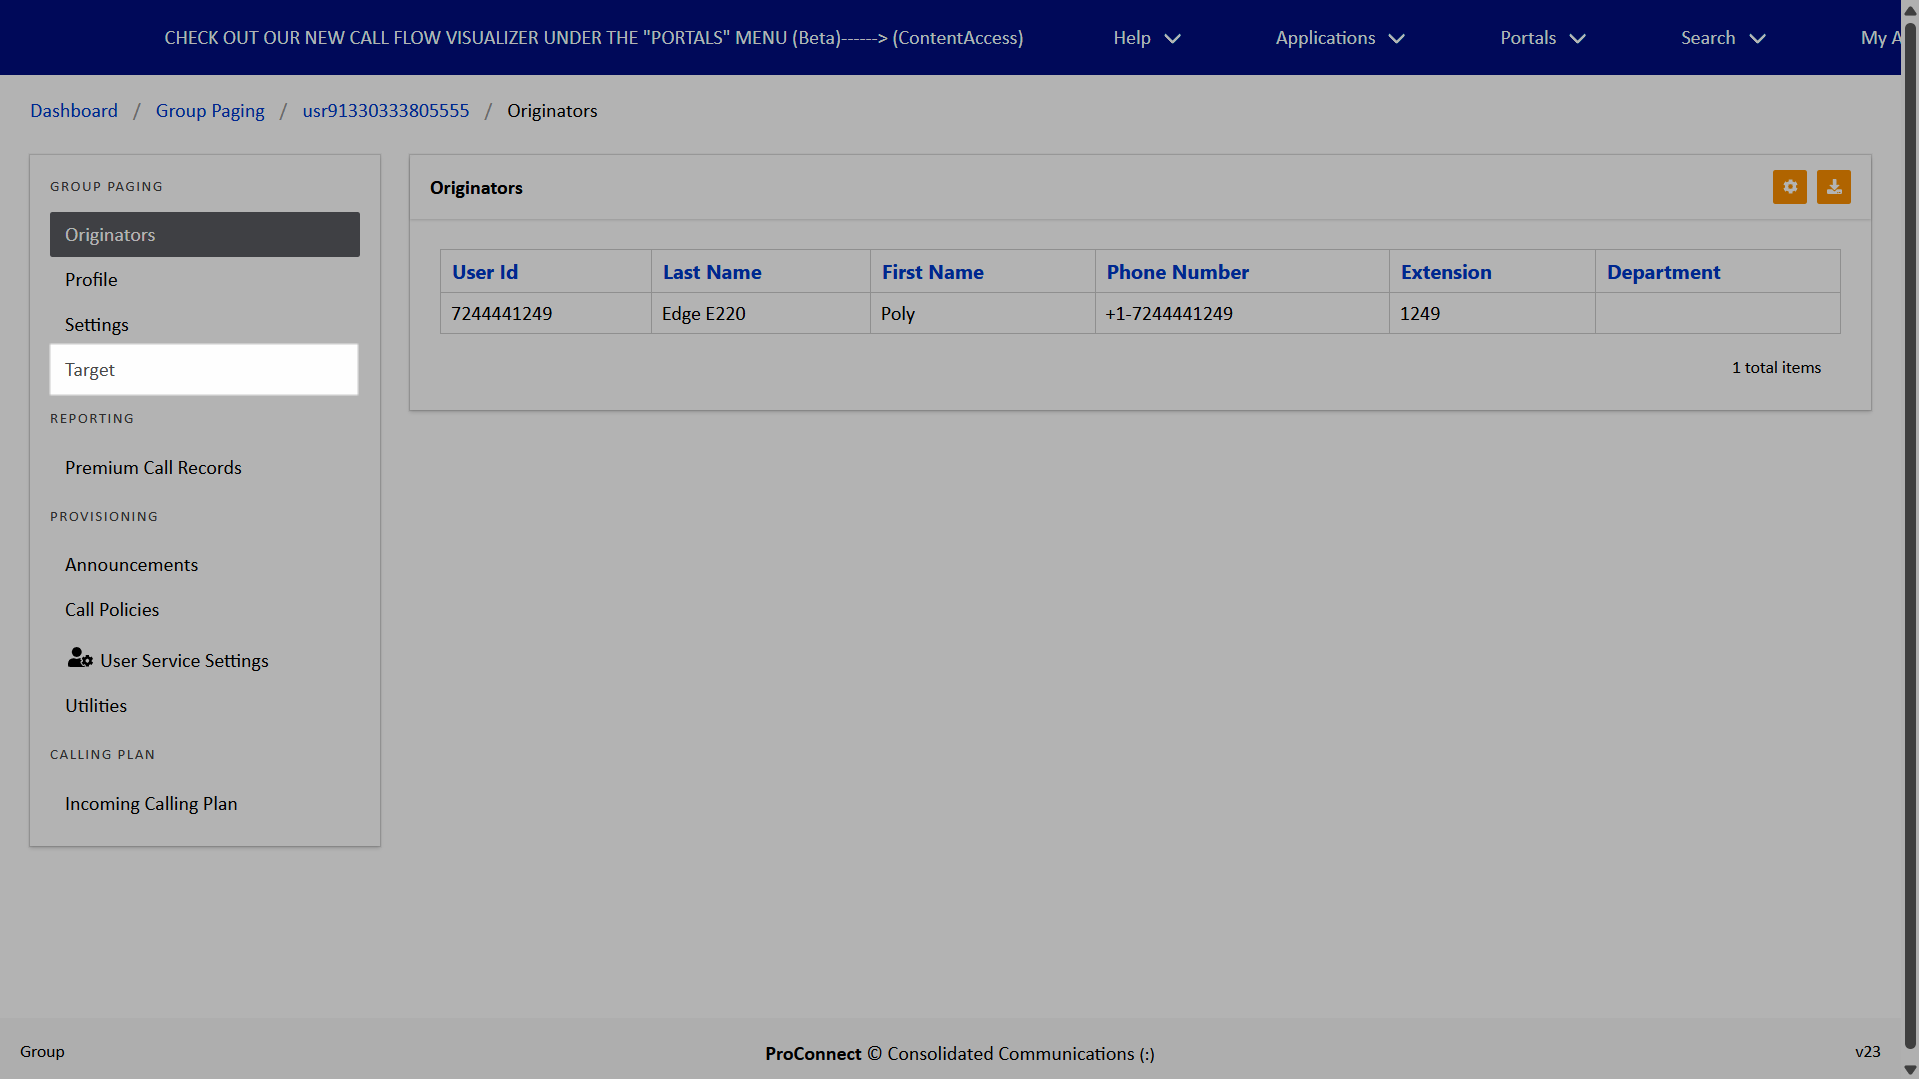
Configure and modify targets
Targets are the users or devices configured to automatically receive and answer group paging announcements.
To add or modify originators, follow these steps:
-
- From the Group Paging list, select your desired paging group.
- Select Target from the menu.
- Click the Edit icon.
- Add Targets by selecting them from the Available list. To move all targets, click Select All. To remove selected targets, click their name within the Selected list. To remove all selected targets, click Deselect all.
- Click Save.
 Click image for large view
 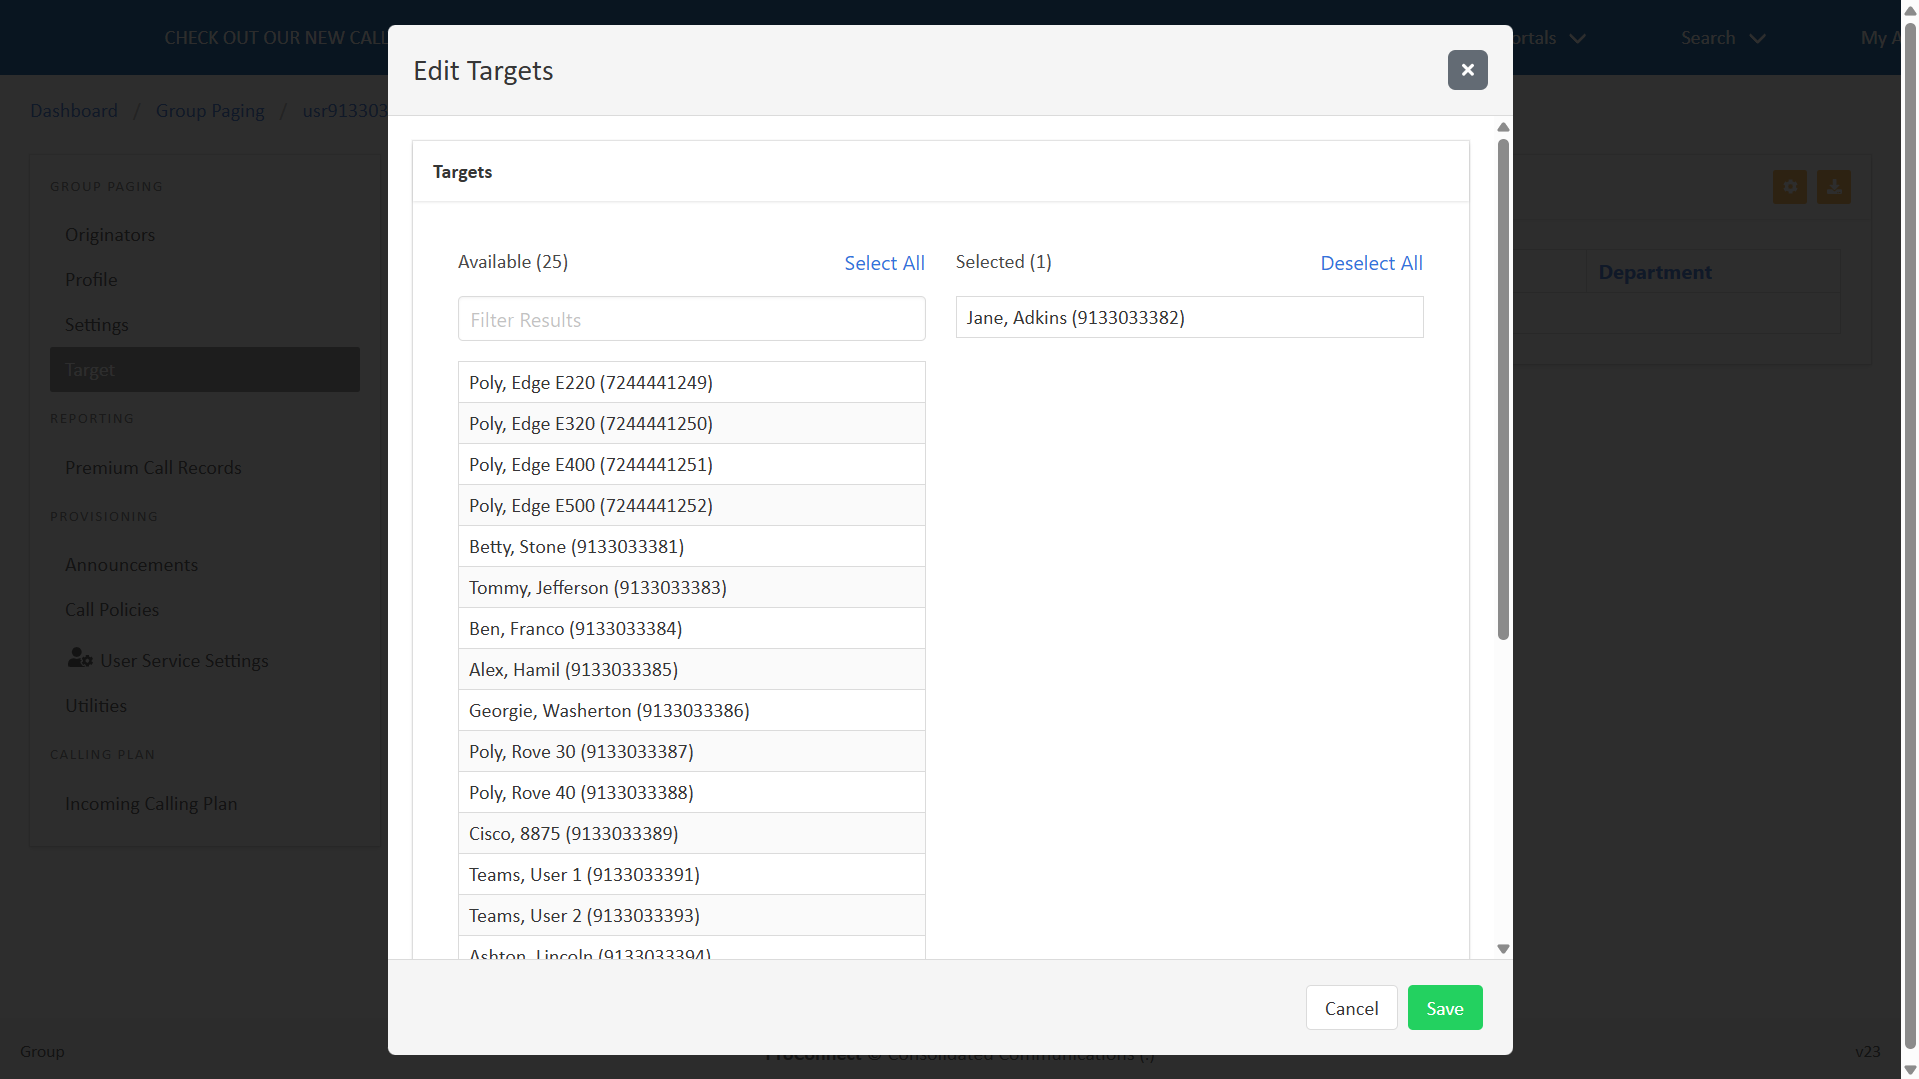 Click image for large view