MENU
- 1. Overview of Texting Using Webex
- 2. Prerequisites
- 3. Add Texting to the Sidebar
- 4. Access the Texting Application
- 5. Add Texting in Webex Spaces
- 6. Settings
- 7. Set Your Webex Notification Settings
- 8. Set Your System Notification Settings
- 9. Send and View Messages
- 10. View a Message
- 11. Manage a Thread
- 12. Manage Contacts
- 13. Add a Contact from Messages
- 14. Add a New Contact (Single)
- 15. Add a New Contact (Bulk)
- 16. Access Reports

Introduction
This document provides guidance for users to effectively utilize their Texting app within ProConnect with Webex.
1.
Overview of Texting Using Webex
- Texting allows you to send and receive text messages from your work phone numbers.
- Creates an easy way for you to use a work number for texting instead of your personal mobile phone.
- All the features of your smart phone from your business line.
2.
Prerequisites
Prior to utilizing Texting for ProConnect with Webex, ensure that you have:
- An active ProConnect with Webex account.
- A ProConnect seat that includes Webex.
- An active Texting subscription through Fidium.
- The Texting application is installed in your Webex sidebar. This application will be activated by Fidium when installing your service.
3.
Add Texting to the Sidebar
Note: If your organization is using the Global (Org-wide default) setup policy, these steps are already in place.
-
- Sign in to your Webex account.
- If you don't see the Texting app in your sidebar, click the …More icon and then select App Hub.
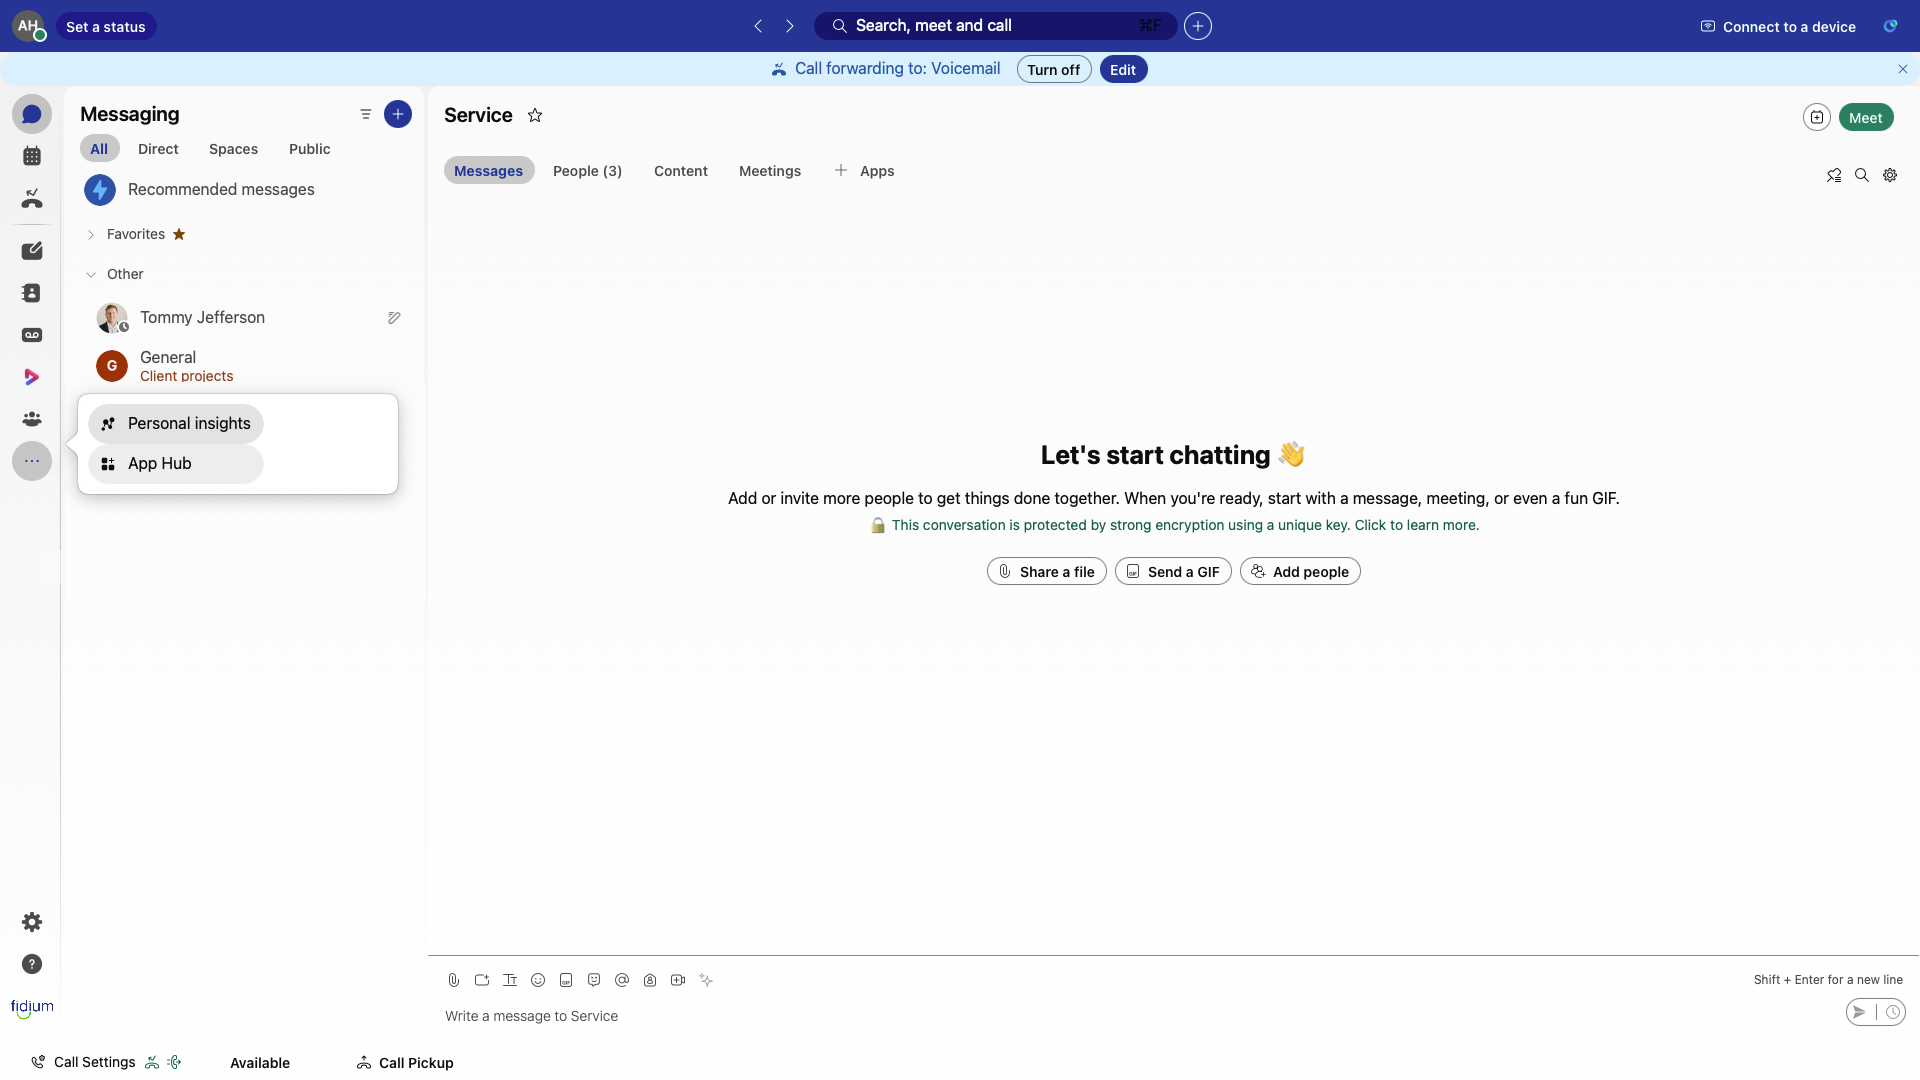
-
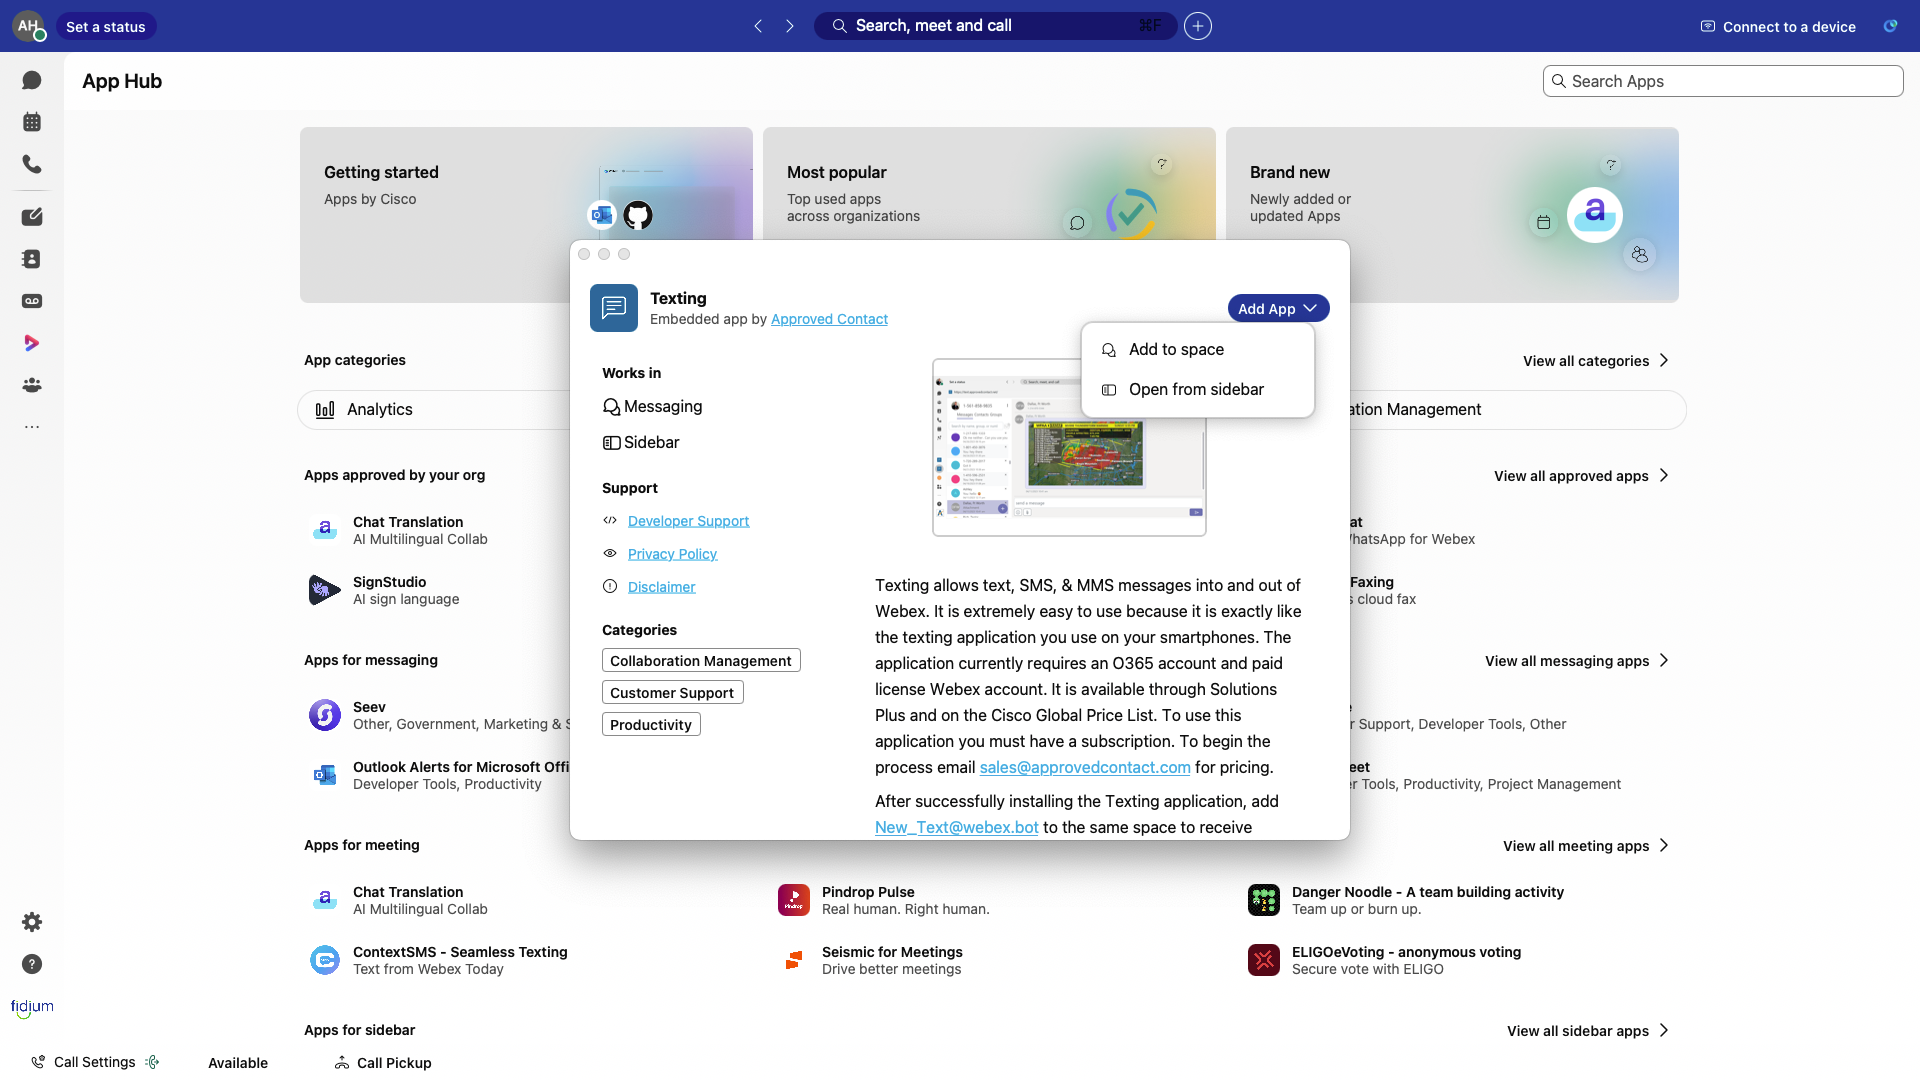
- In the Search bar, type Texting.
- Click Texting to open the app. Click Add App and select Open from sidebar.
- The app is now accessible from the sidebar.
Note: When you receive a Text message, a Webex pop-up notification appears on your device, and the space list shows a bolded name or blue dot. For more information on messages, please view the Send and view messages section below.
4.
Access the Texting Application
- Sign in to your Webex account.
- Click the Texting app from the sidebar. If you don't see it, click the …More icon and search for the Texting app to open it.
- Verify it is the correct phone number.
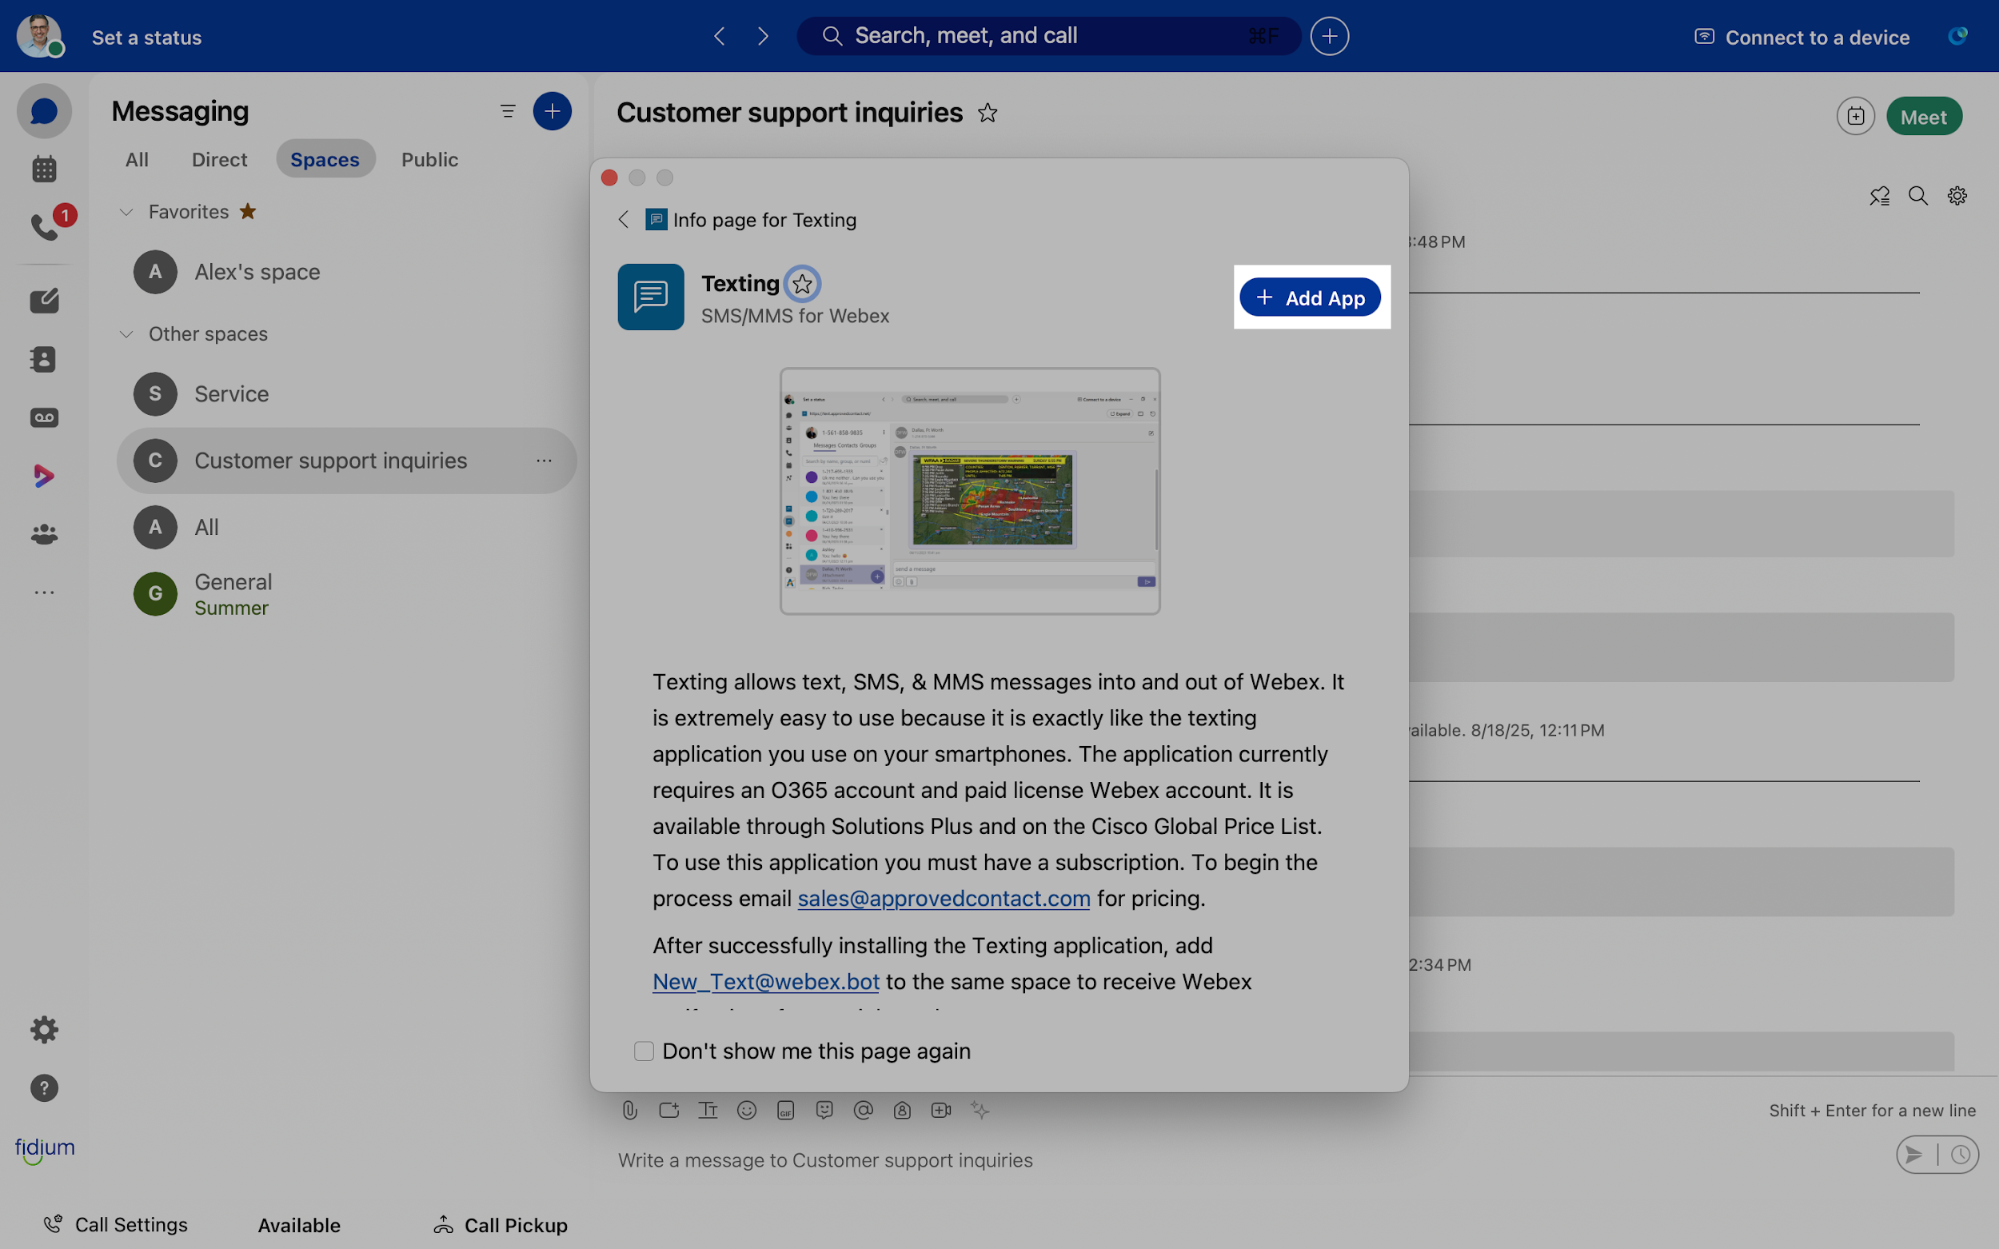
5.
Add Texting in Webex Spaces
-
- Sign in to your Webex account.
- Navigate to the desired Webex Space you wish to include Texting.
Note: To create a space in Webex, you must have a ProConnect seat that includes support for Webex chat and meetings. If your ProConnect seat comes with the softphone-only version of Webex, you will not be able to create a space. Please contact your Account Executive to upgrade your seat to include the Webex collaboration tools.
-
- To learn how to create a space, check out our Webex for Mobile guides for Mac or Windows.
- Click Apps.
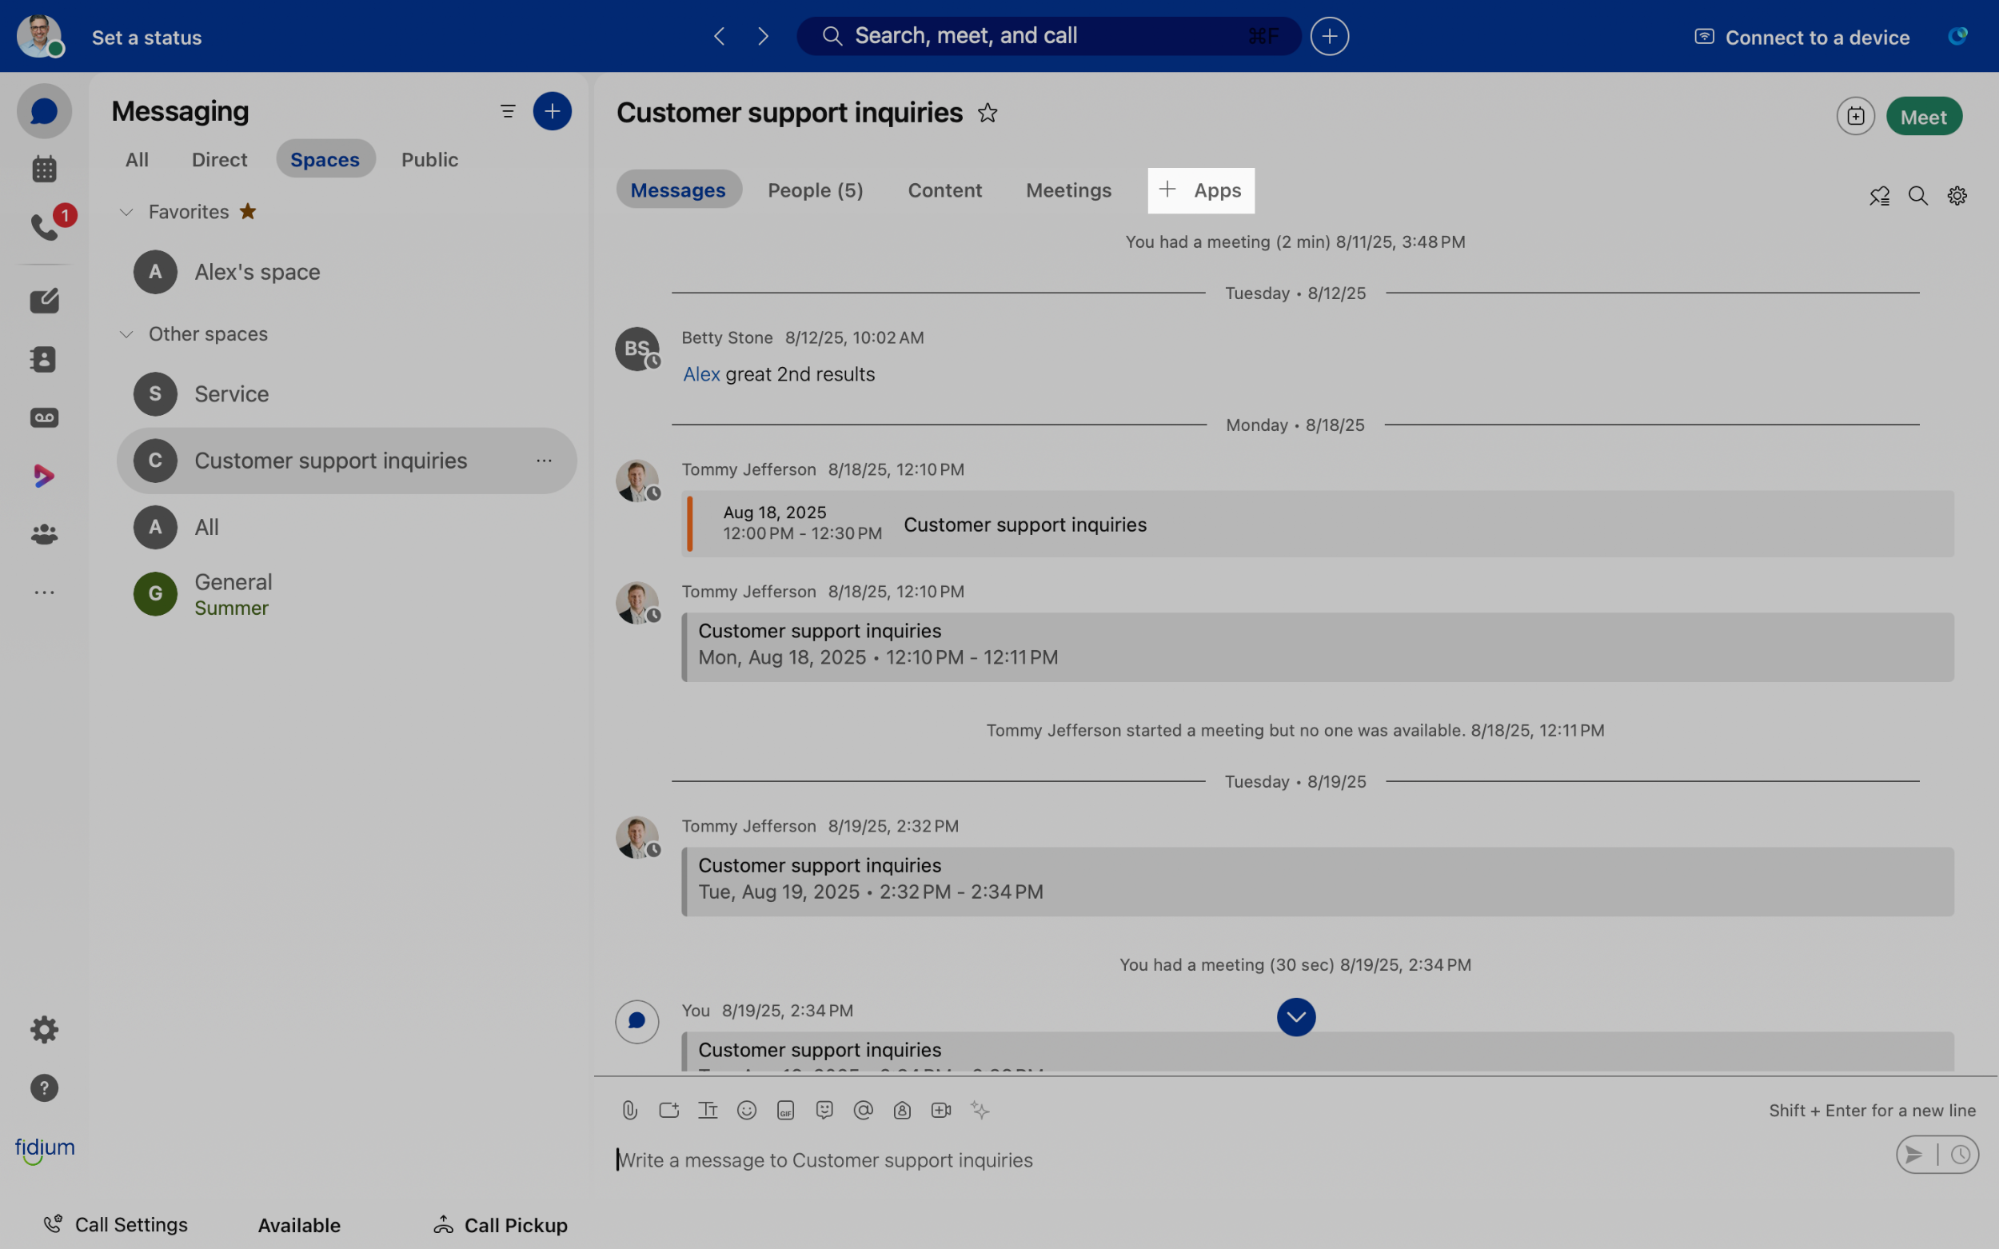
-
- In the Search bar, type Texting.
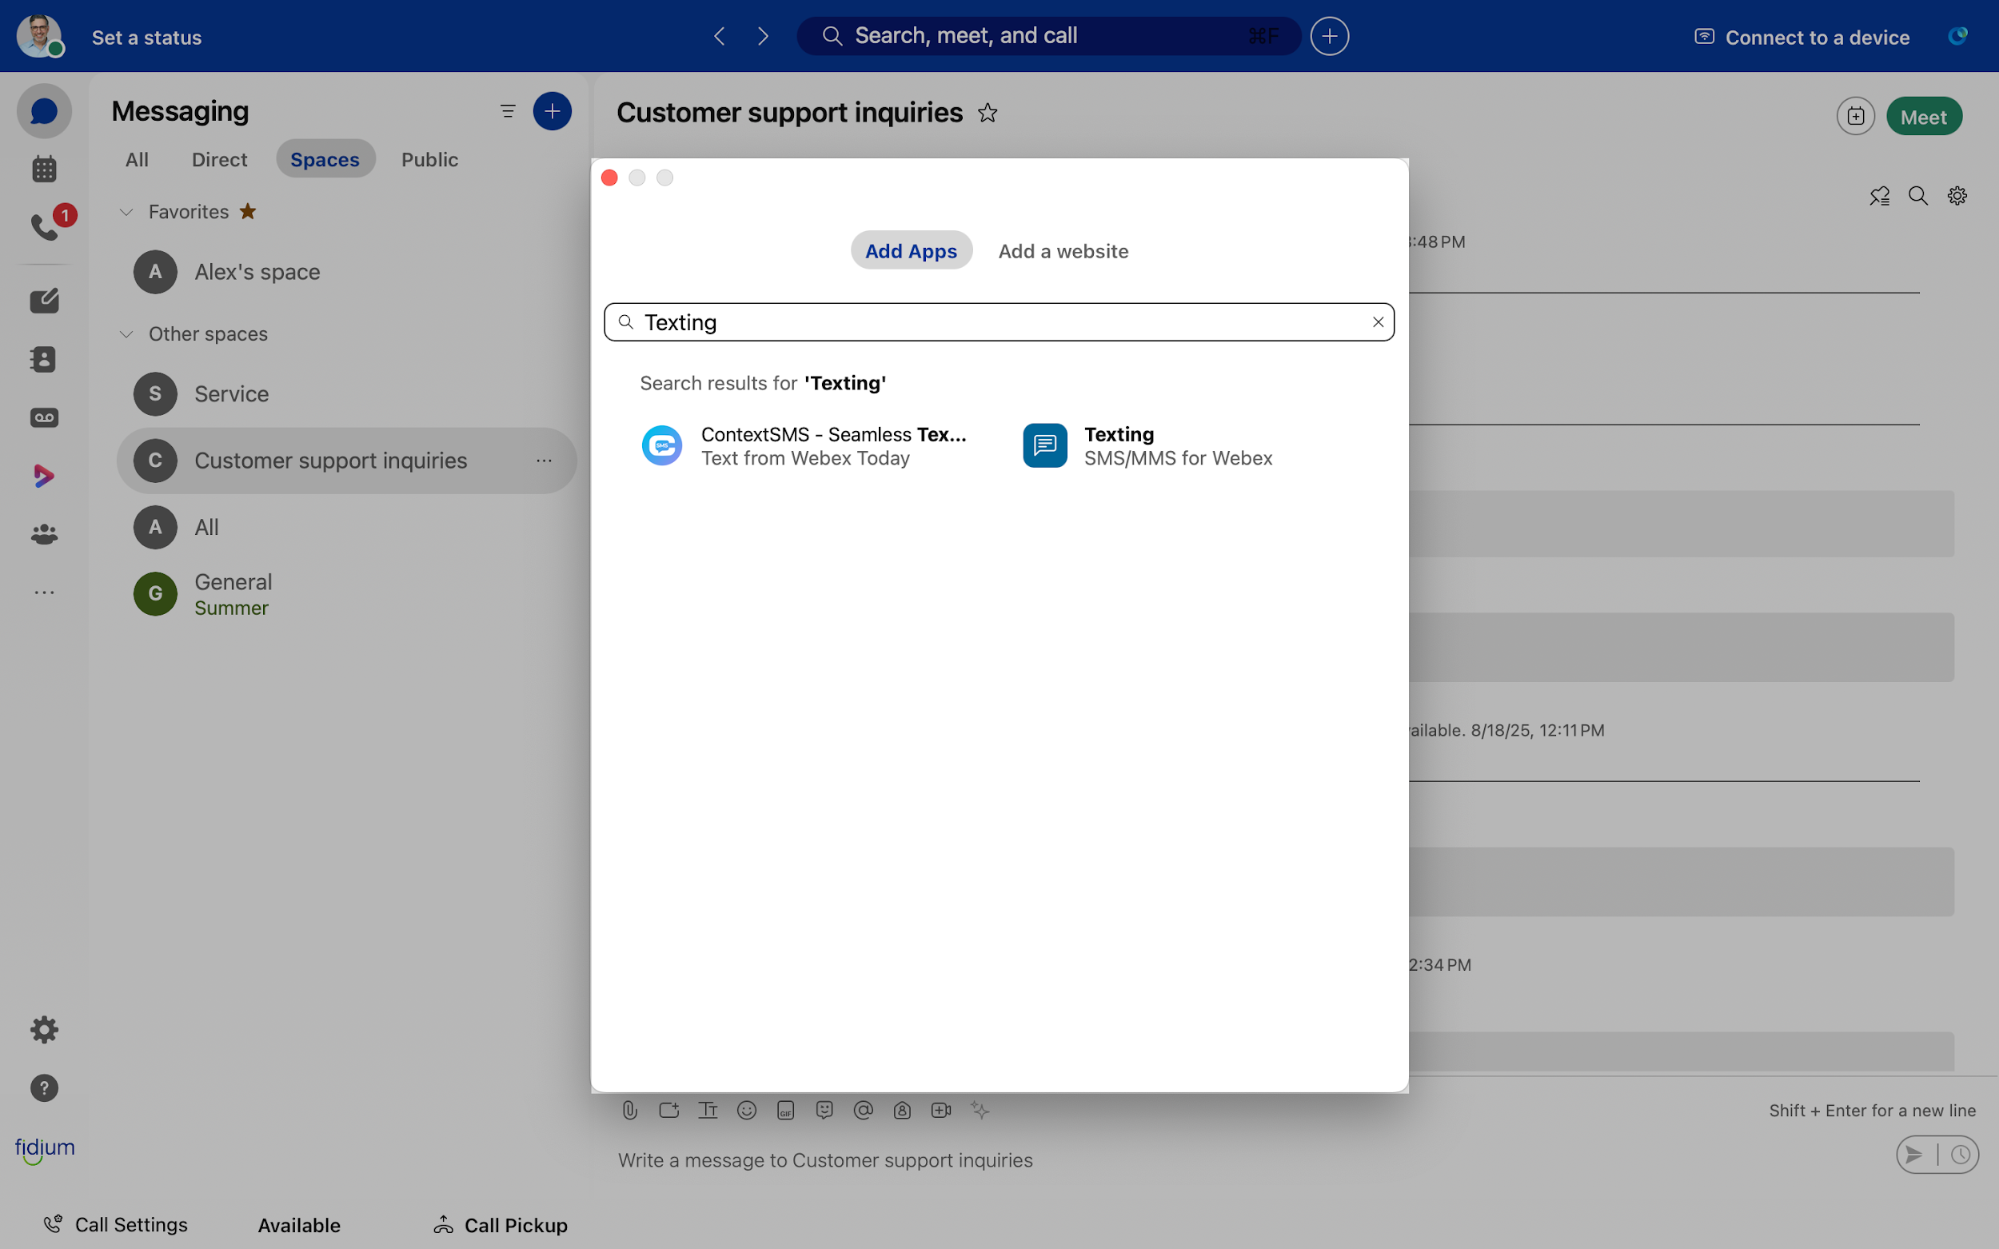
-
- From the populated results, select Texting SMS/MMS for Webex.
- Click Add App to install.
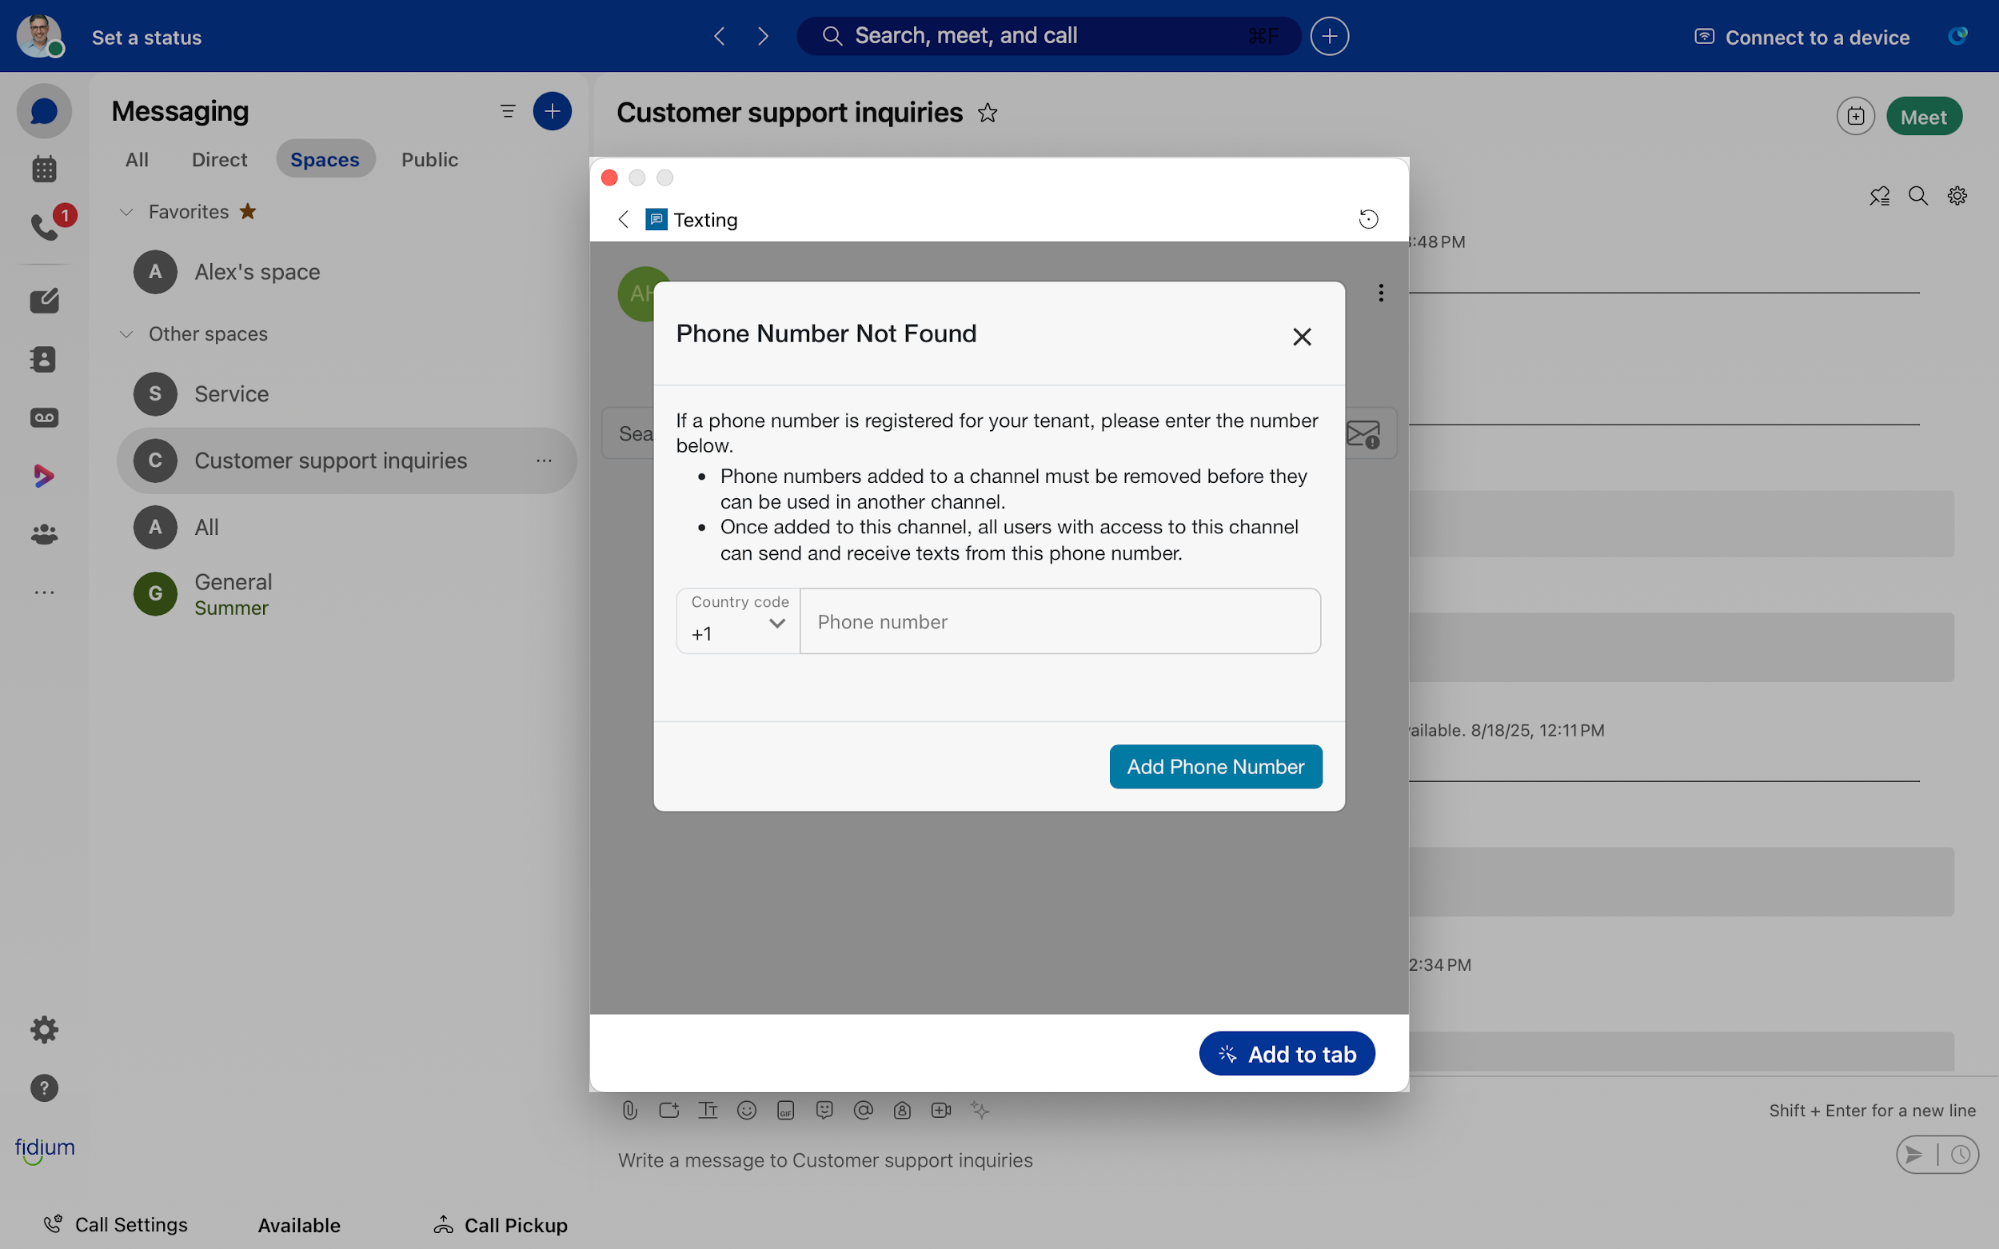
-
- Enter the pre-approved phone number.
- Click Add Phone Number.
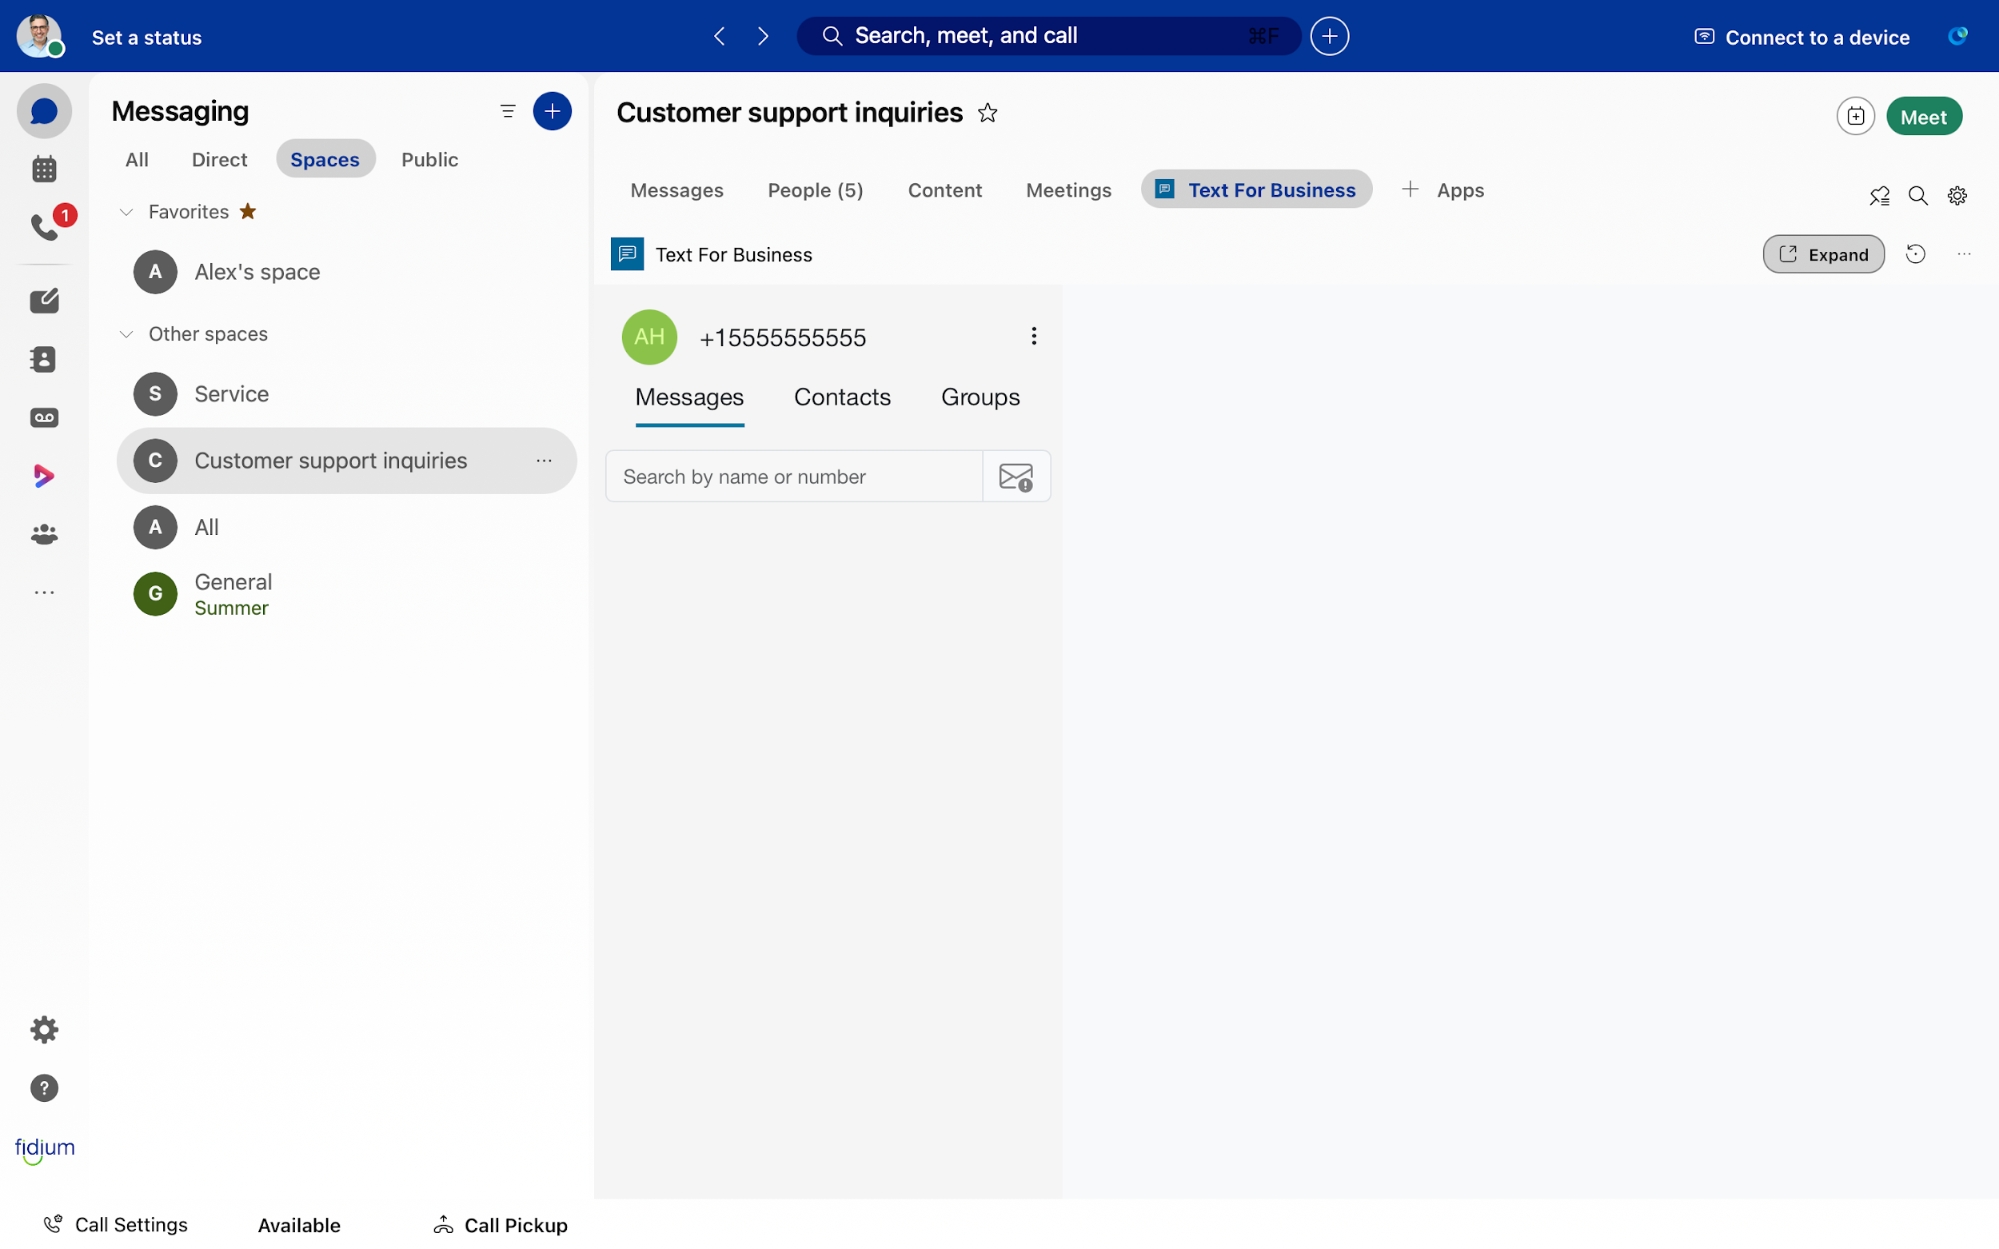
- Click Add to tab to set the tab in your Space.
-
- Click Text For Business to use Texting within the Space.
6.
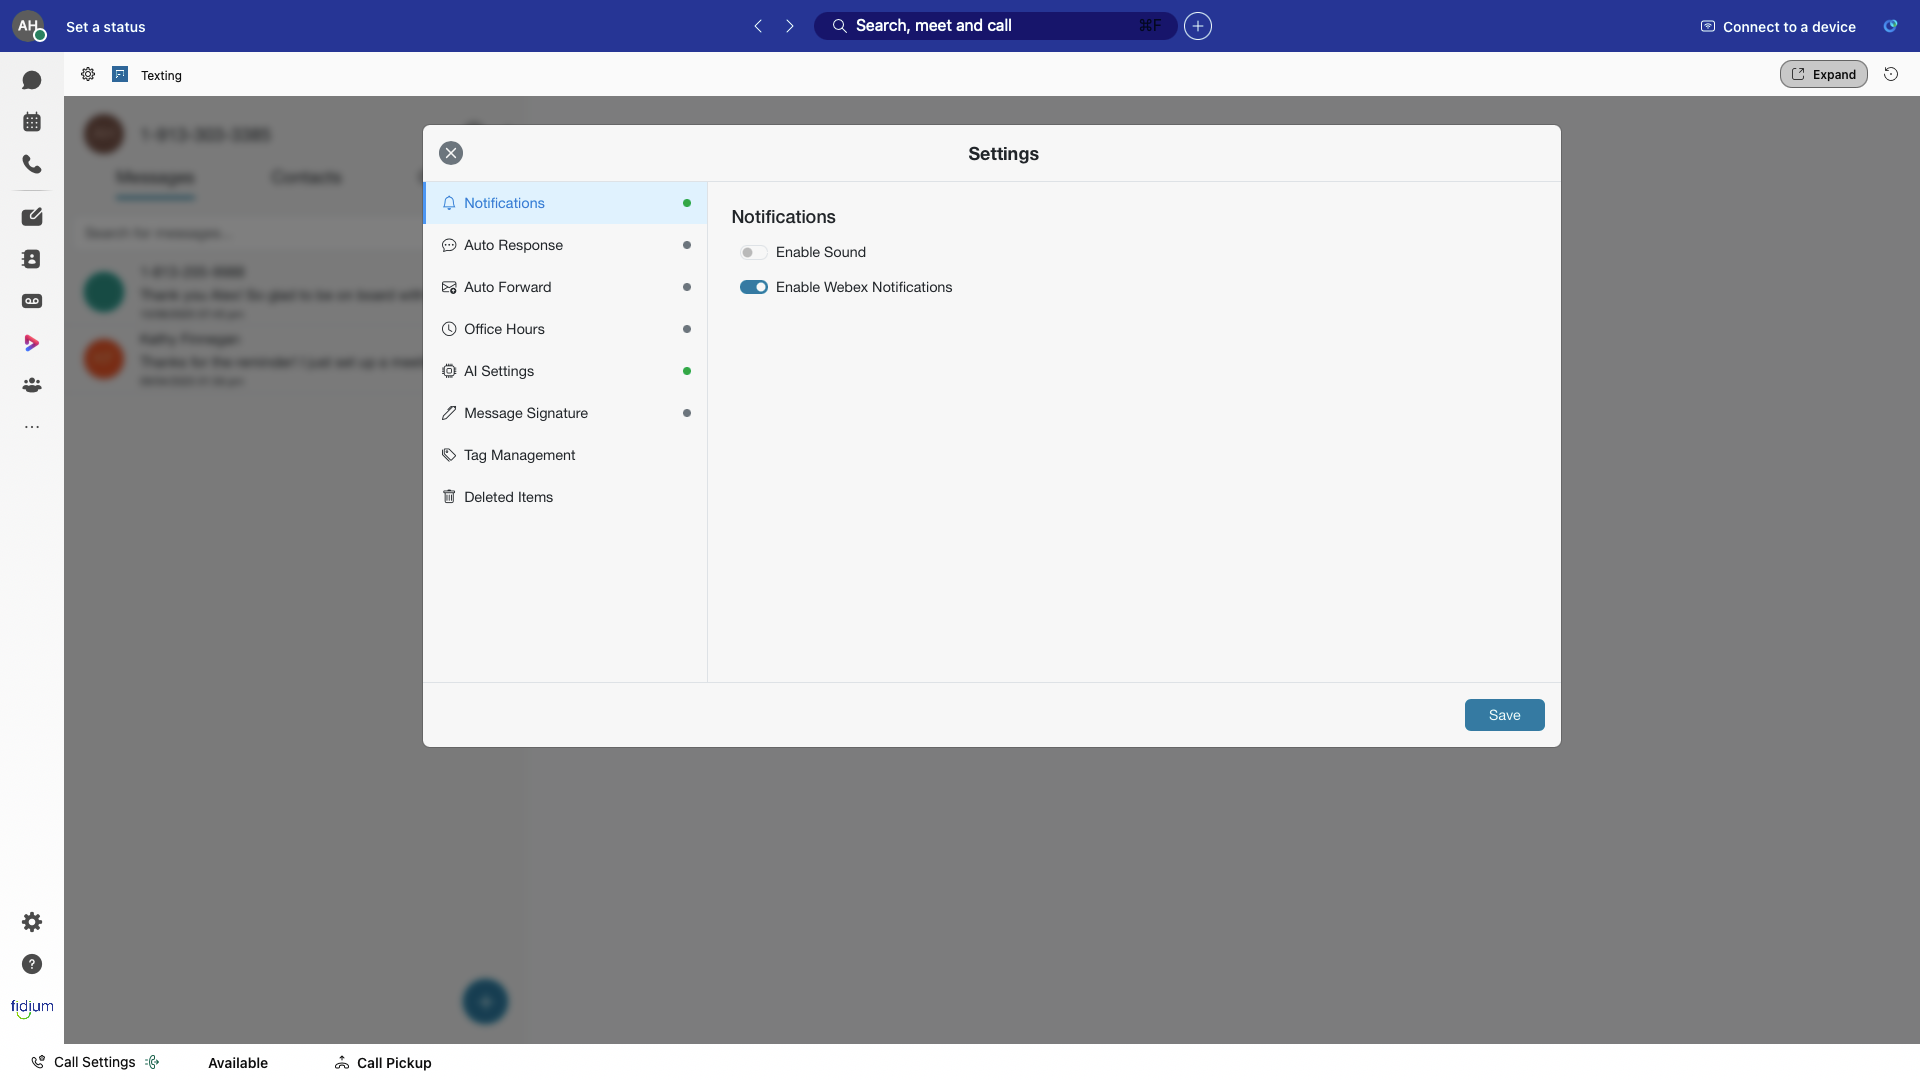
Settings
Configure Settings for Your Phone Number
You can make changes to the notifications and settings specific to your account in the Texting application.
- Navigate to the Texting application in your Webex account.
- Select the settings icon option to the right of your phone number. A list containing several menu options populates.
-
- Notifications – Control how and where you're alerted to new messages. Webex notifications are defaulted and toggled on.
- Auto Response – Set an automatic reply for incoming texts. Note: This feature is only available for A2P accounts (marketing campaigns) and will not work for person-to-person texting.
- Auto Forward – Forward incoming messages to one or more email addresses.
- Office Hours – Send automatic replies when messages arrive outside business hours. Note: This feature is only available for A2P accounts (marketing campaigns) and will not work for person-to-person texting.
- AI Settings – Enable, disable, or customize AI assistance for your phone number. When enabled, this feature will add an "Enhance" and "Generate" options to your message response and use AI to help with your response.
- Message Signature – Add a custom signature to your outgoing messages.
- Deleted Items – View, search, and restore deleted messages or threads.
- Tag Management – Create and manage tags to organize message threads.
- Multiple Numbers – Send and receive messages across multiple phone numbers in one Teams channel.
 Click image for large view
-
7.
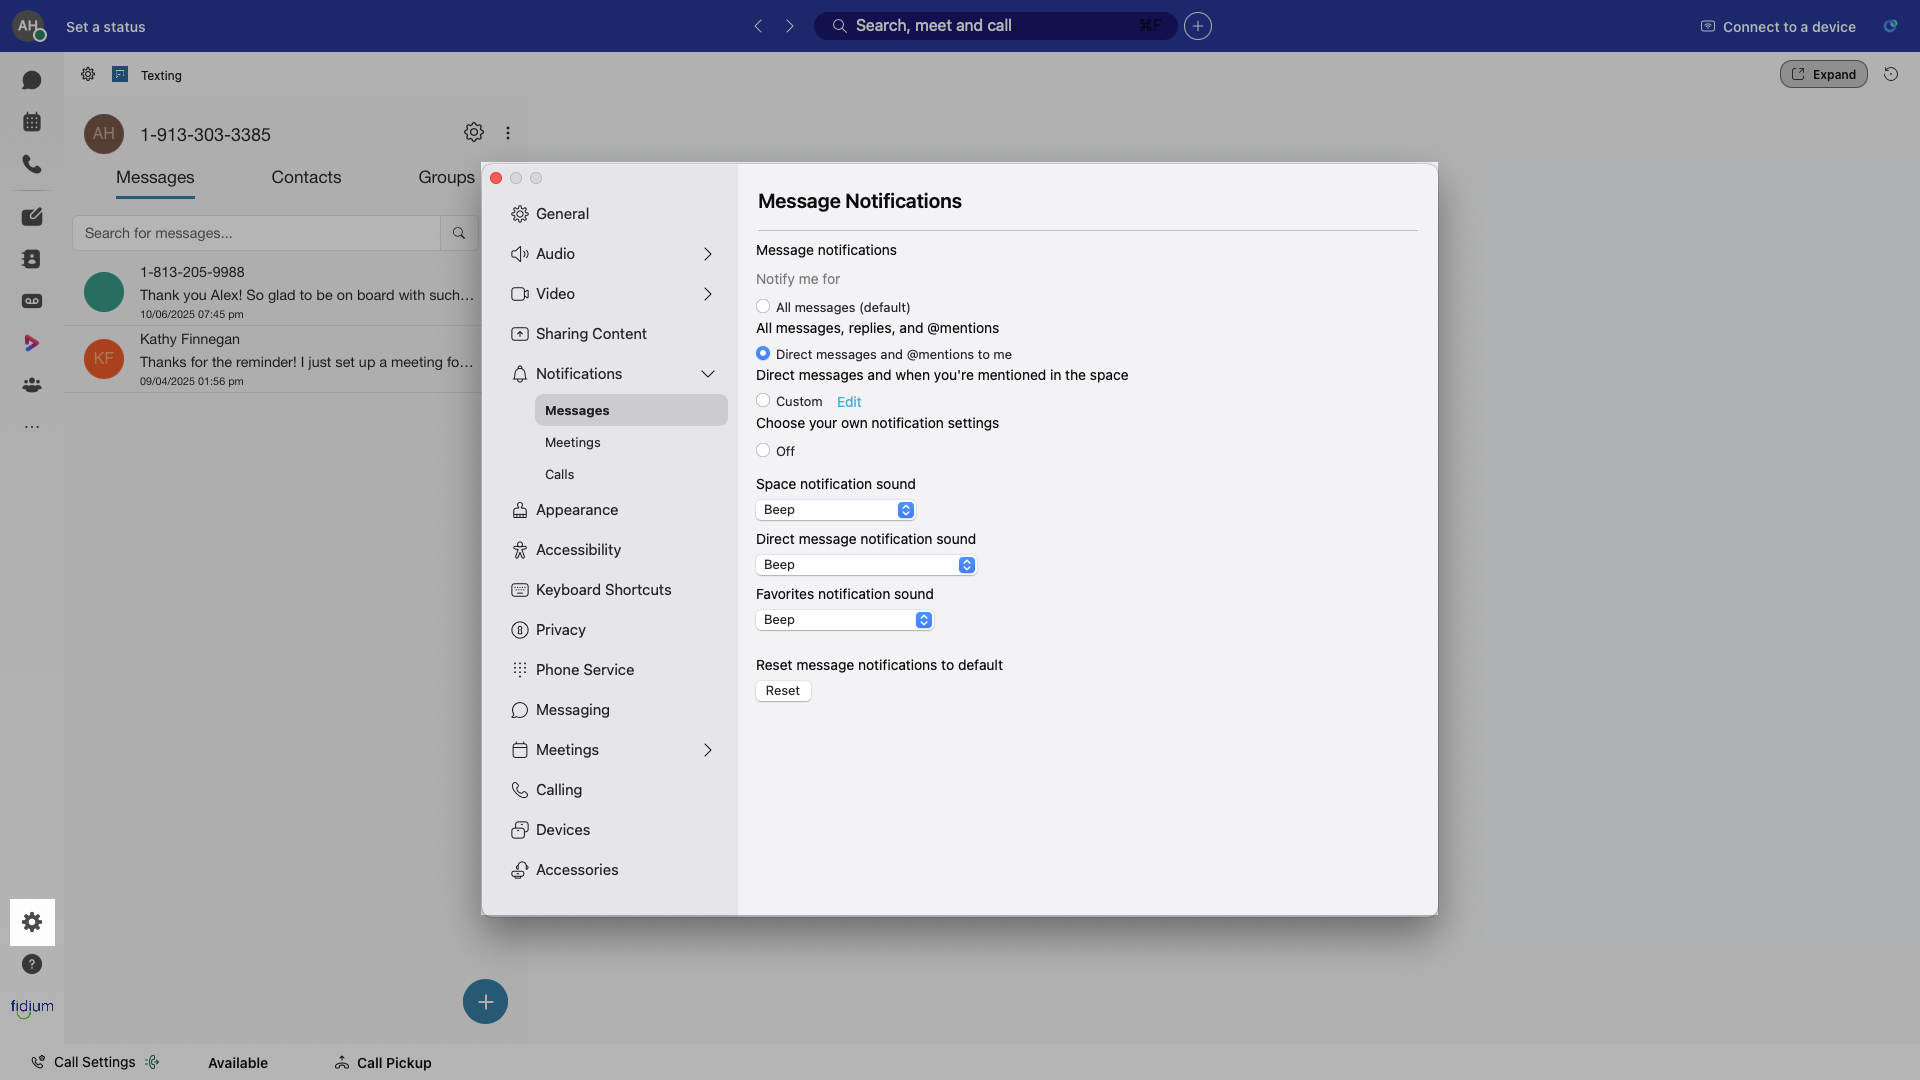
Set Your Webex Notification Settings
-
- Sign in to your Webex account.
- Click the settings icon.
- Click Notifications and then Messages.
- Select your desired notifications. The following notification preferences can be set: All messages, Direct messages and @mentions to me, Custom, and Off.
- Select your preferred sounds for the different notification types: Space, Direct Message, Favorites.
- Select Save.
8.
Set Your System Notification Settings
It's important to ensure that your device has the proper notifications turned on. This process is different but similar across Windows, Mac, Android, and iOS devices.
- Open your device's system settings.
- Select notifications and choose the Webex application.
- Turn notifications on or off depending on your preference.
- Ensure that your notifications are on for the Webex app on each device you use to access your account.
9.
Send and View Messages
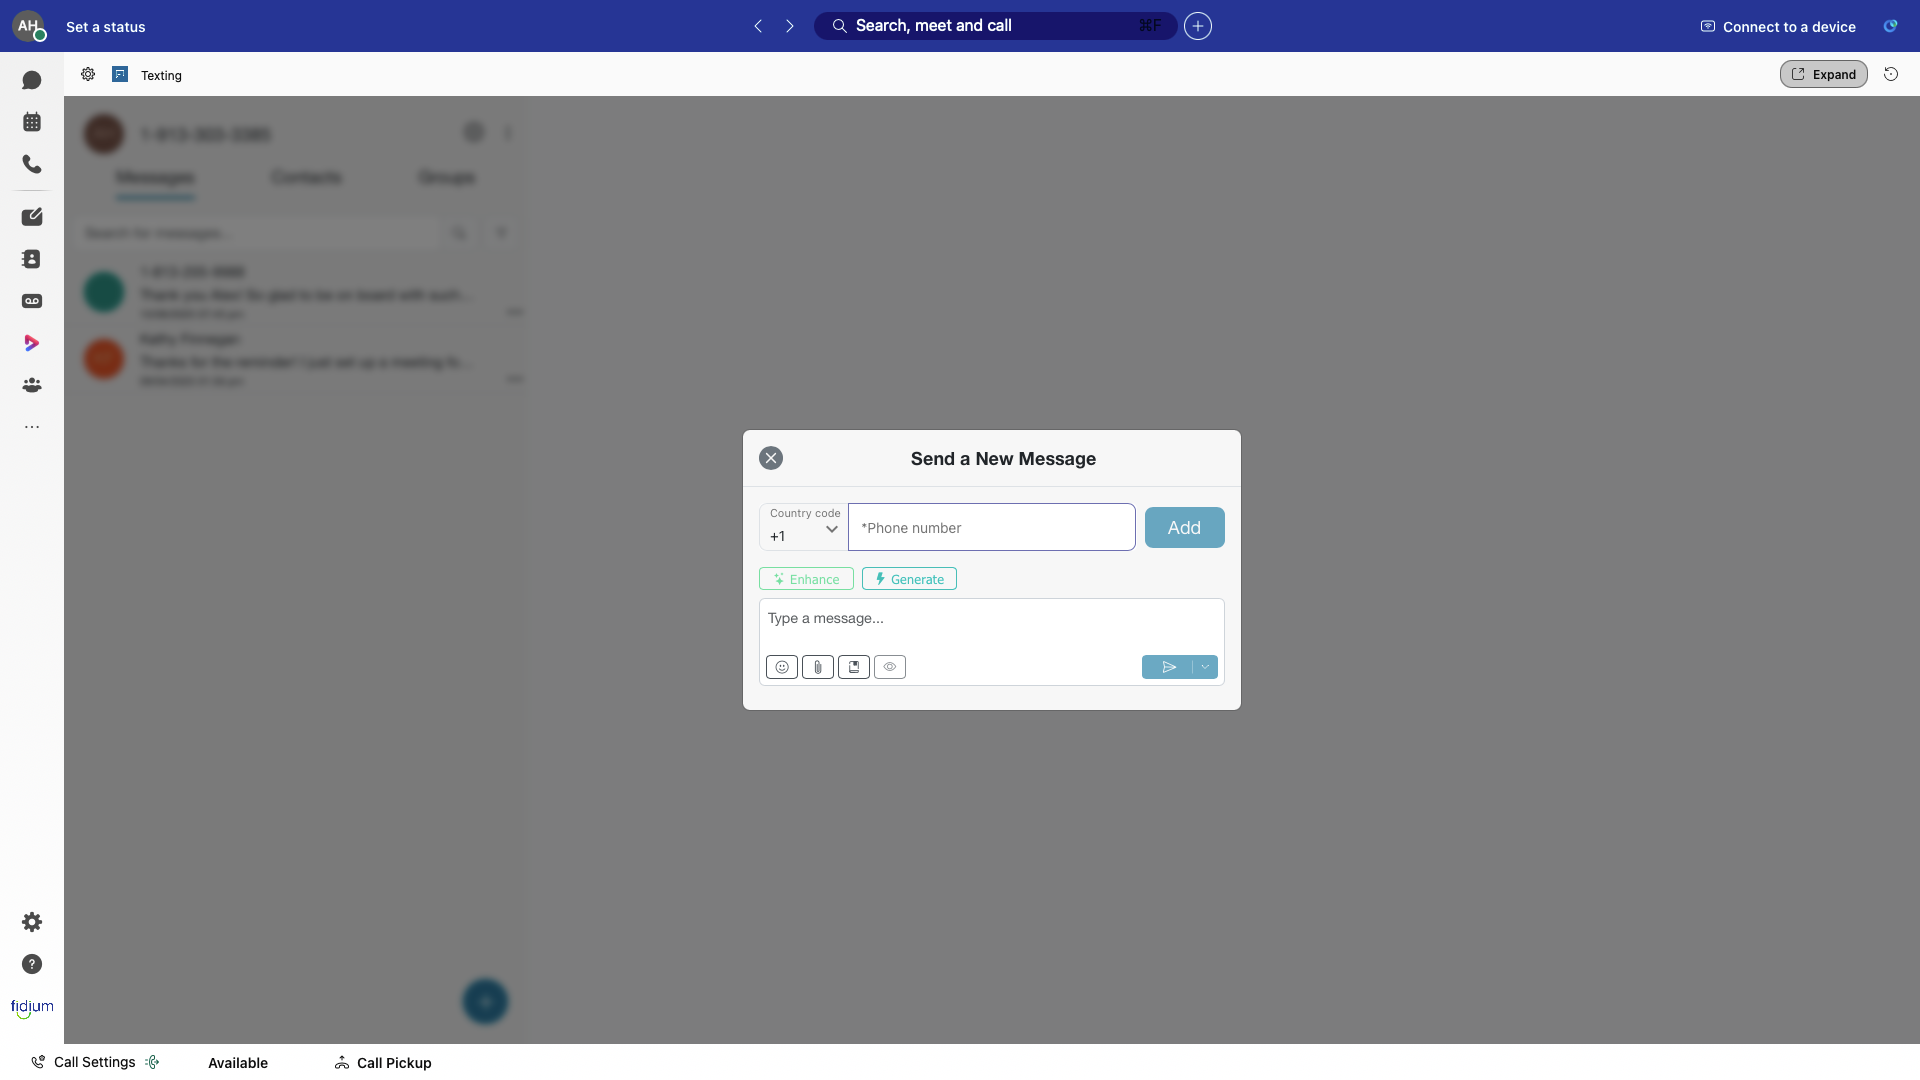
Send a Message
-
- Sign in to your Webex account and navigate to the Texting app.
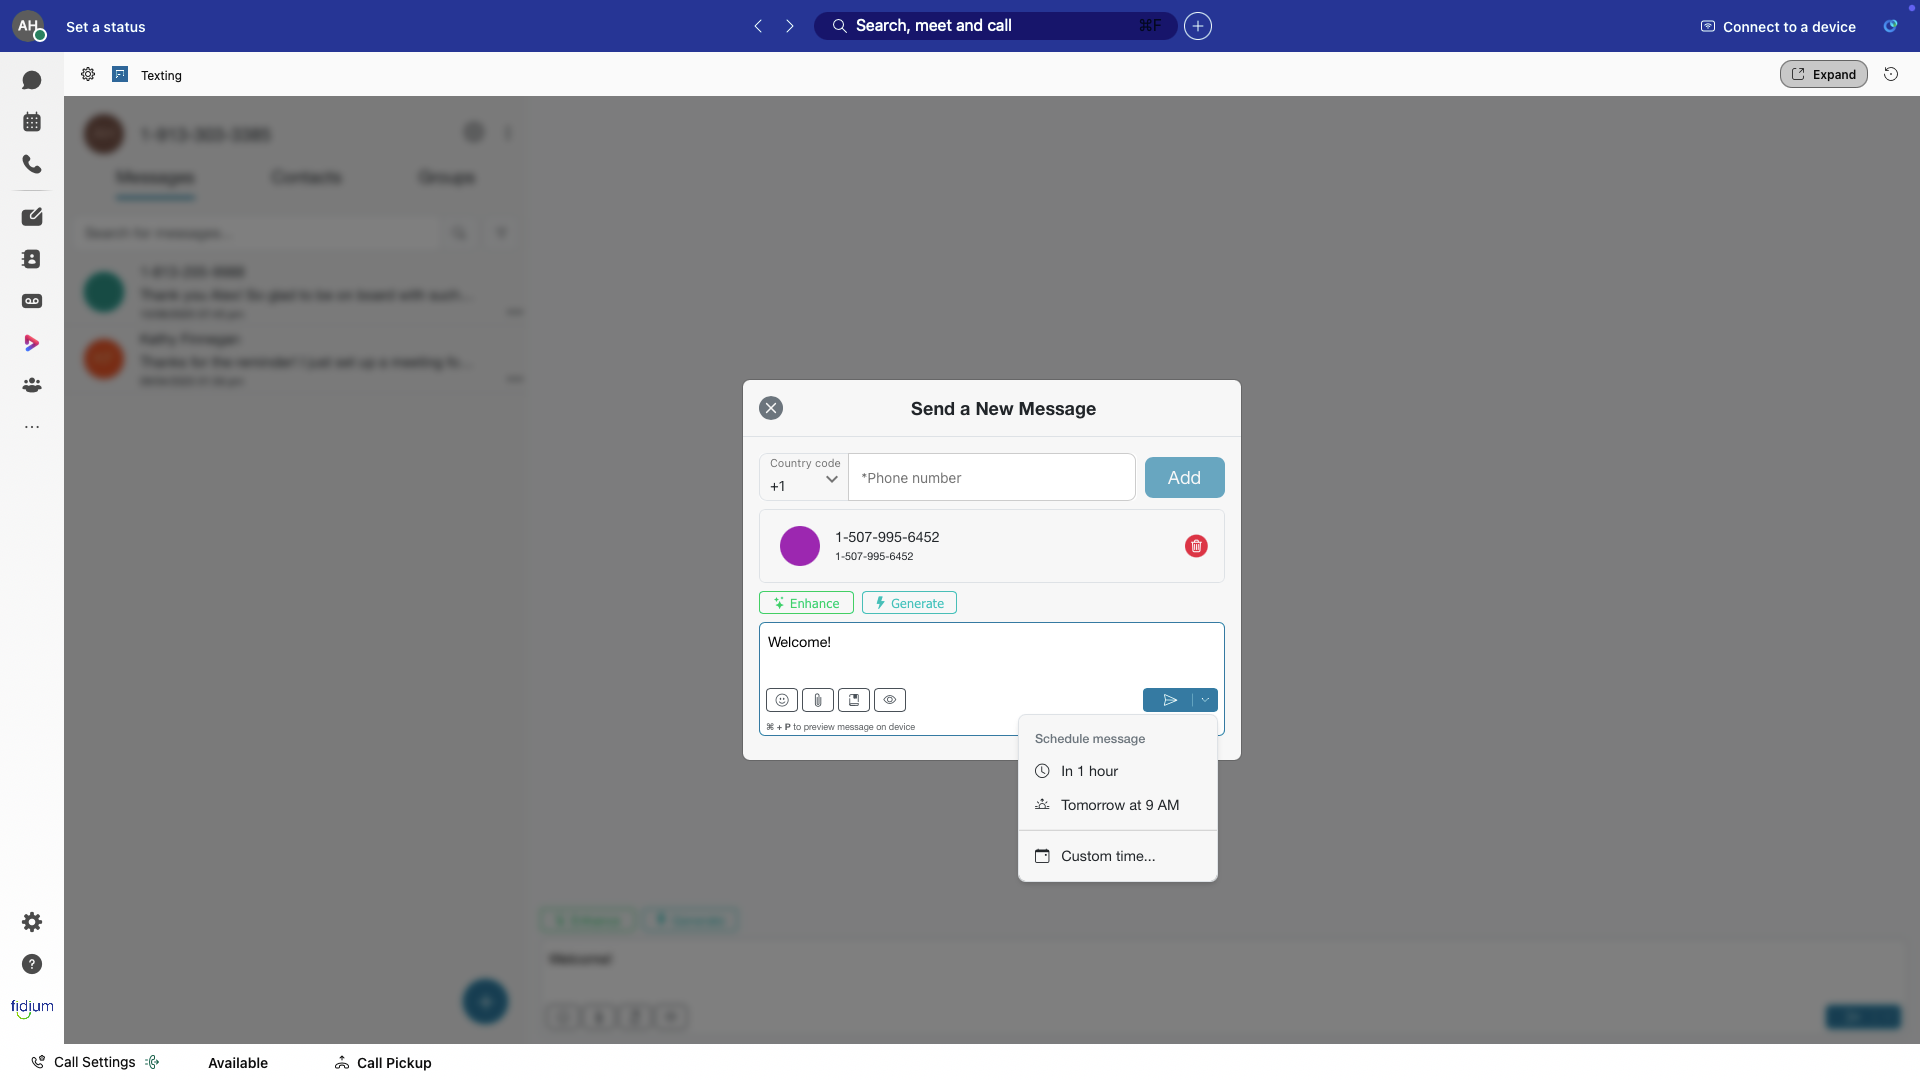
- On the Messages tab, select +. A Send a New Message window appears.
-
- Enter the phone number of the recipient and click Add.
- Create your message in one of the following ways:
- Type a message to reply manually
- Use Enhance to improve your typed message with AI
- Click Generate to write your message using AI
- Use a template
Note: To use AI features, they must be previously turned on in Settings.
- Personalize with emojis or attachments. Note: Only certain attachment types are supported by carriers. Check with your carrier to ensure compatibility before sending.
- Click preview to view how your message appears on a mobile phone.
- Click the arrow to send the message immediately. Optionally, you can click the down arrow to schedule your message. Options include:
-
- In 1 hour
- Suggested time
- Custom time – Set the Date and Time, then click Schedule Message.
 Click image for large view
 -
- Once scheduled, you can Send Now, Reschedule, or Delete the message.
10.
View a Message
- Sign in to your Webex account and navigate to the Texting app.
- Click Messages to see your sent and received messages. The first line of each message is displayed.
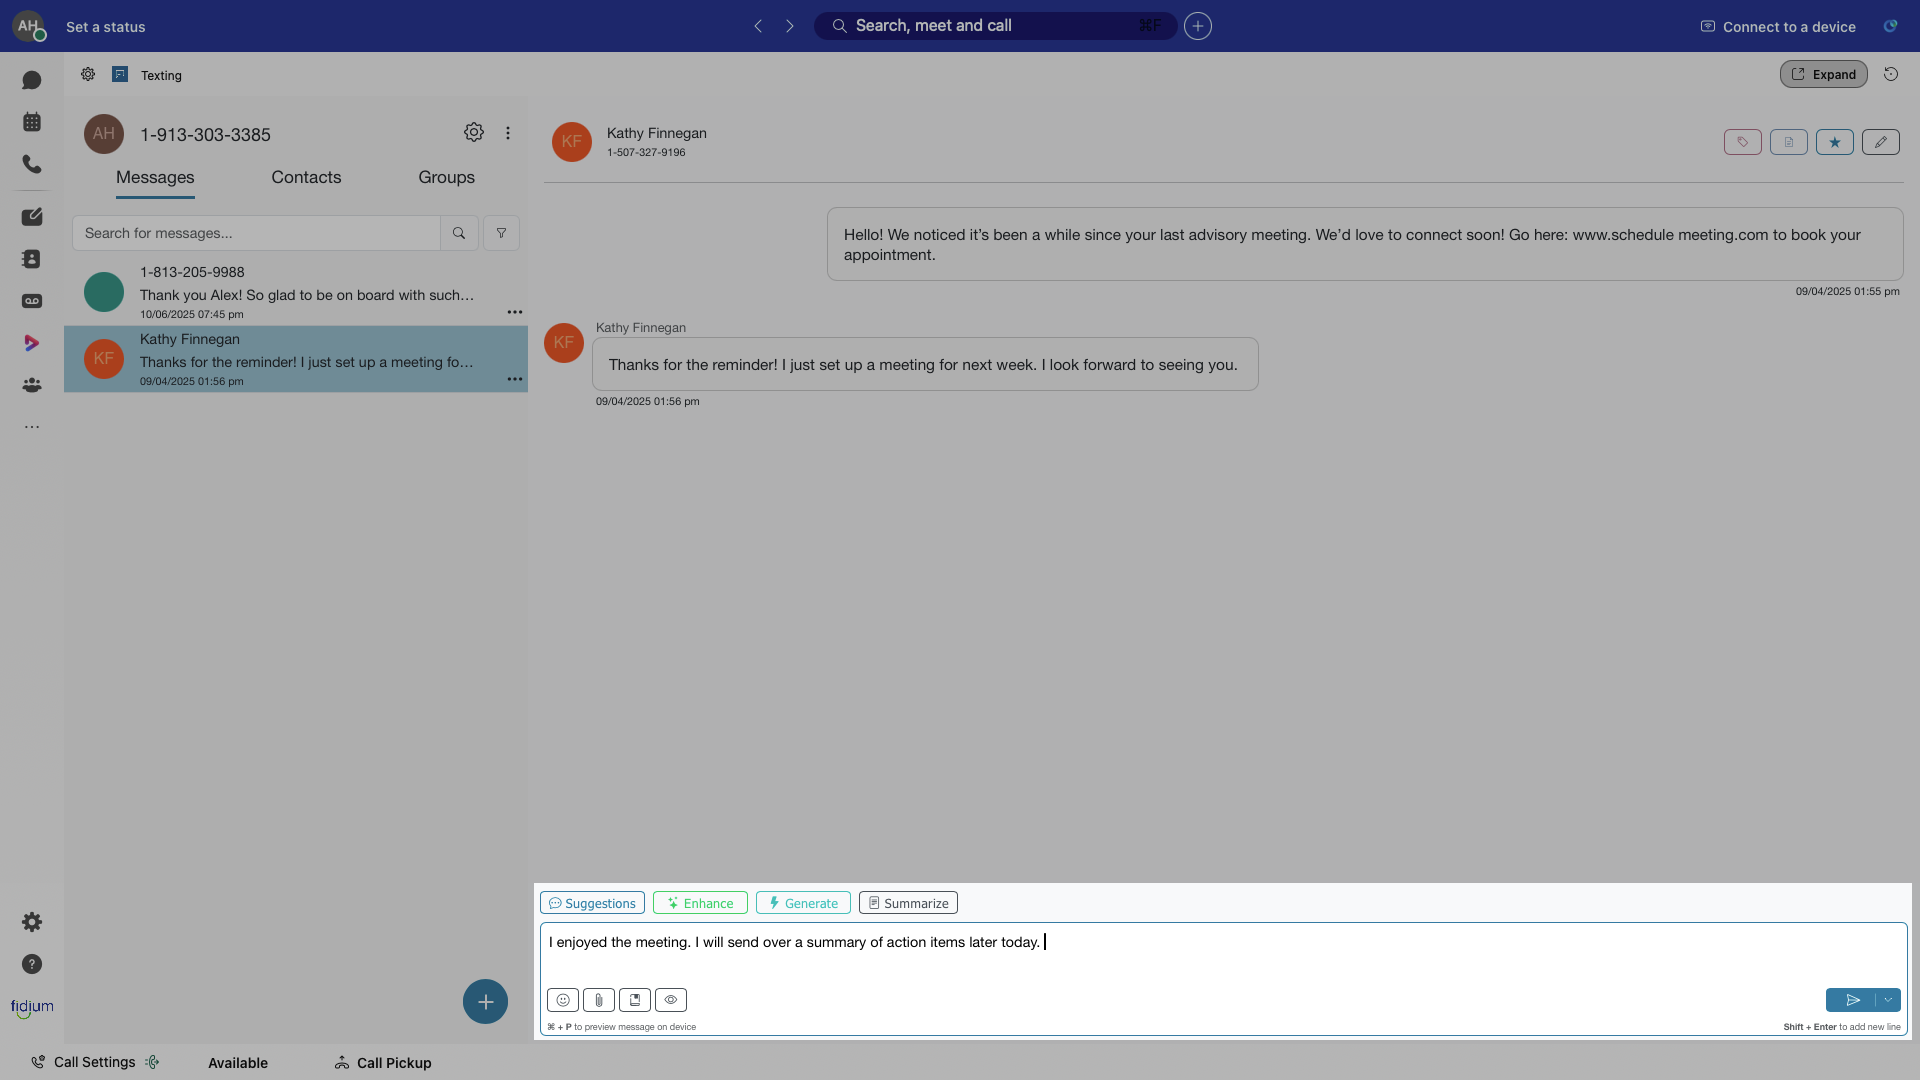
- Click a message to view the full conversation and continue with the following methods:
-
- Suggestions – Get AI response ideas
- Enhance – Improve your typed message with AI
- Generate – Create an AI response
- Summarize – See a conversation summary
- Type a message to reply manually
 Click image for large view
 -
11.
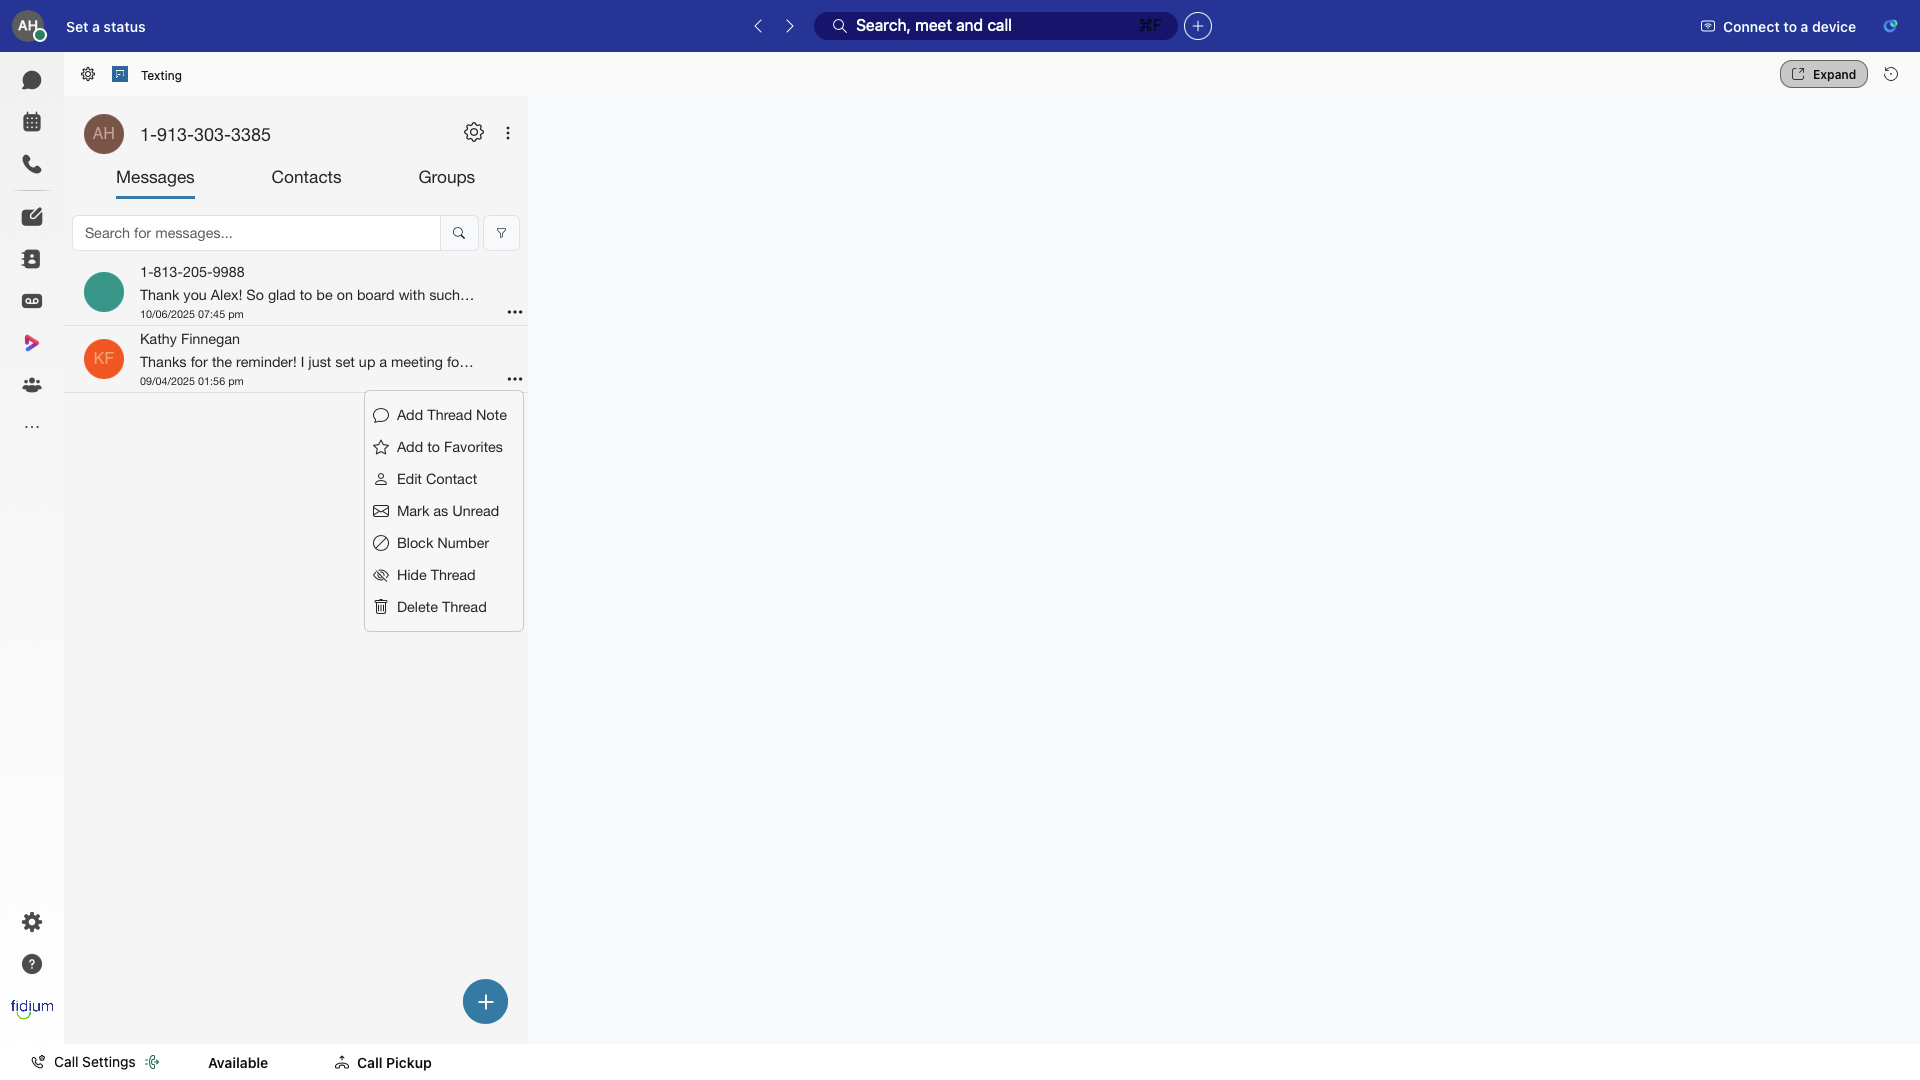
Manage a Thread
- Sign in to your Webex account and navigate to the Texting app.
- Click Messages to see your message threads.
- Click the more options icon to:
- Add Thread Note – Attach a note to the thread for reference or reminders.
- Add to Favorites – Mark the thread as a favorite for quick access.
- Edit Contact – Update the contact information associated with the thread.
- Mark as Unread – Mark the thread as unread to keep track of messages you want to revisit.
- Hide Thread – Hide the thread from your main view without deleting it.
- Delete Thread – Remove the thread completely from your Messages list.
 Click image for large view
 - Click the message thread to open it. You can manage the following:
-
- Add Tags – Organize threads by category, project, or priority.
- Add Notes – Include additional details or context for the thread.
- Add to Favorites – Quickly mark threads you frequently reference.
- Edit Contact – Update or correct the contact's name, number, or other details.
 Click image for large view
 -
12.
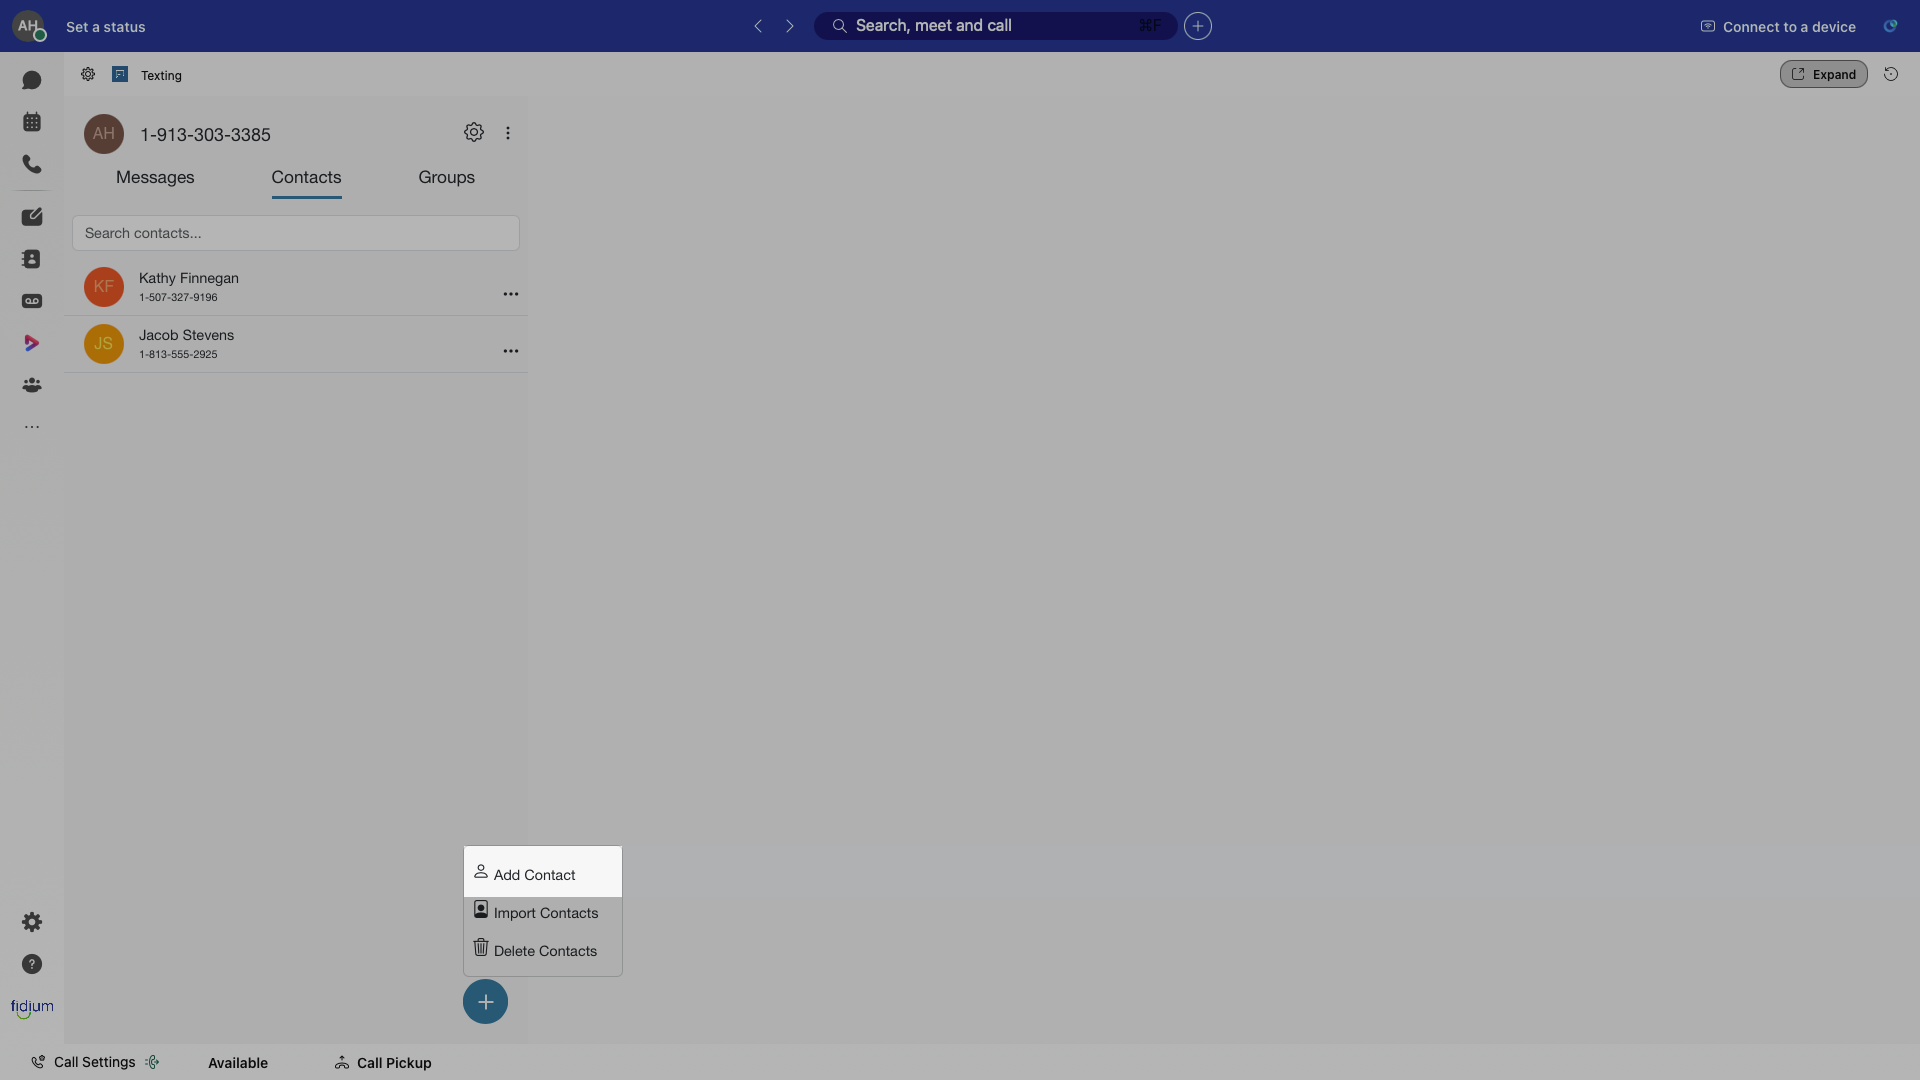
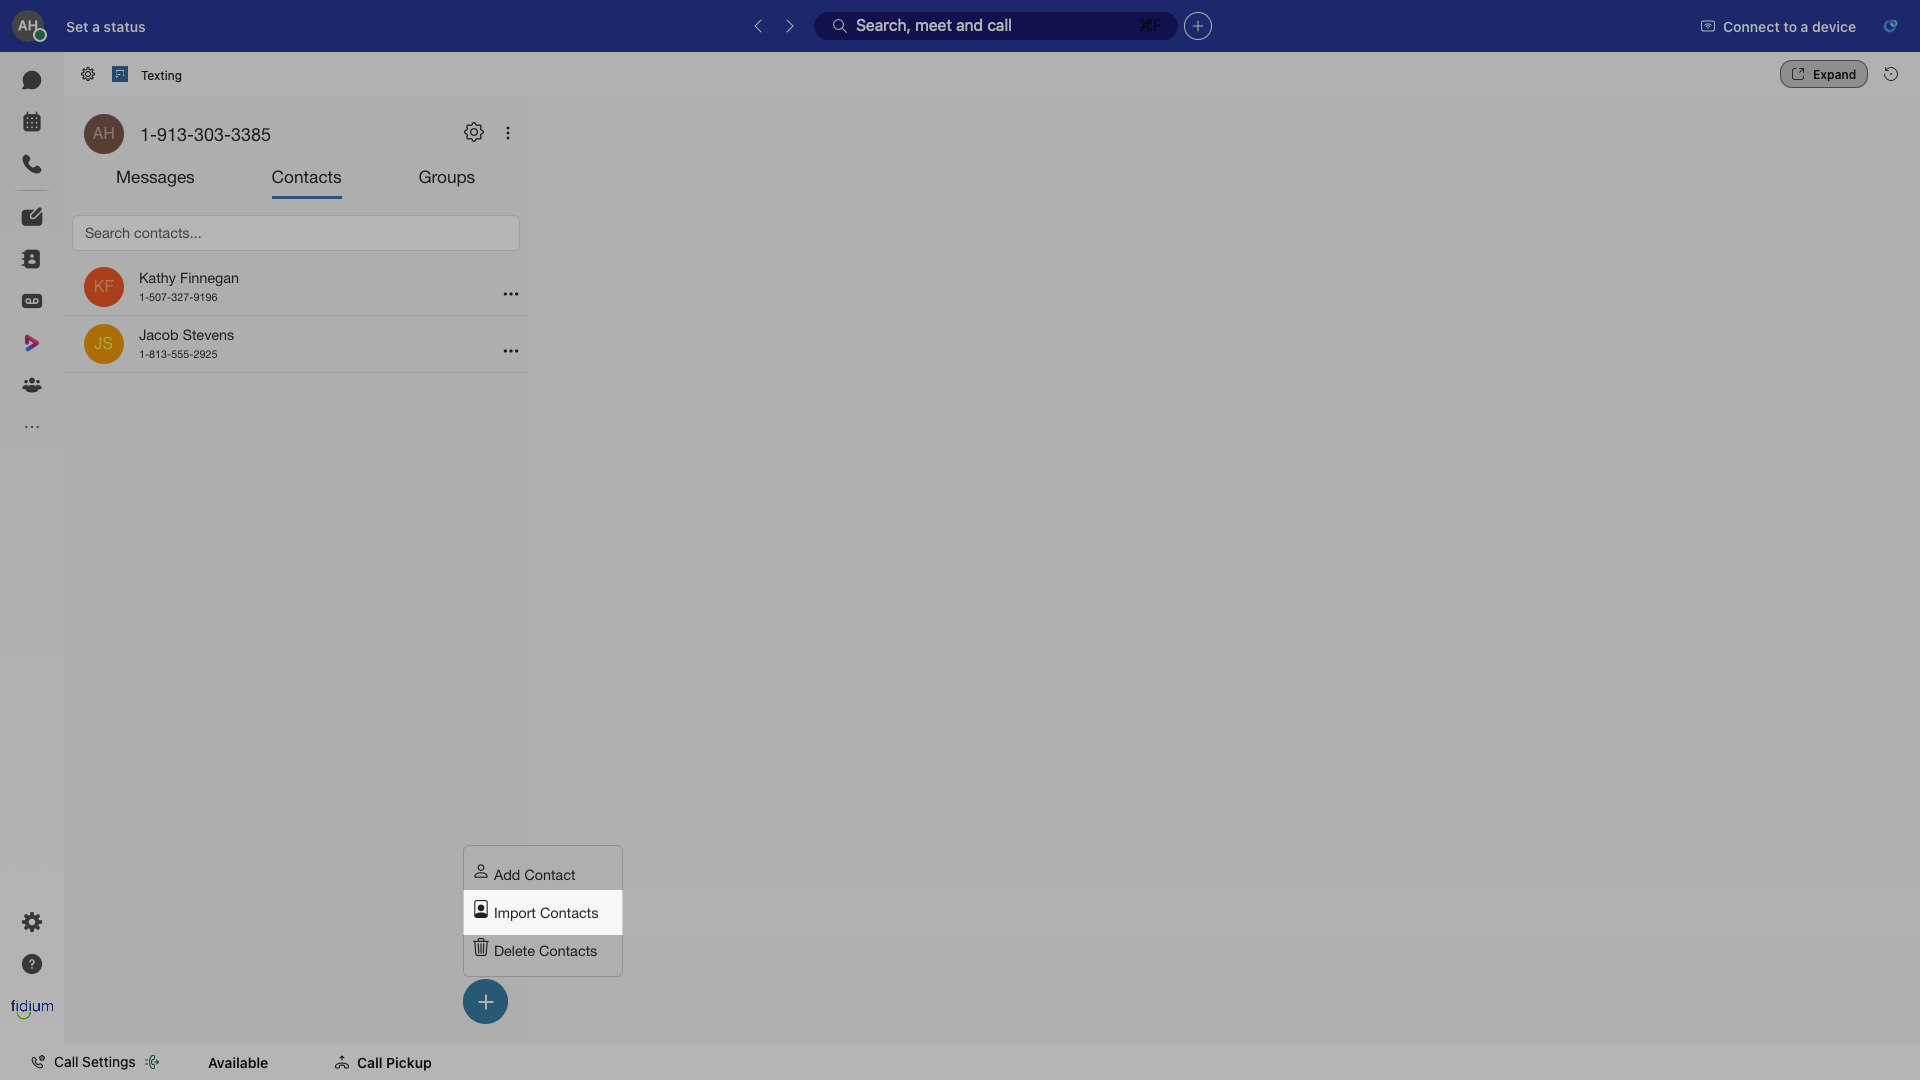
Manage Contacts
The Contacts tab populates an alphabetical list of your current contacts. The following actions can be completed within the Contacts tab.
- Search for a contact.
- Select a contact to view text message history.
- Tap on the … icon to view, edit, or delete that contact.
- Add or import contacts.
- Currently, contacts are only collected and edited at the individual application level. No one else can see or edit your contacts.
13.
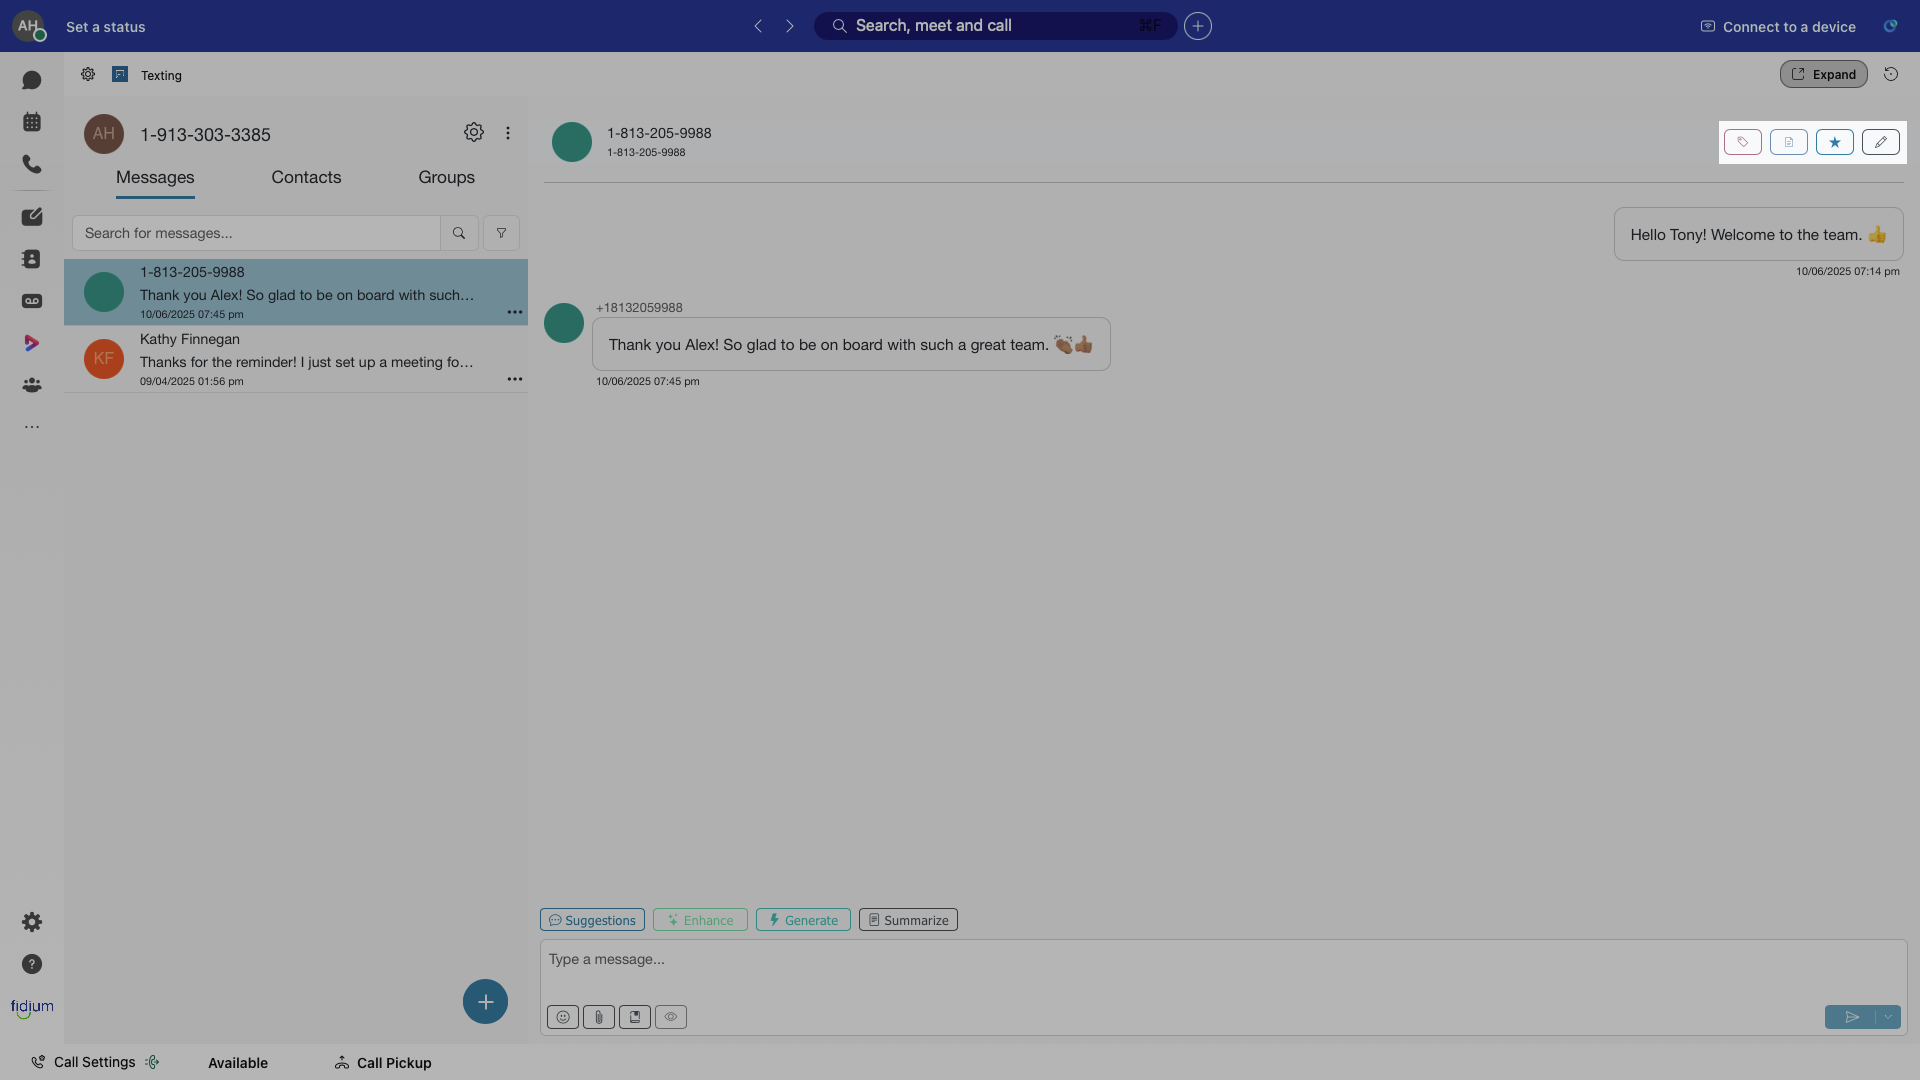
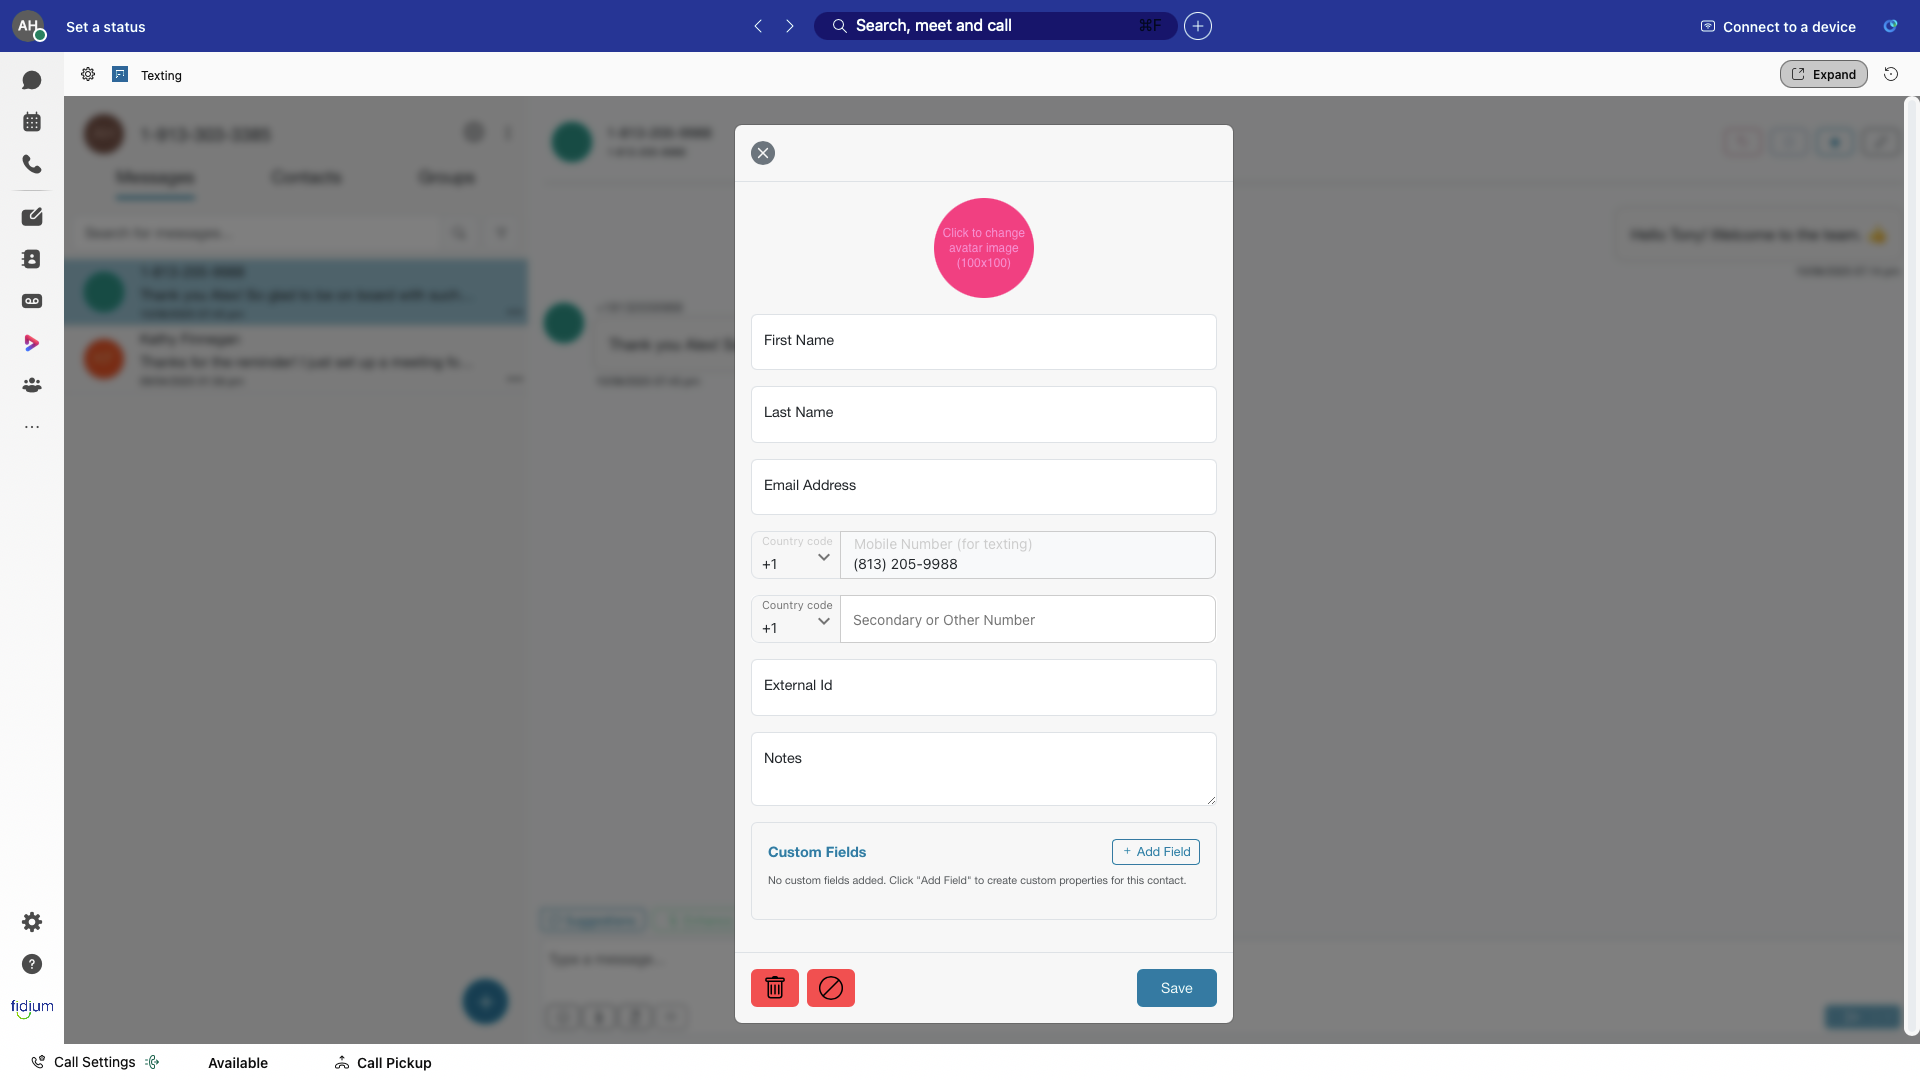
Add a Contact from Messages
-
- Navigate to Messages.
- Select the message you wish to view.
- Click the more options icon. Click Create Contact.
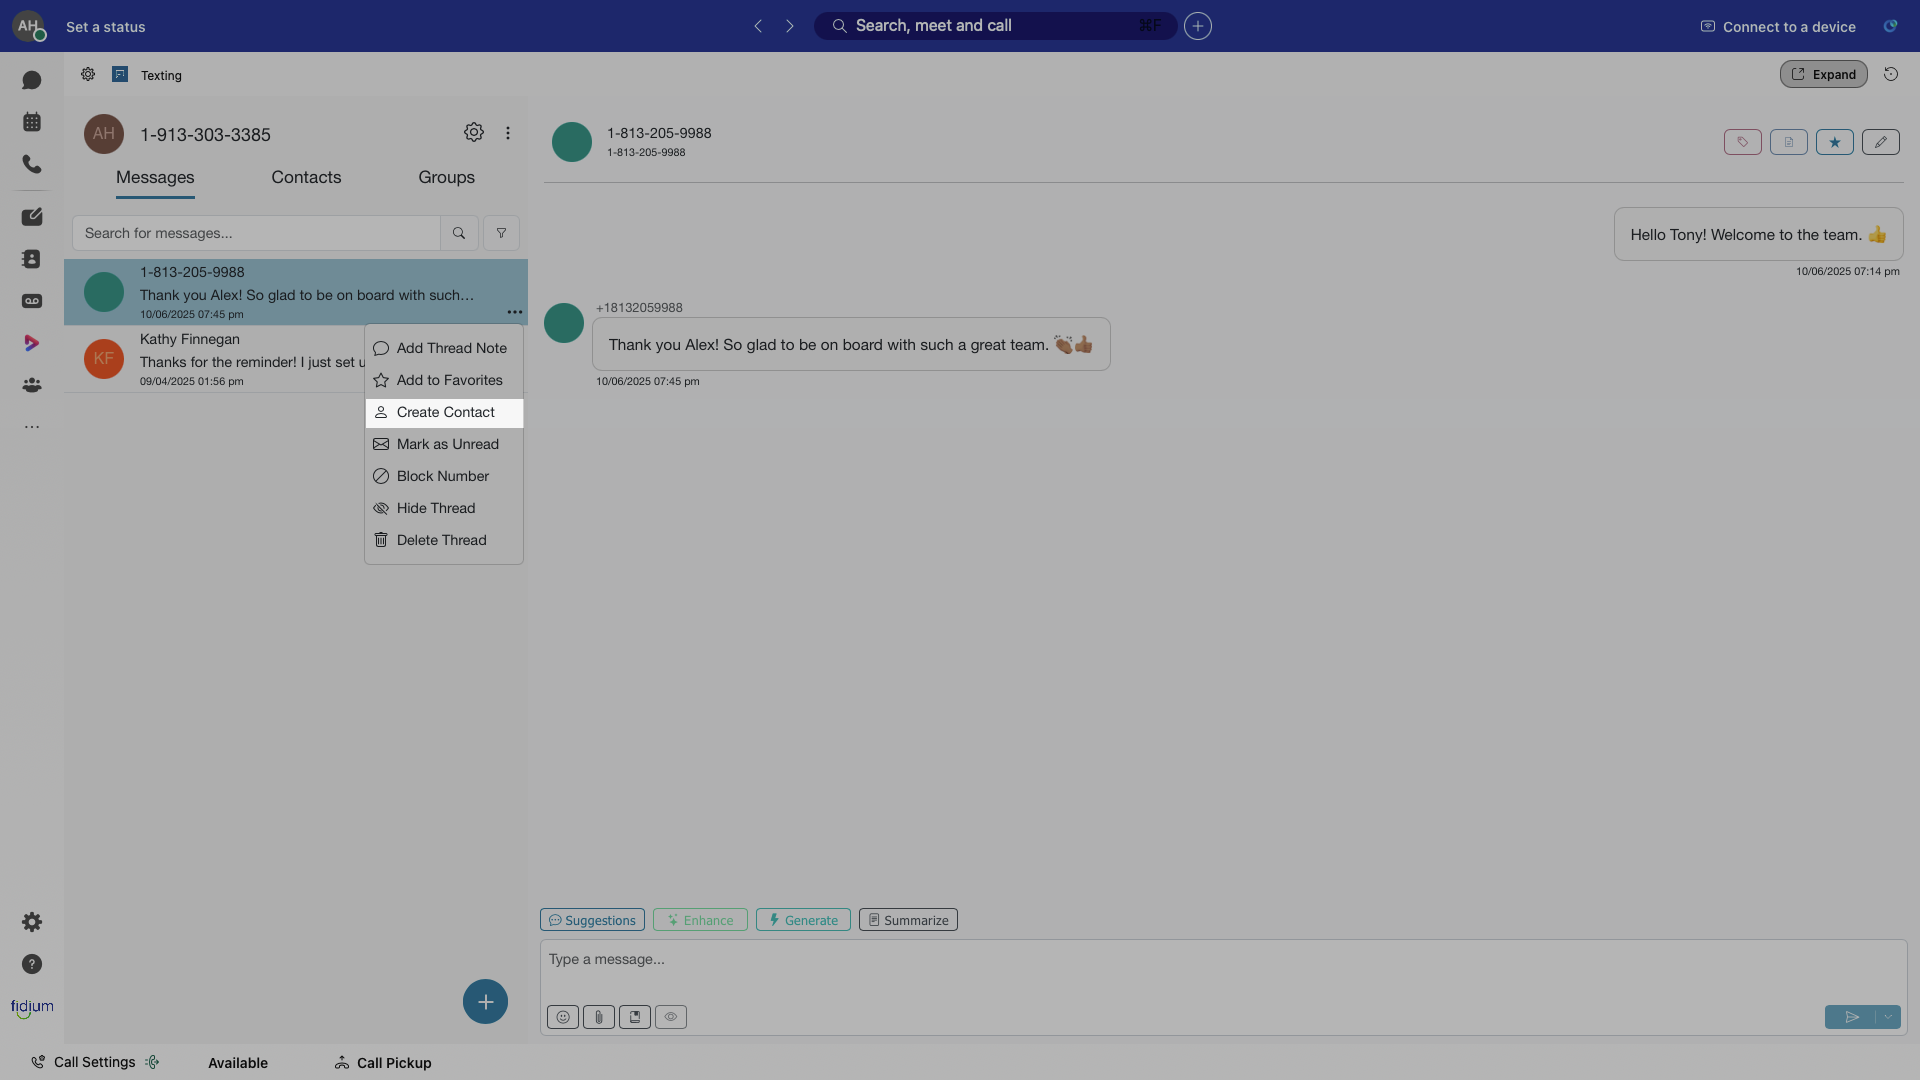
-
- Add desired contact information. Note: Only a mobile number is required.
- Select Save to save the contact or the trash icon to delete the contact. Note: If deleted, the app will only display the phone number unless you re-add the contact information.
14.
Add a New Contact (Single)
-
- On the Contacts tab, select +.
- Choose Add Contact.
- Enter desired contact information. A mobile number must be entered.
- Select Save to save the contact or the trash icon to delete the contact.
15.
Add a New Contact (Bulk)
-
- On the Contacts tab, select +.
- Choose Import Contacts.
-
- Click Download Sample to get a CSV file template. This ensures the correct column formatting.
- Open the file and enter your data:
- Mobile number is required (10-digit format with no dashes or spaces)
- Optional fields include: Name, Email, External ID (helpful for linking to other systems), and Notes.
- Save the file locally to your device as a .csv file.
- Return to Webex and click Choose File to upload your saved CSV file.
-2.png)
- Toggle on Update contact info if existing if you want the upload to overwrite any existing contacts already in your Texting contacts.
- Review the contact list, and click Submit.
- Once complete, the new contacts appear in Contacts.
16.
Access Reports
Reports give you a quick view of your text message activity, including how many messages you've sent and received. They provide a simpler way to track usage, monitor communication, and ensure everything is running smoothly.
To view your message reports:
-
- Sign in to your Webex account and navigate to the Texting app.
- Tap the ellipsis icon next to the phone number you want to check.
- From the dropdown menu, tap Reports.
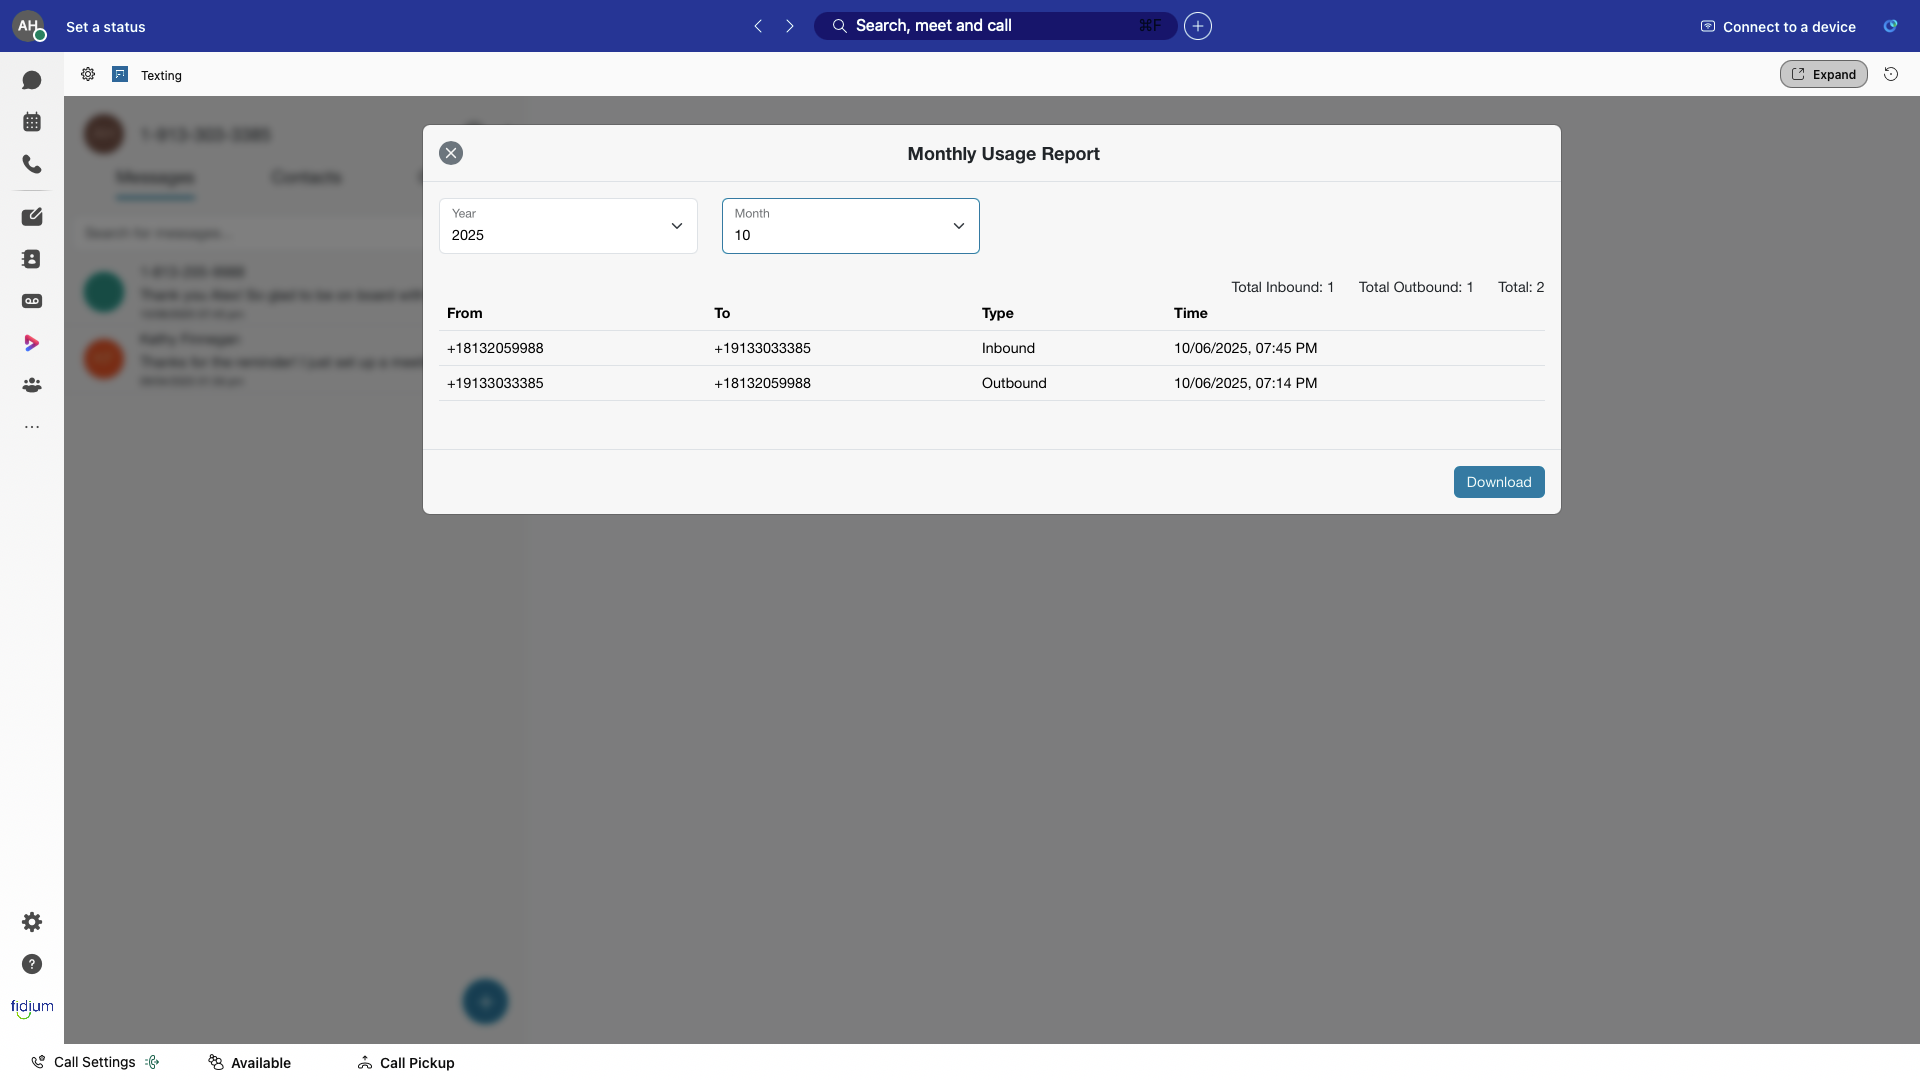
- The Monthly Usage Report opens.
- Use the dropdowns to choose the Year and Month you wish to view.
- The report shows:
- The number of messages you sent.
- The number of messages you received.
- The total number of messages.
- The phone numbers that sent or received the messages.
- The date and time each message was sent.
- Tap Download to save the report.