MENU

Introduction
Within the admin portal, you can configure a variety of user features across your organization. This guide highlights the most commonly used features and provides an overview of how to set them up and manage them for your users.
1.
Call Forwarding
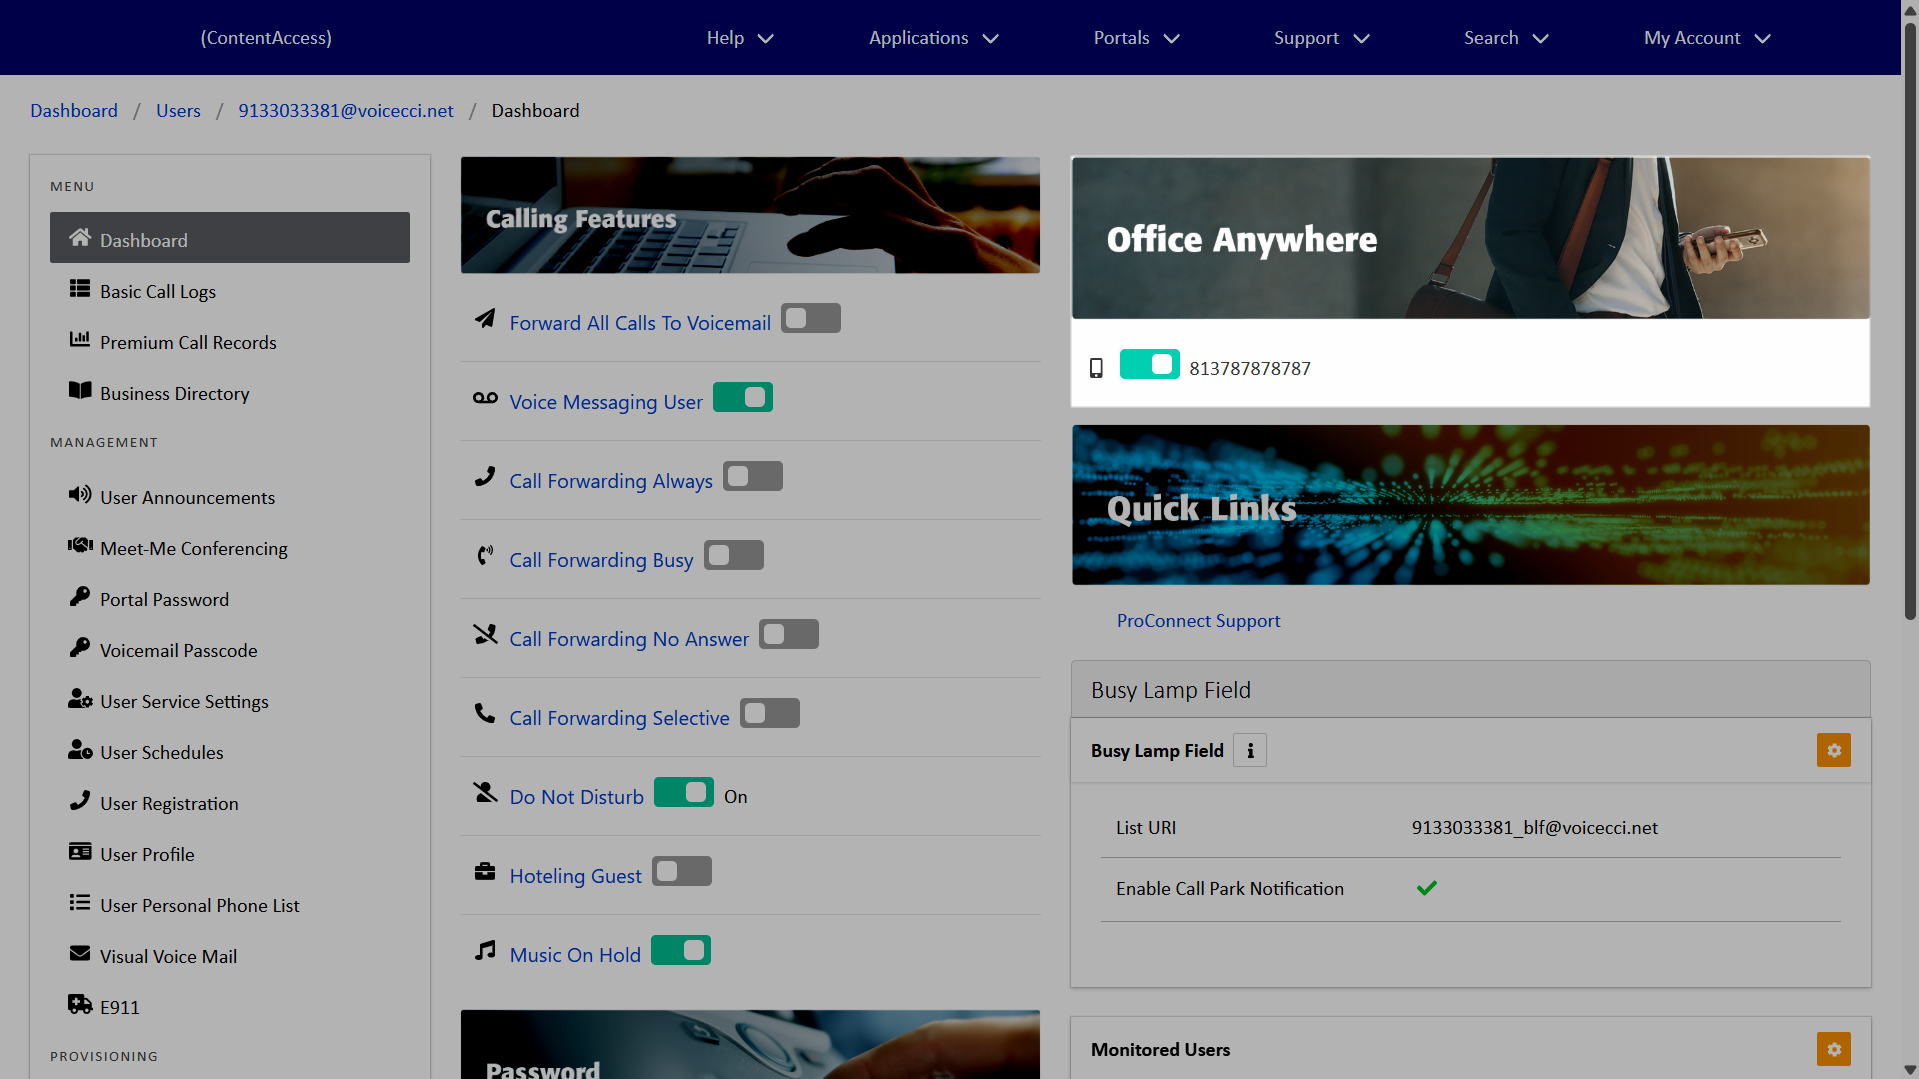
Admin can enable and manage a user's call forwarding settings. This is especially useful when a user is unexpectedly out of the office or when troubleshooting call forwarding issues.
The following call forwarding options are available:
- Forward All Calls To Voicemail - Forwards all calls directly to the configured voicemail box.
- Call Forward Always - Forwards all calls to the predefined destination.
- Call Forwarding Busy - Forwards calls when your number is in a busy state, such as on an active call or in do not disturb, to the predefined destination.
- Call Forwarding No Answer - Forwards calls when unanswered after a set number of rings to the predefined destination.
- Call Forwarding Selective - Selectively forwards calls to the predefined destination based on the criteria set.
To modify call forwarding:
- From the dashboard, under Users, select your desired user.
- Under Calling Features, choose the call forwarding option to enable and configure.
- Forward All Calls To Voicemail - Select the toggle to enable. To configure additional settings, click Forward All Calls To Voicemail. Modify the settings as desired and click Save.
- Call Forward Always - Select the toggle to enable. Select the checkbox next to Is Active. Check the box next to Is Ring Splash Active, if desired. In the Forward To field, enter the call forwarding destination. Click Save.
- Call Forwarding Busy - Select the toggle to enable. Select the checkbox next to Is Active. In the Forward To field, enter the call forwarding destination. Click Save.
- Call Forwarding No Answer - Select the toggle to enable. Select the checkbox next to Is Active. In the Forward To field, enter the call forwarding destination. Enter the Number Of Rings. Click Save.
- Call Forwarding Selective - Select the toggle to enable. To configure additional settings, click Call Forwarding Selective. Modify the settings as desired and click Save.

2.
Hoteling
Hoteling lets users temporarily access their service profile (phone number, features, and calling plan) on a designated host device. The feature includes two roles, Host and Guest, allowing users to log in to shared phones and automatically transfer their profile to that device, which becomes their primary phone during the session.
This is ideal for traveling employees, remote offices, or call centers with shared devices, enabling users to maintain their full phone functionality and identity across locations or shifts.
Configure a Hoteling Host
To enable a user to be a hoteling host, follow these steps:
- From the dashboard, under Users, select your desired user.
- Click User Service Settings in the left-hand menu, then select Hoteling Host.
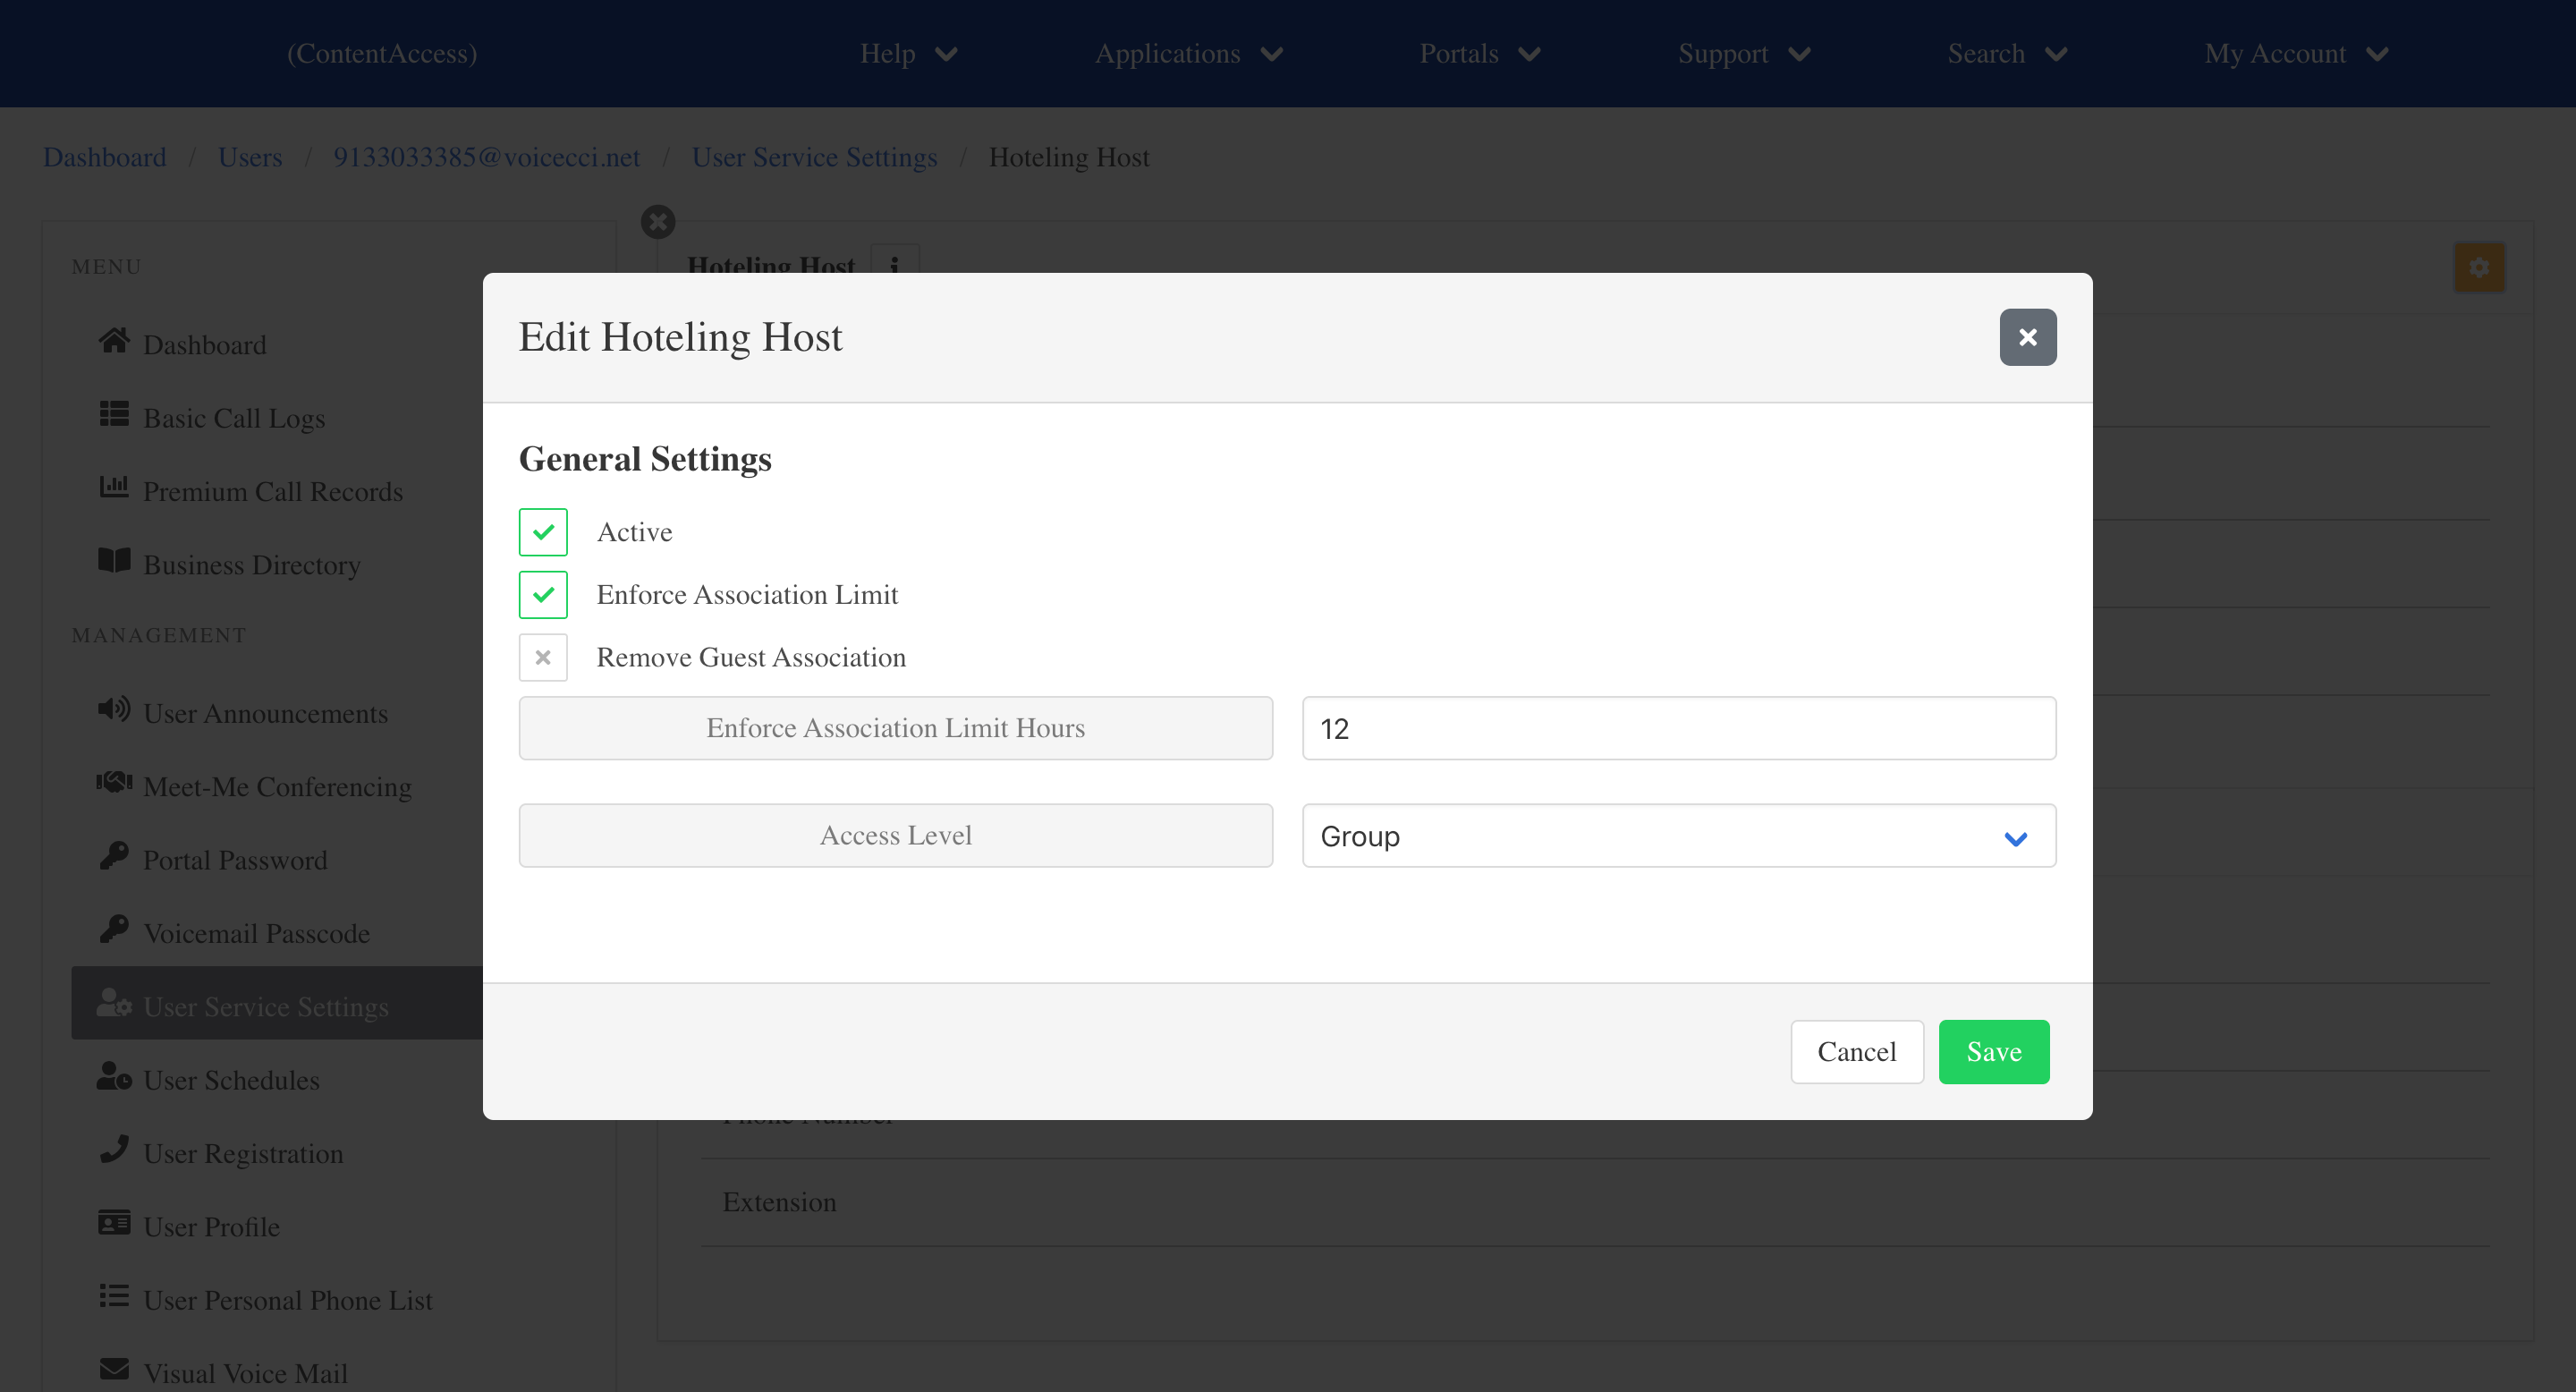
- Click the Edit icon to modify the following settings:
- Is Active - Check this box to enable the user as a hoteling host.
- Enforce Association Limit - Check this box to limit the amount of time that the user is allowed to be a hoteling host of the associated guest. Then, enter the number of hours under Enforce Association Limit Hours.
- Remove Guest (User) Association - Check this box to remove a user from being able to be selected as a hoteling host.
- Access Level - From the drop-down menu, select the hoteling host access level for this user — Group or Enterprise.
- Click Save.


Configure a Hoteling Guest
To enable a user to be a hoteling guest, follow these steps:
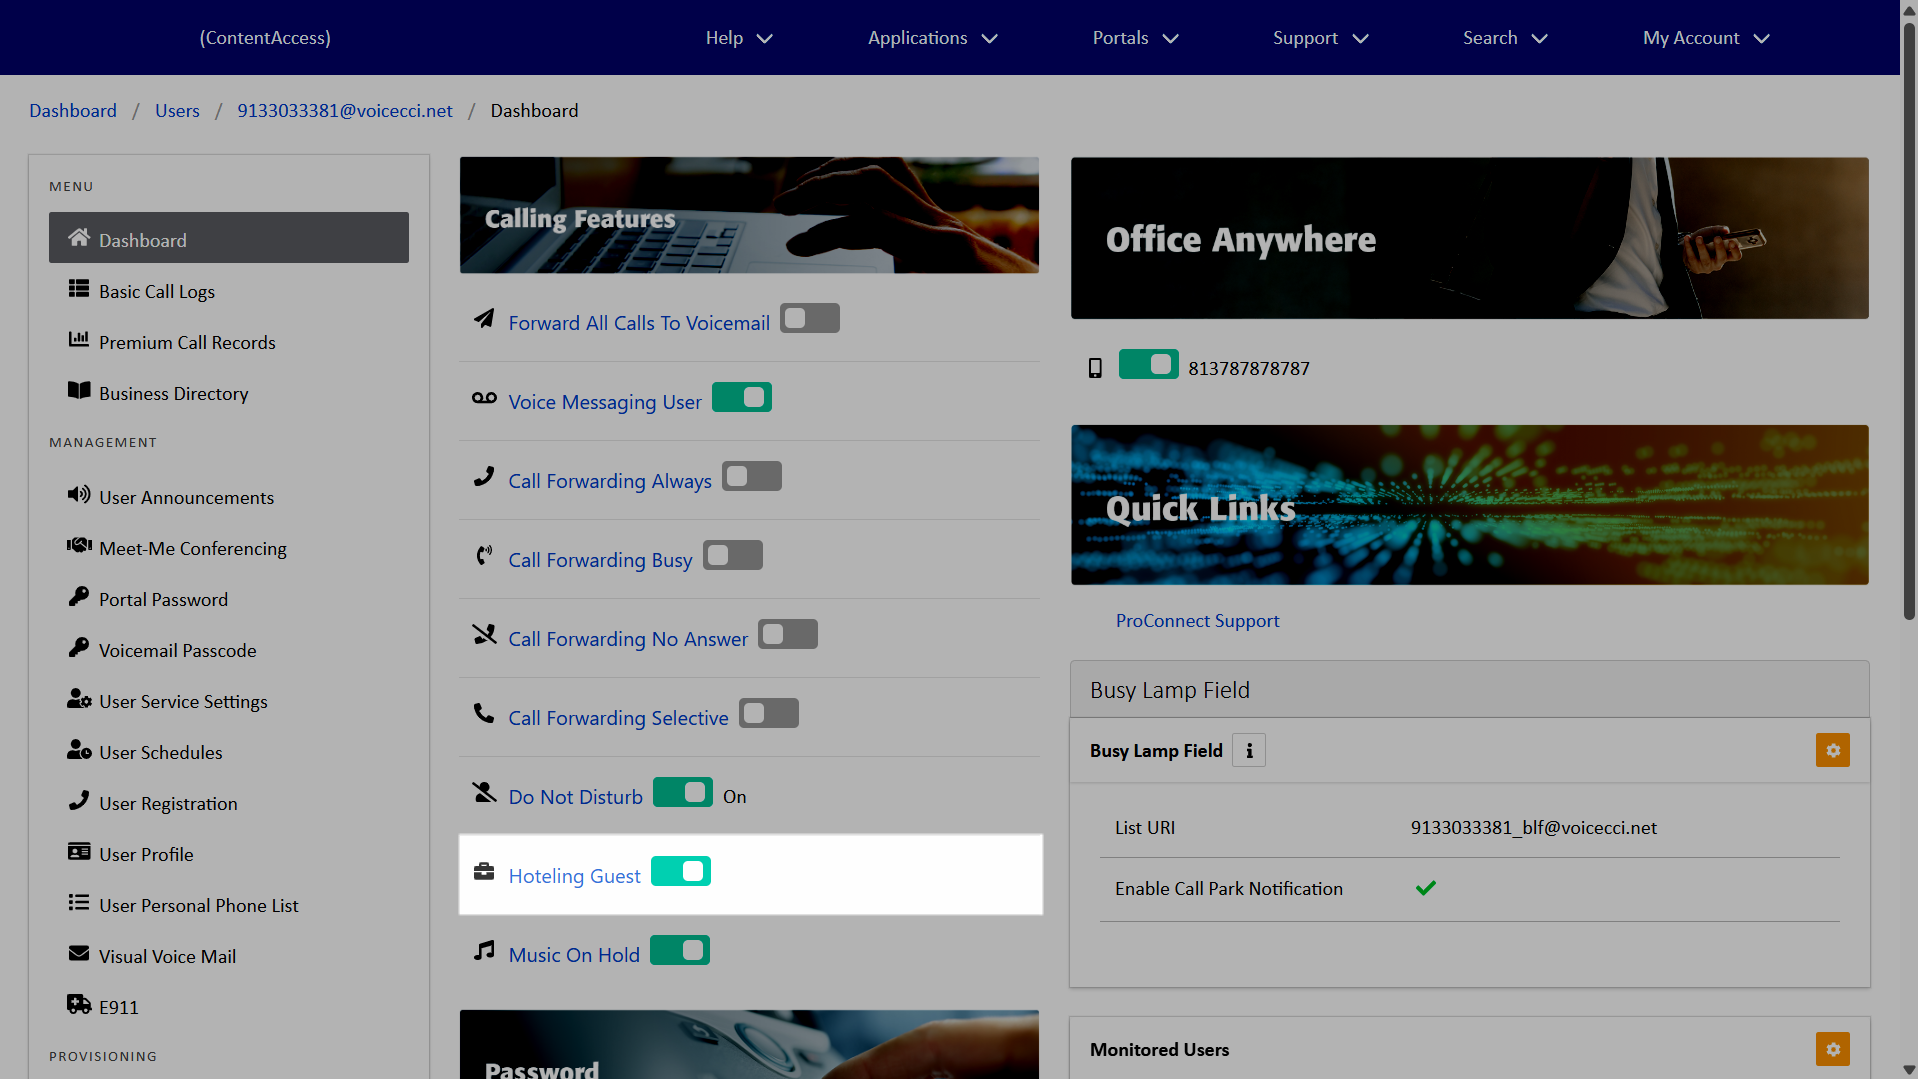
- From the dashboard, under Users, select your desired user.
- Under Calling Features, toggle on Hoteling Guest.
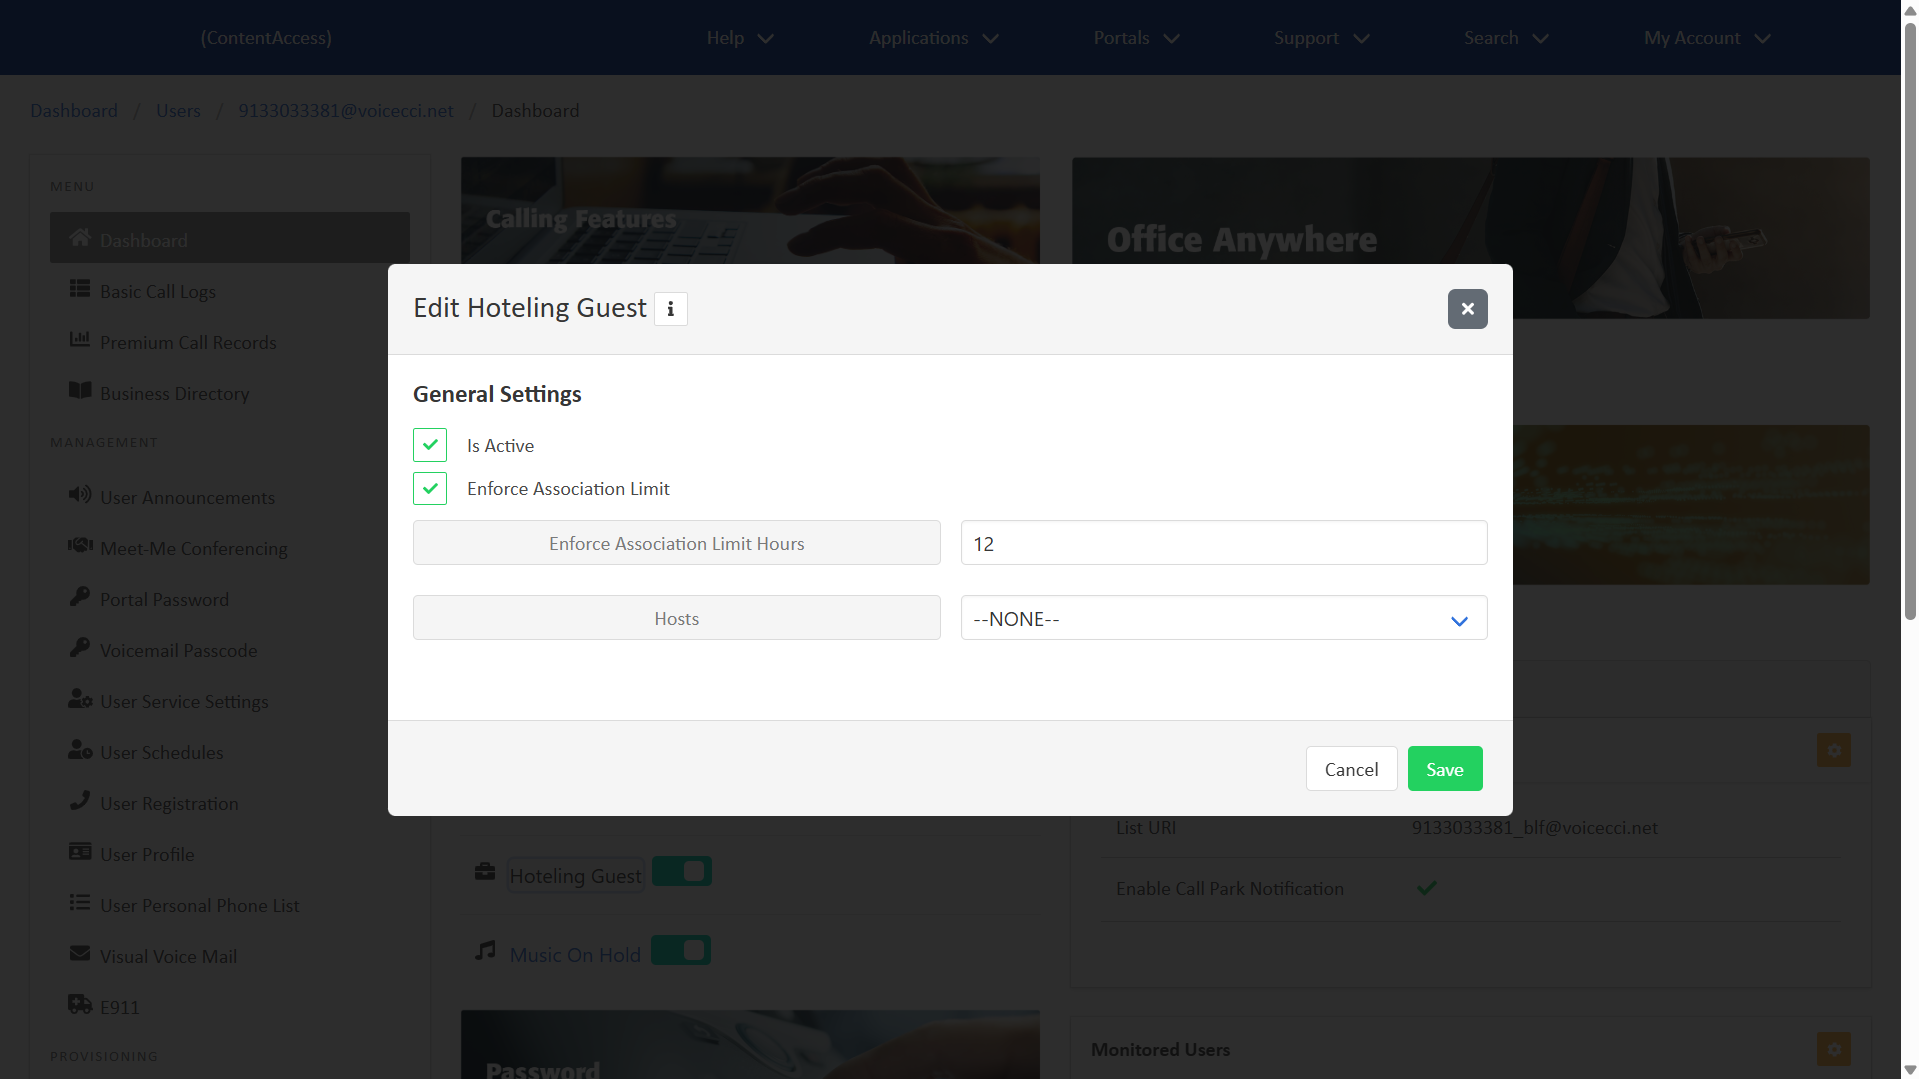
- Click Hoteling Guest to modify the following settings:
- Is Active - Check this box to enable the user as a hoteling guest.
- Enforce Association Limit - Check this box to limit the amount of time that the user is allowed to be a hoteling guest of the associated host.
- Enforce Association Limit Hours - Enter the number of hours the user is allowed to be a hoteling guest.
- Hosts - Select the hoteling host to associate this guest with.
- Click Save.
3.
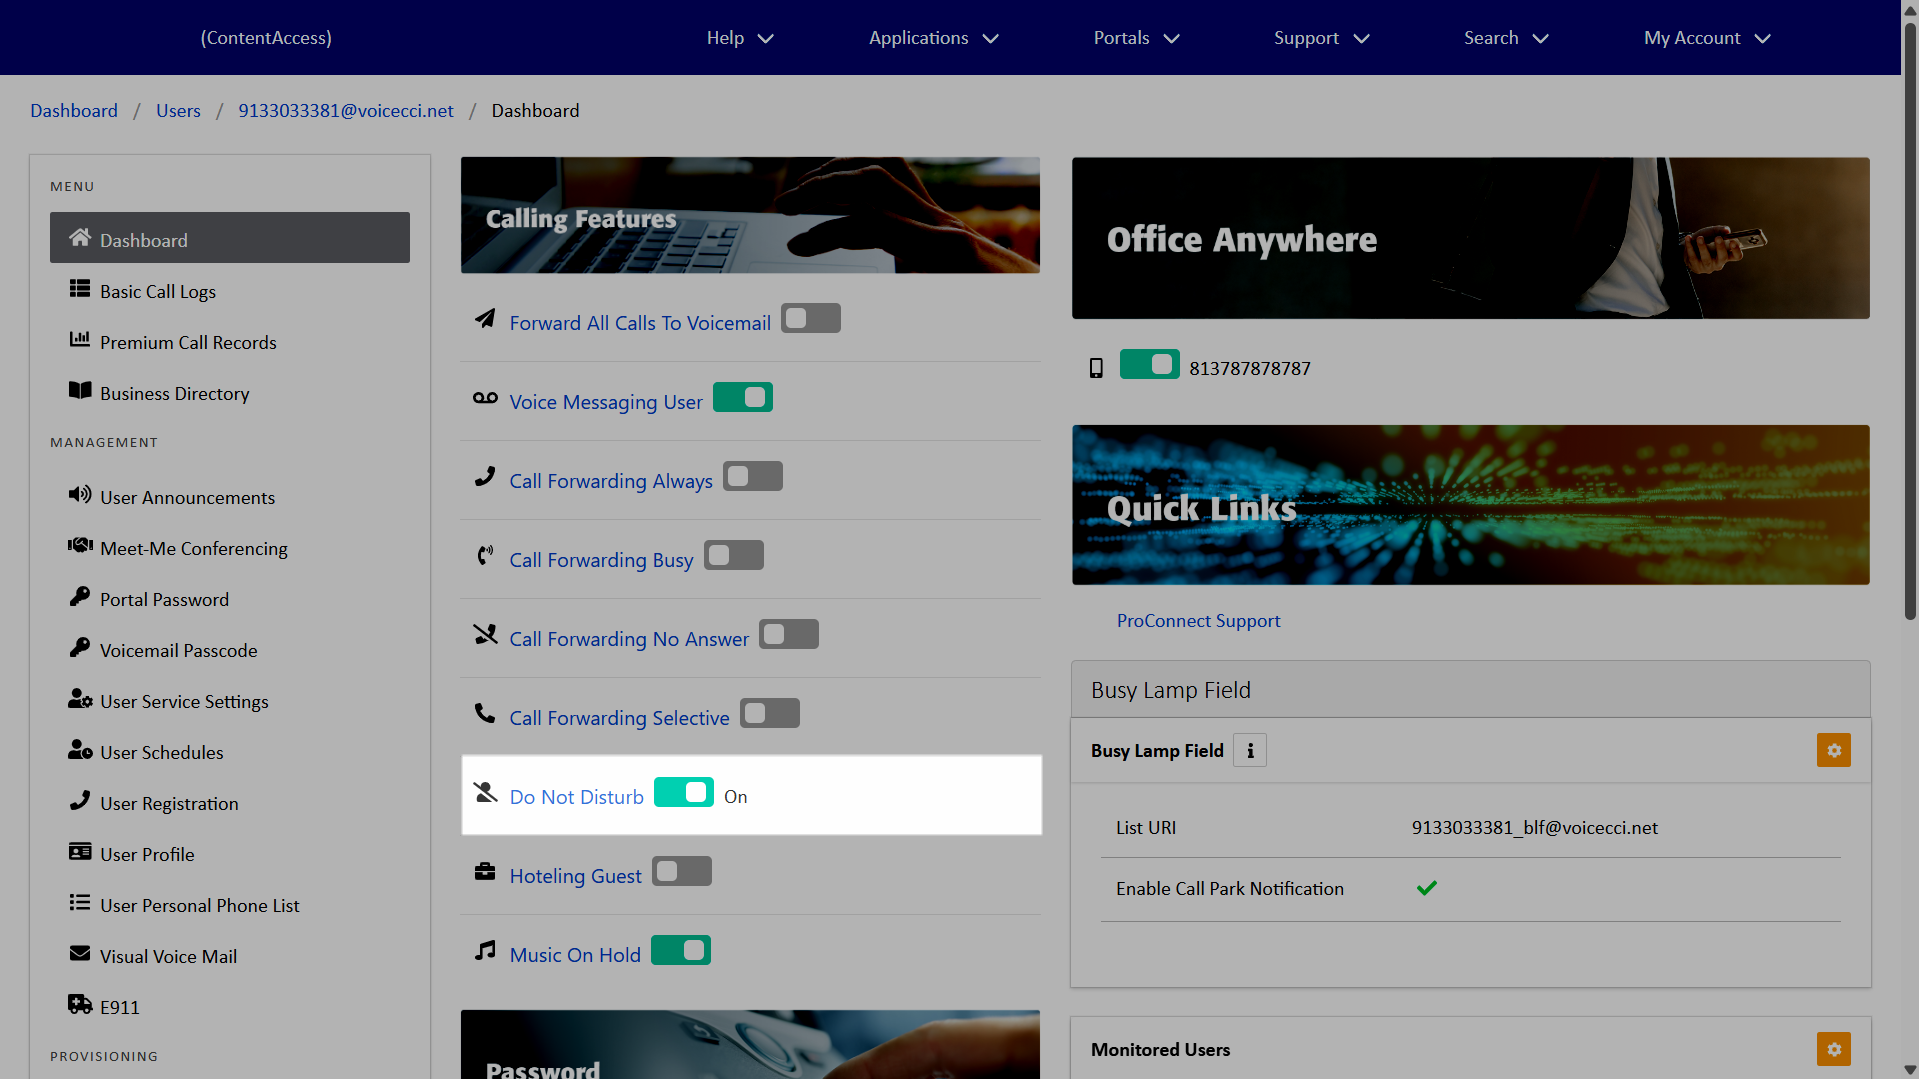
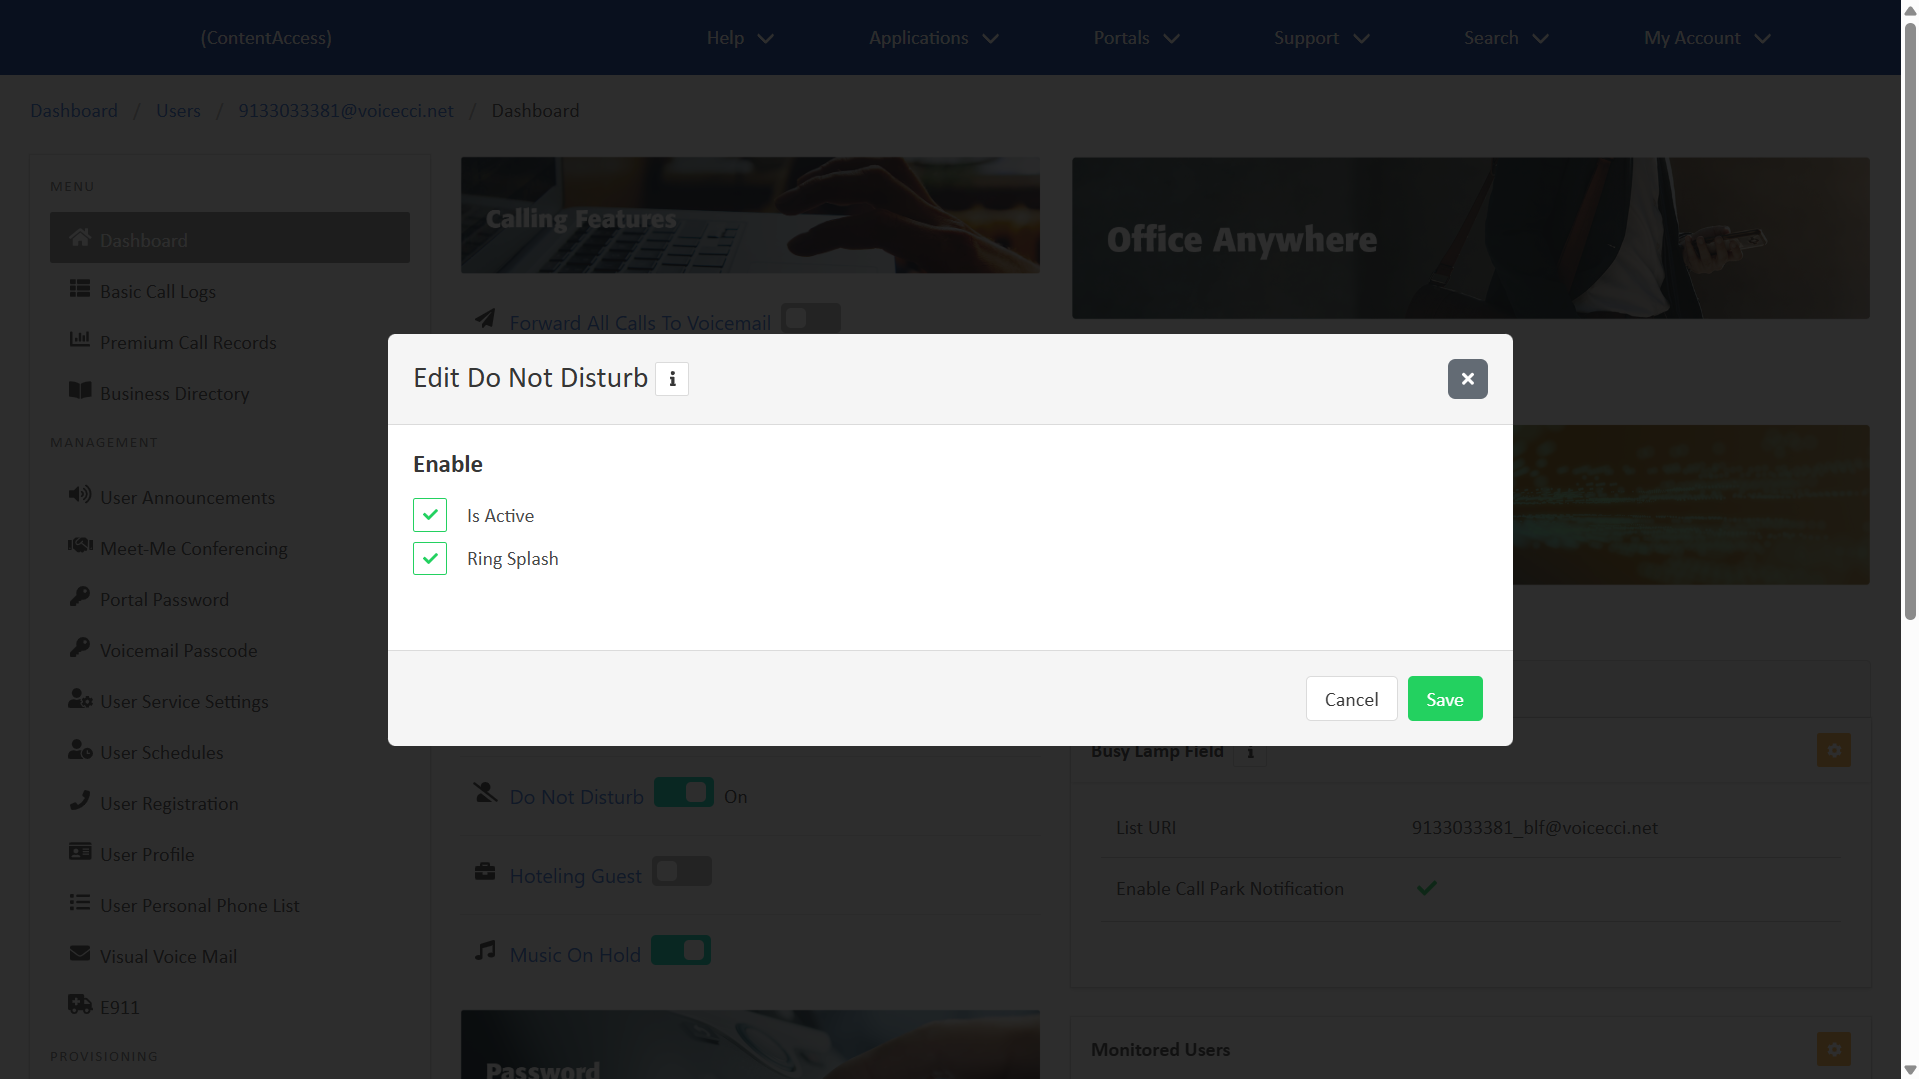
Do Not Disturb
Do not disturb automatically forwards all incoming calls to voicemail. If no voicemail service is configured, the caller hears a busy tone.
To enable do not disturb, follow these steps:
- From the dashboard, under Users, select your desired user.
- Under Calling Features, toggle on Do Not Disturb.
- Click Do Not Disturb to add a Ring Splash, if desired.
- Click Save.
4.
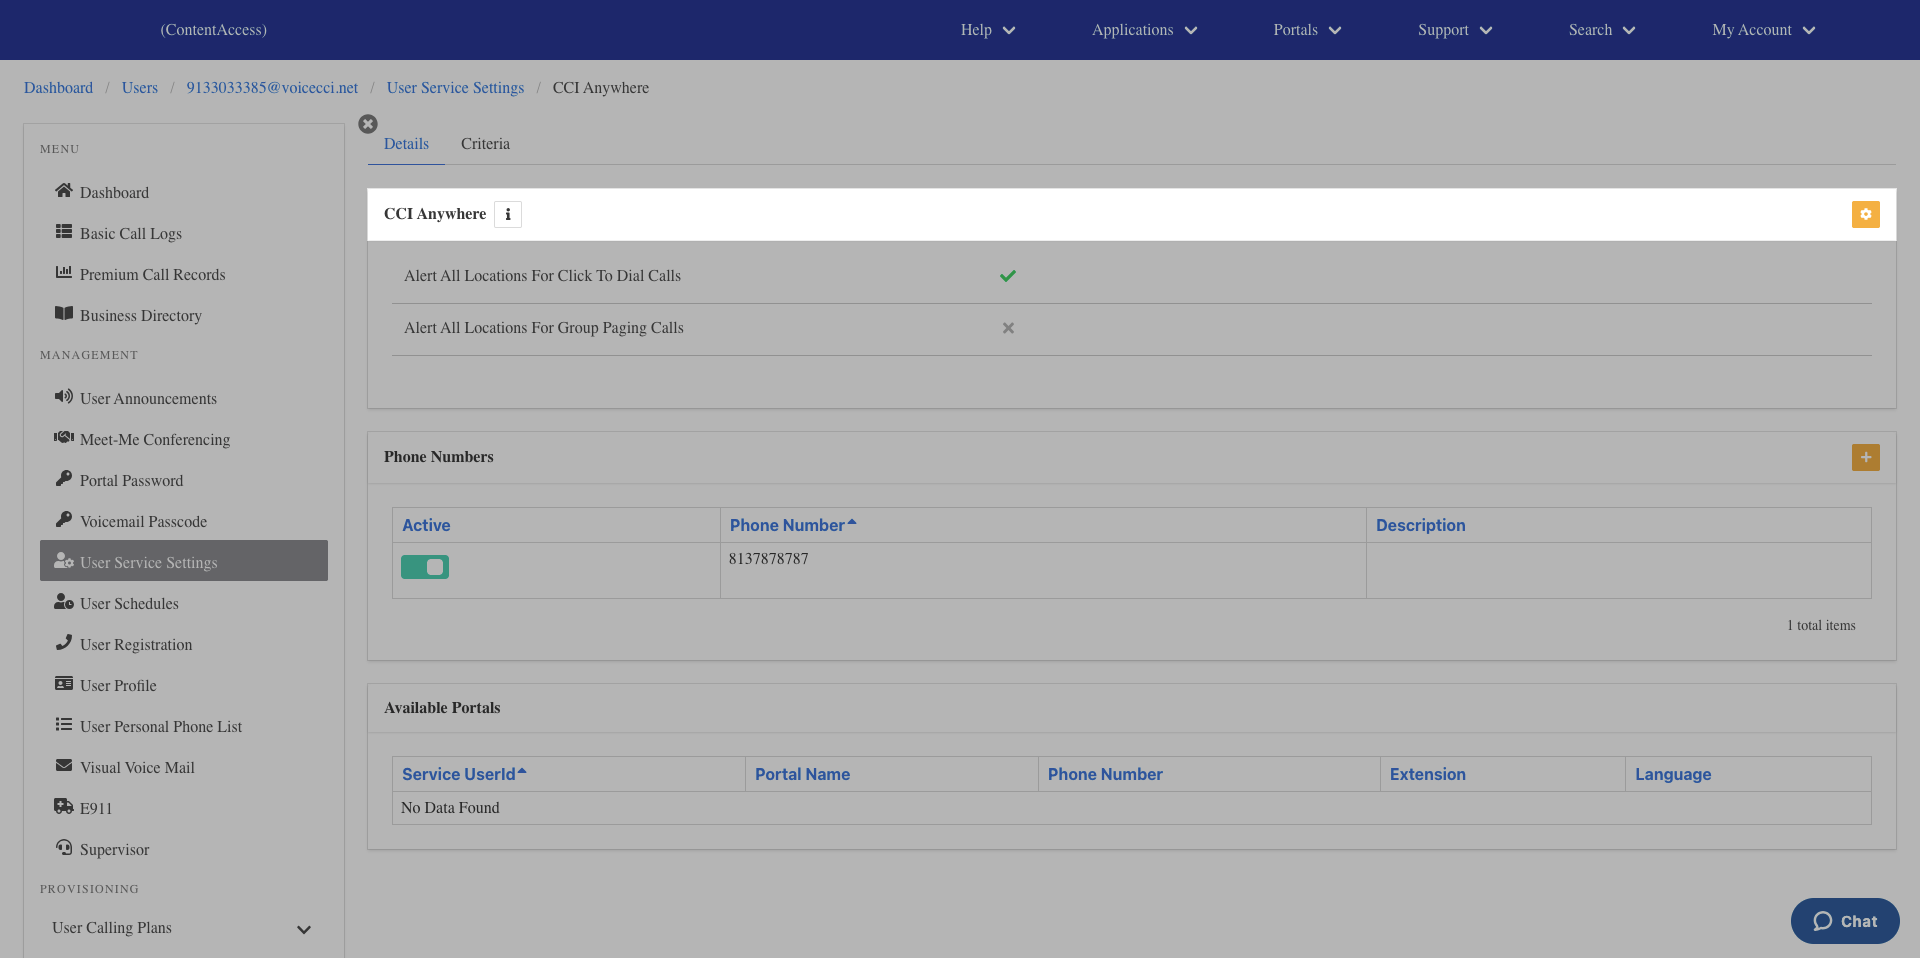
Office Anywhere
Office Anywhere extends the business calling experience across devices, allowing users to access core calling features from their mobile phones. Users can dial four-digit extensions, transfer calls without knowing a colleague's location, and maintain a consistent business Caller ID.
With Office Anywhere, users can:
- Receive office calls on a designated alternate device (typically a mobile phone).
- Place calls that display their office Caller ID.
- Move active calls between desktop and mobile devices seamlessly.
After setup, users dial the Anywhere Portal number to place or receive calls, and administrators can modify Portal settings as needed.
To configure Office Anywhere for a user, follow these steps:
- From the dashboard, under Users, select your desired user.
- Under Office Anywhere, toggle on to enable.
- Click the Office Anywhere banner to open additional settings.
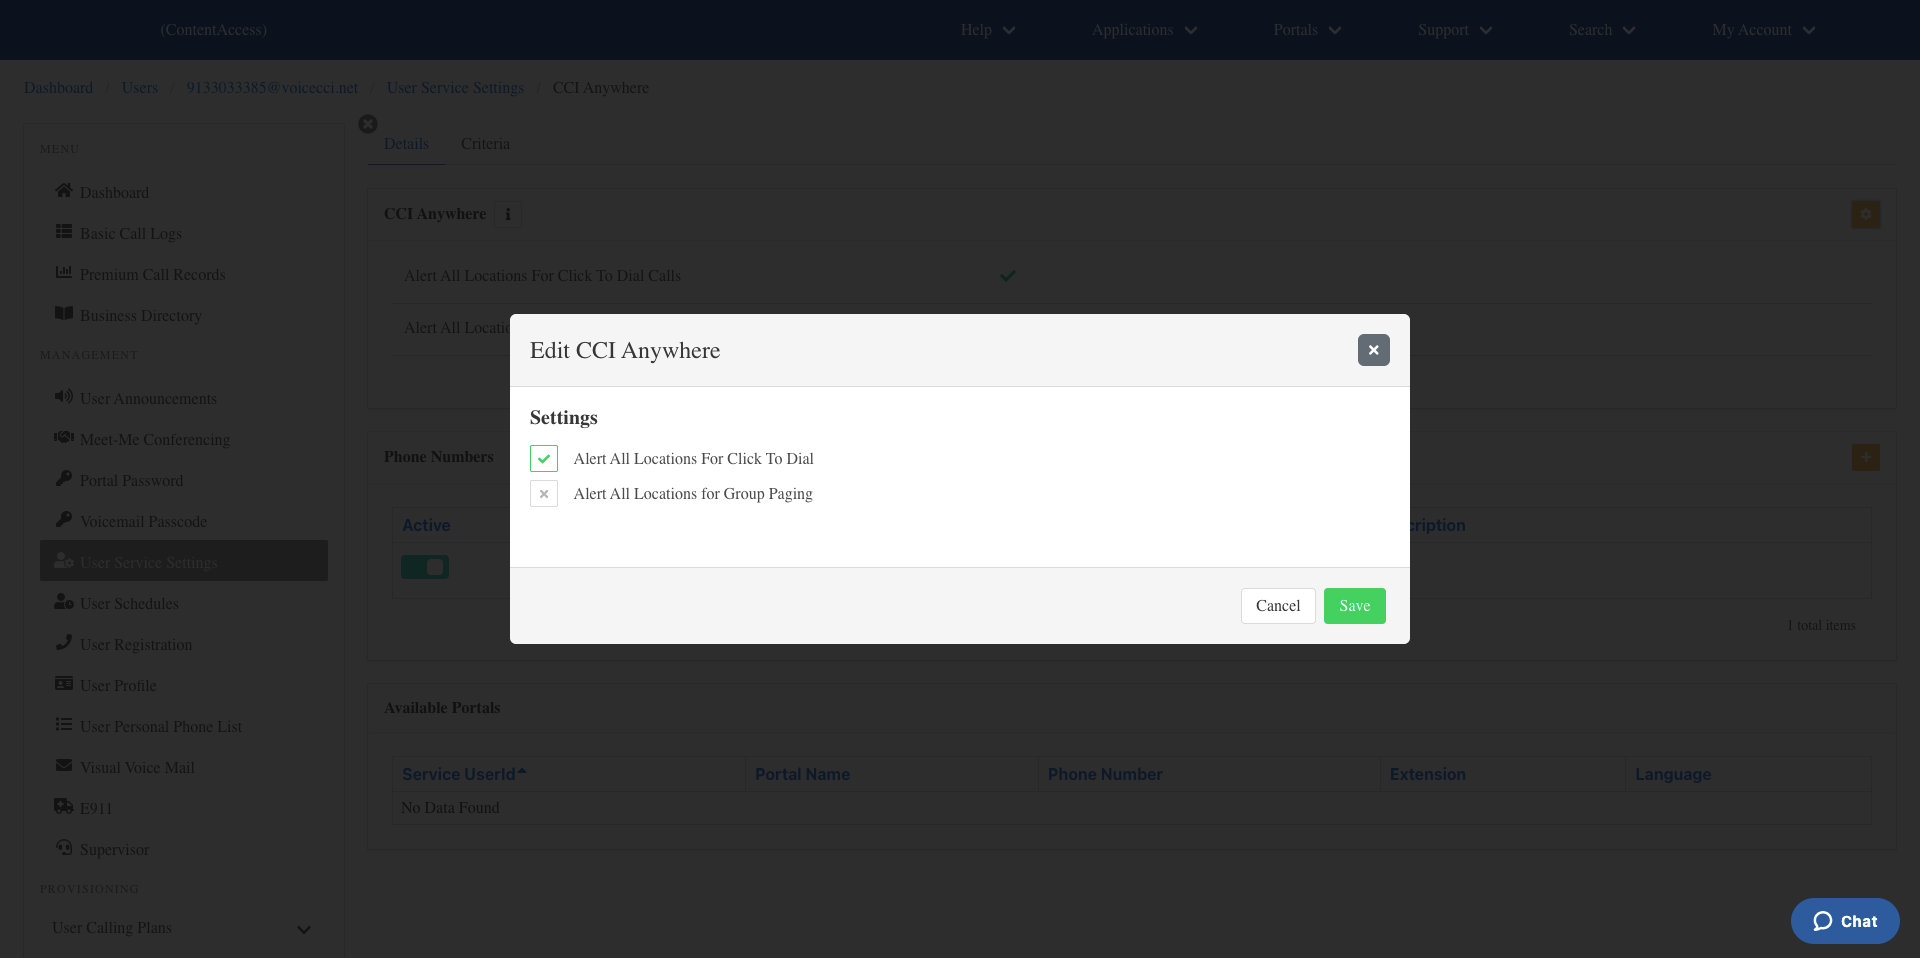
- To add alerts for click-to-dial calls and group paging calls, select the Edit icon next to CCI Anywhere.
- To add phone numbers, select the Plus icon next to Phone Numbers.