MENU

1.
Manage Voice Messaging
Voice Messaging allows you to specify how to handle your voicemail messages. You can use Unified Messaging to retrieve messages from your phone, or choose to have messages delivered directly to your email. Voice Portal allows you to set a personalized name and configure auto-login options. Message Greetings allows you to upload personal audio files to use when callers reach your voicemail box.
2.
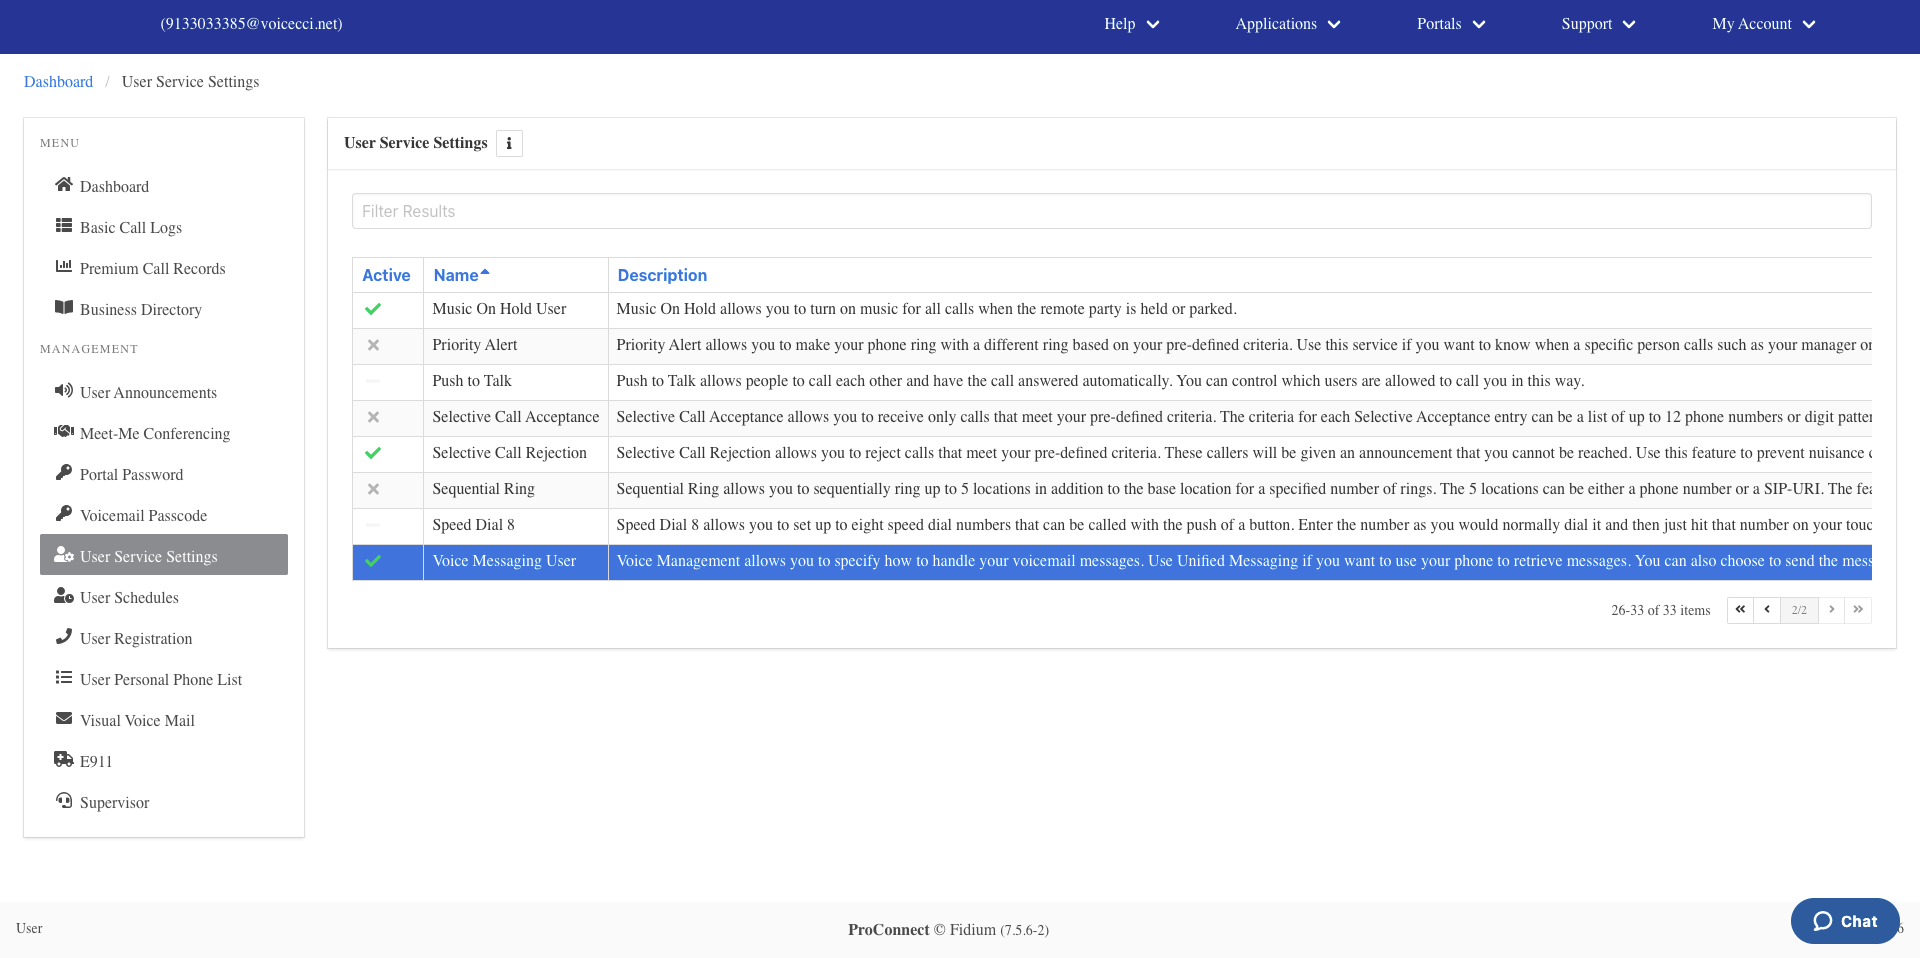
Access Voice Messaging Settings
To access Voice Messaging settings, follow these steps:
- From the dashboard menu, click User Service Settings.
- On the Services page, click Voice Messaging User.
3.
Configure Settings
To configure Voice Messaging settings, follow these steps:
- From the Settings section, click the Edit icon.
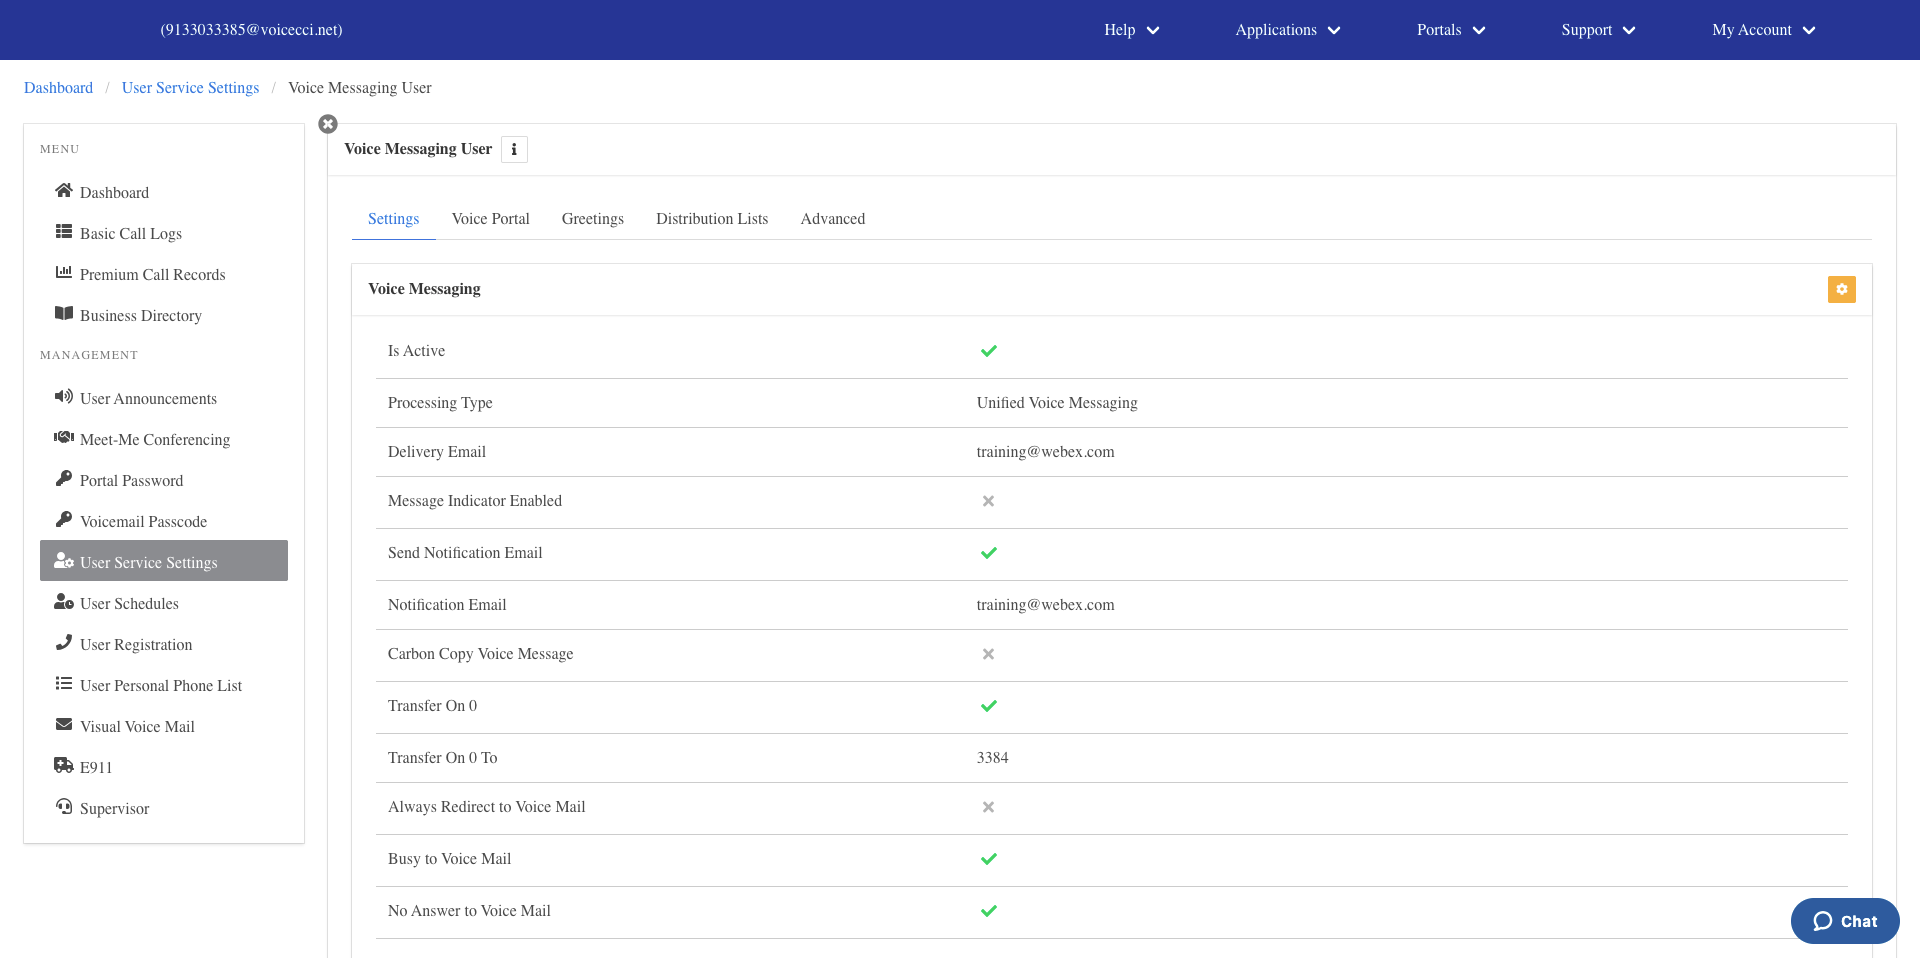
- Enable any of the following options as needed:
- Enabled — Check this box to enable the feature.
- Enable Phone Message Waiting Indicator — Enables the message waiting LED on your phone to indicate when a new voicemail has been received.
- Send Voice Message Notification Email — Sends an email notification to a specified address when a voicemail is received. This option does not send a copy of the voicemail or transcription.
- Send Carbon Copy Message — Sends a recording of all voicemails to a specified email address. This box must be checked for voicemail transcription to work.
- Transfer on Zero — Allows callers to transfer to a specified phone number when they dial 0 from your voicemail box.
- Always Redirect to Voicemail — All calls directed to your phone will immediately redirect to voicemail without first ringing your phone.
- Redirect Busy to Voicemail — Calls will be redirected to voicemail when your phone is busy.
- Redirect No Answer to Voicemail — Calls will be redirected to voicemail when you do not answer after a specified number of rings. The number of rings is set in the Greetings section.
- Configure the following delivery options as needed:
- Processing — Select whether voice messages are sent to your phone and email (Unified Voice and Email Messaging) or delivered to email only (Deliver to Email Address Only).
- Delivery Email — Enter the email address where voice messages will be delivered.
- Email Notification To — Displayed only when Send Voice Message Notification Email is checked. Enter the email address to receive notification emails. This address will not receive a copy of the voicemail.
- Carbon Copy To — Displayed only when Send Carbon Copy Voice Message is checked. Enter the email address to receive a copy of the .wav file. Note: If this field is populated with cc1.stt@mutaresoftware.com, do not change the email address. This is what sends the .wav file to the transcription service.

- Click Save.
4.
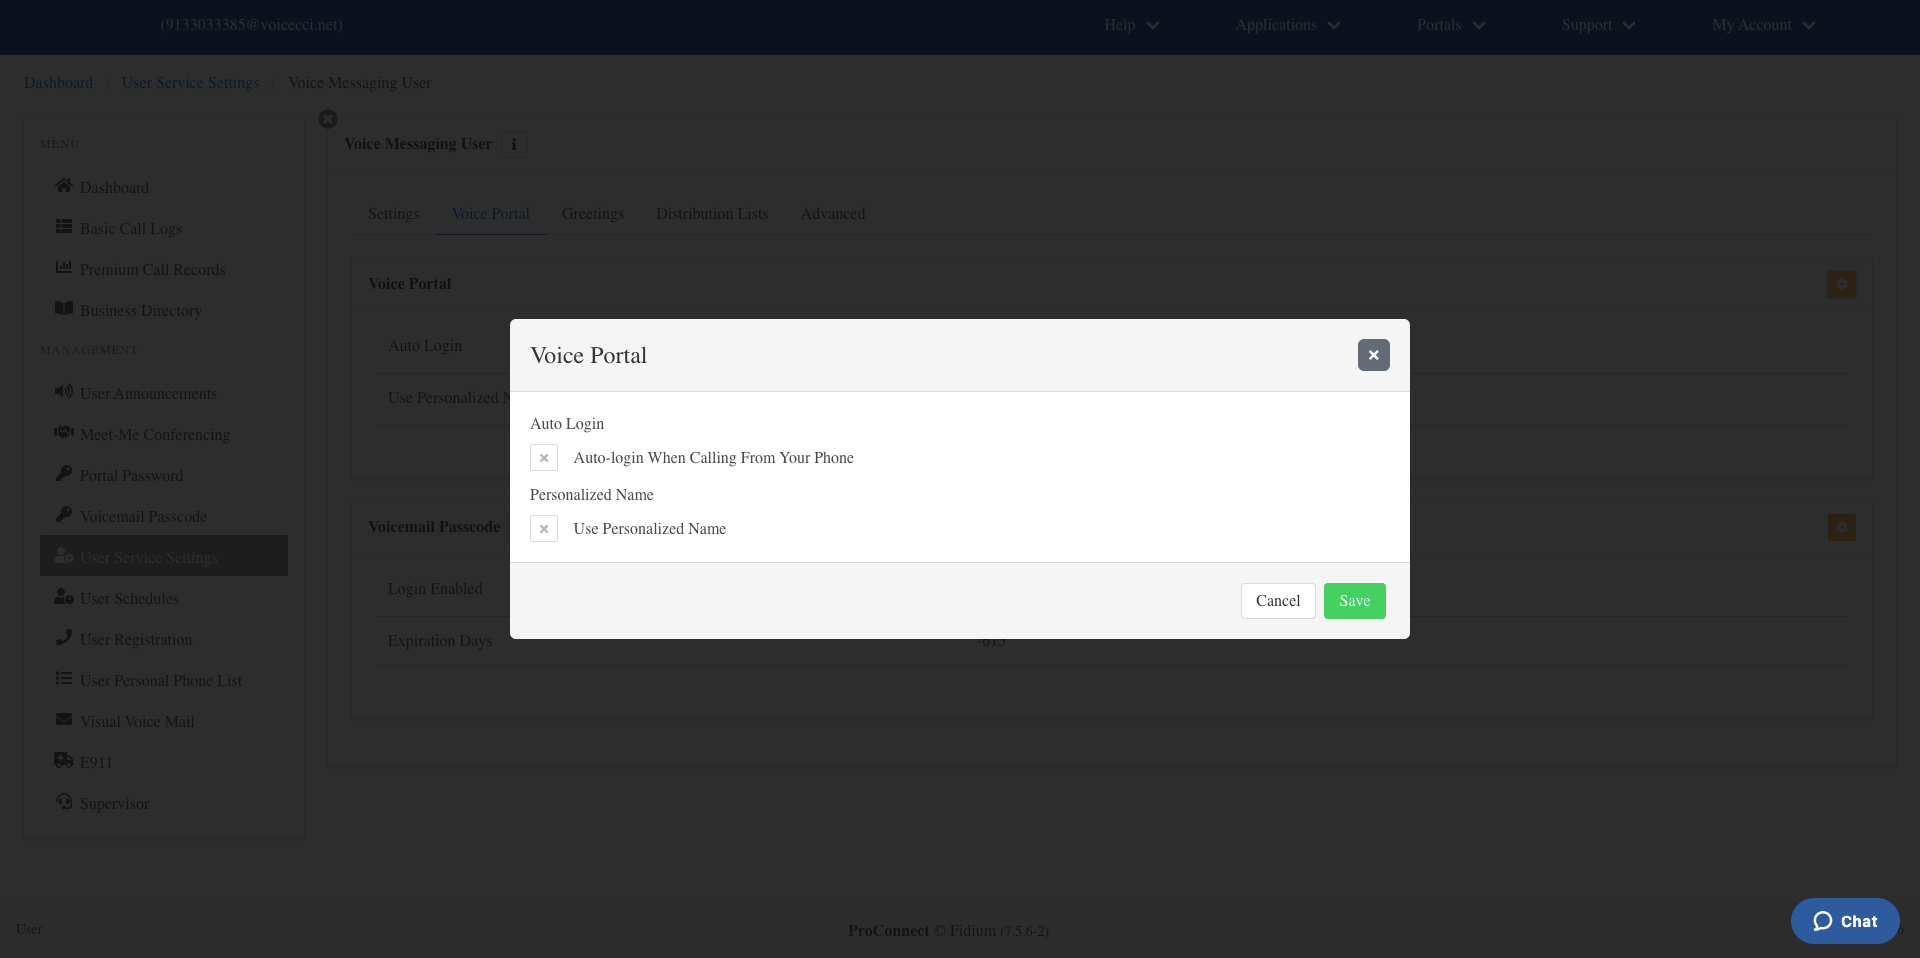
Configure Voice Portal
To configure your Voice Portal settings, follow these steps:
- From the Voice Portal section, click the Edit icon.

- Enter and confirm your portal passcode.
- Optionally, enable Auto-Login to allow your voicemail box to log in automatically when calling from your own phone without entering your passcode.
- Optionally, configure your Personalized Name by uploading a .wav file to use as your name when callers reach your voicemail box. You can also record your name by dialing into your voicemail box through the telephone user interface.
- Click Save.
5.
Configure Greetings
To configure your greeting options, follow these steps:
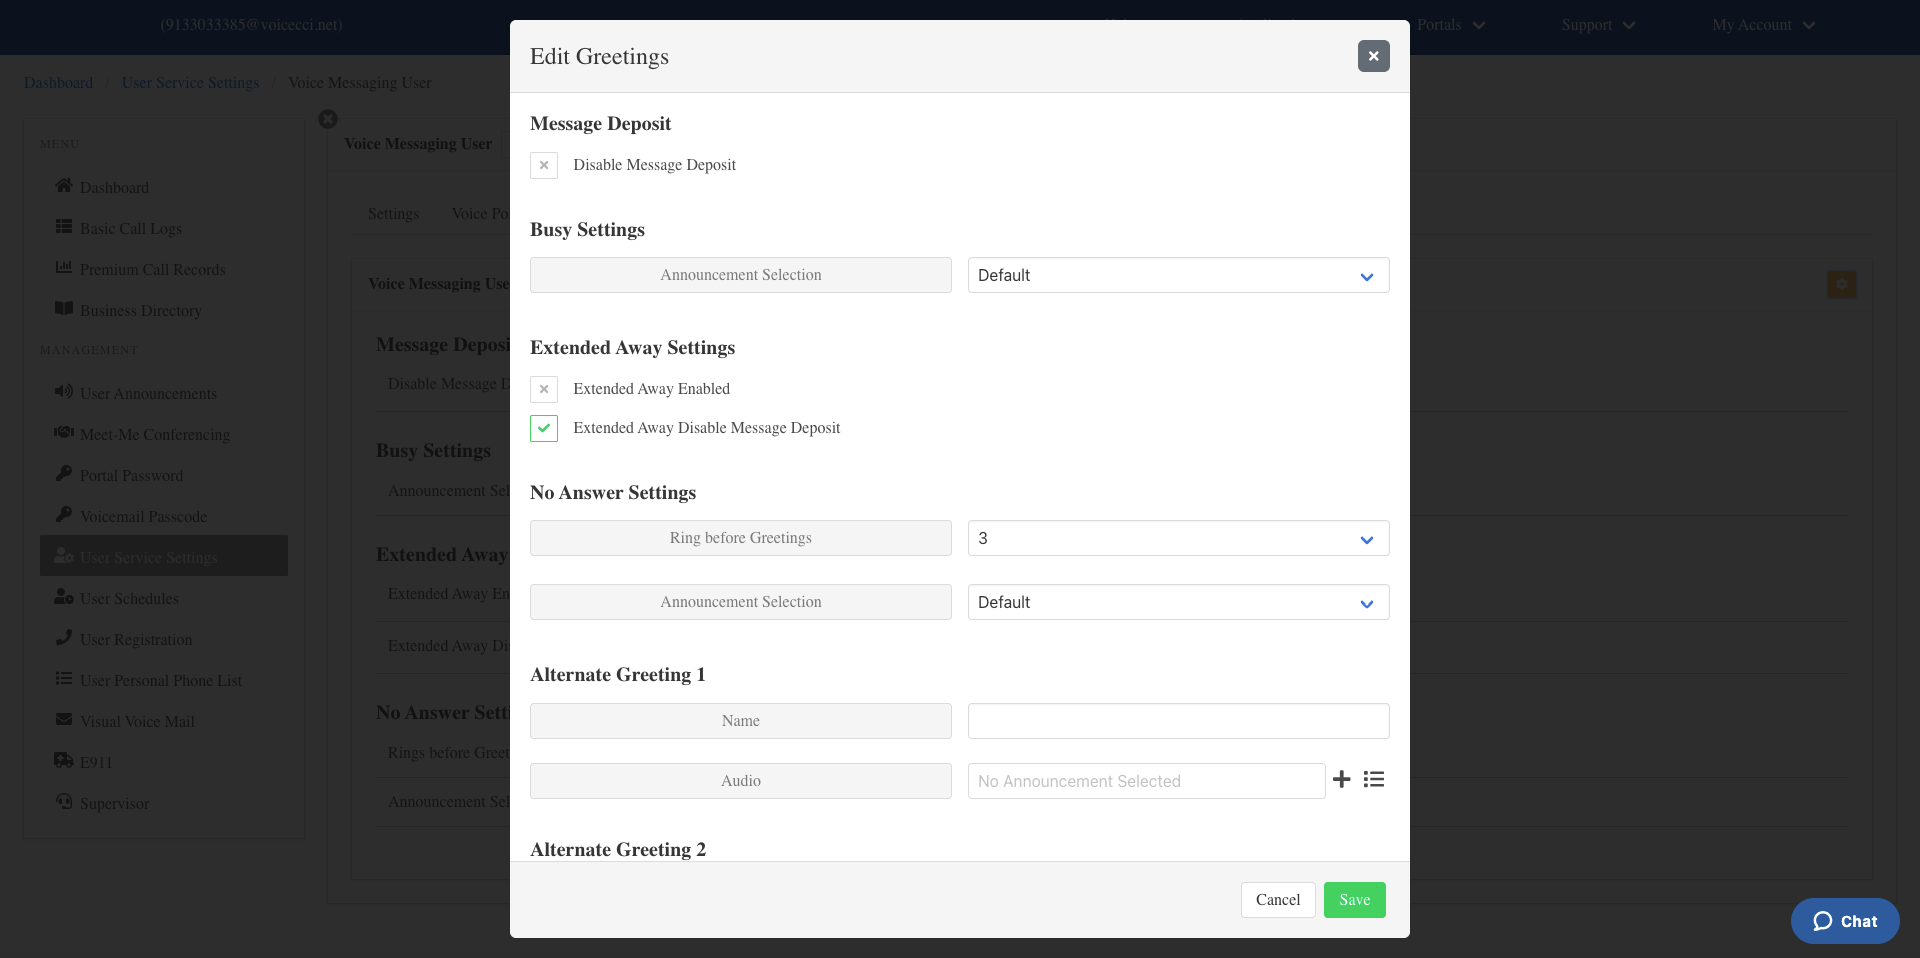
- From the Greetings section, click the Edit icon.
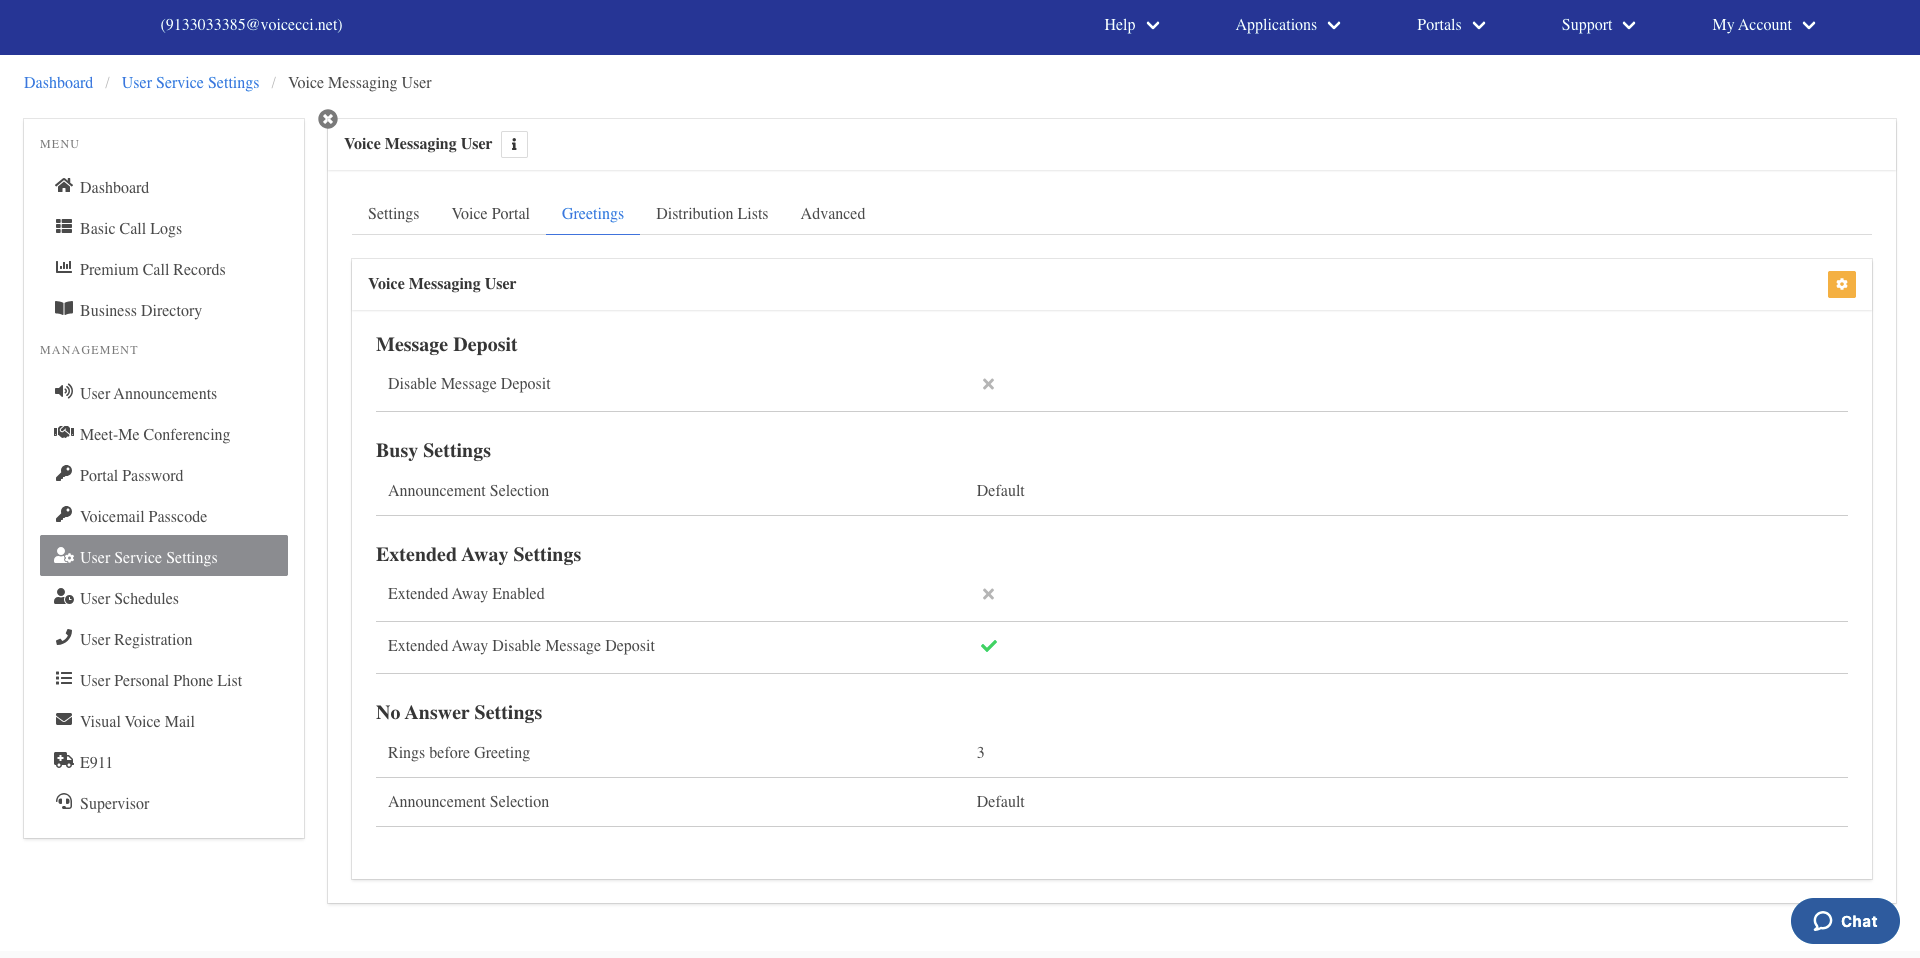
- Configure any of the following options as needed:
- Message Deposit — Use this setting to block messages from being left on your voicemail. This is also referred to as an "Announcement Only" mailbox.
- Busy Settings — Select a default or personalized busy greeting. If a personal greeting is selected, upload the audio file or record the message by calling into your voicemail box. You can also select a message from your User Announcements folder.
- Extended Away Settings — Set a greeting to play when you will be away from your mailbox for an extended period. Enable this option by dialing into your voicemail box. You can also disable message deposit when this greeting is active.
- No Answer Settings — Enter the number of rings a caller should hear before forwarding to voicemail. Select the greeting type: Default, Personal, Alt 1, Alt 2, or Alt 3.
- Alternate Greeting 1 — Pre-record an alternate greeting to use at specified times. Enter a name for the greeting and upload the audio file.
- Click Save.
6.
Configure Distribution Lists
Distribution lists allow you to send voicemail messages to multiple recipients at once using a single list ID. Up to 15 distribution lists can be configured.
To configure a distribution list, follow these steps:
- From the Distribution section, click the list ID entry you want to configure.
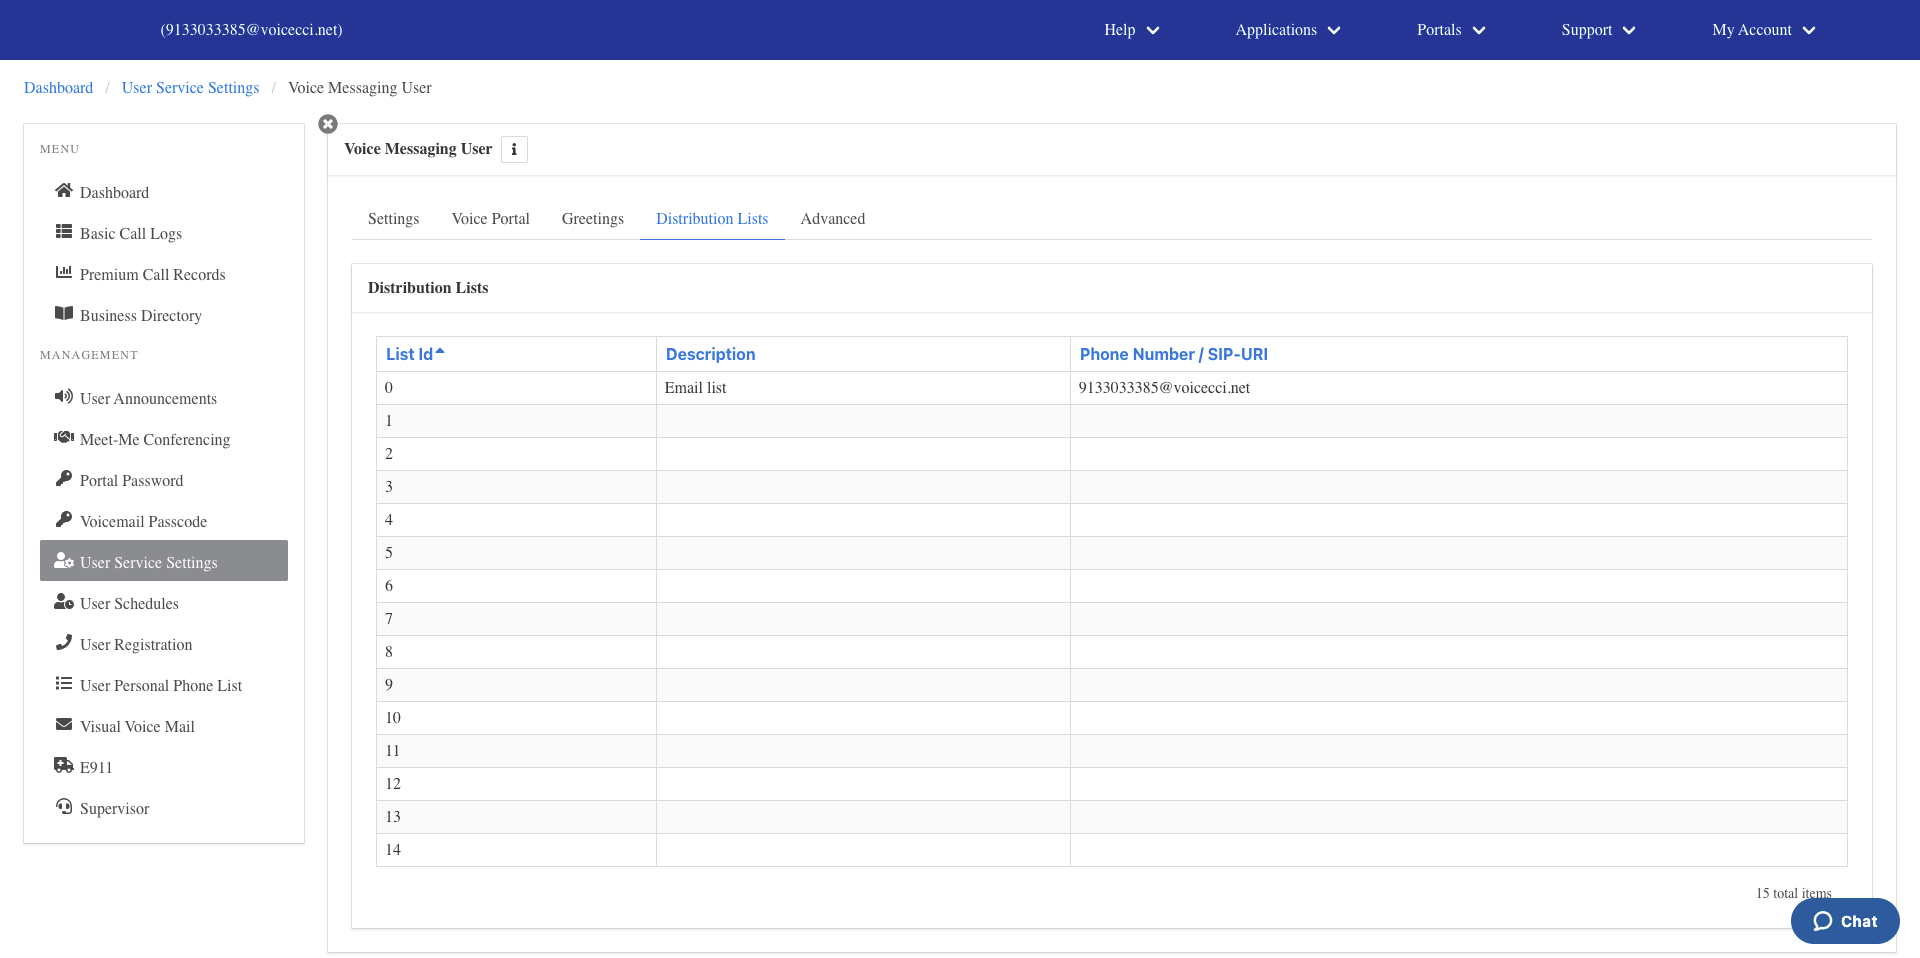
- In the Edit Details window, enter a description for the list.
- Enter a valid phone number or SIP-URI in the Phone Number / SIP-URI field. To add additional numbers, click the Add icon.
- Click Save.

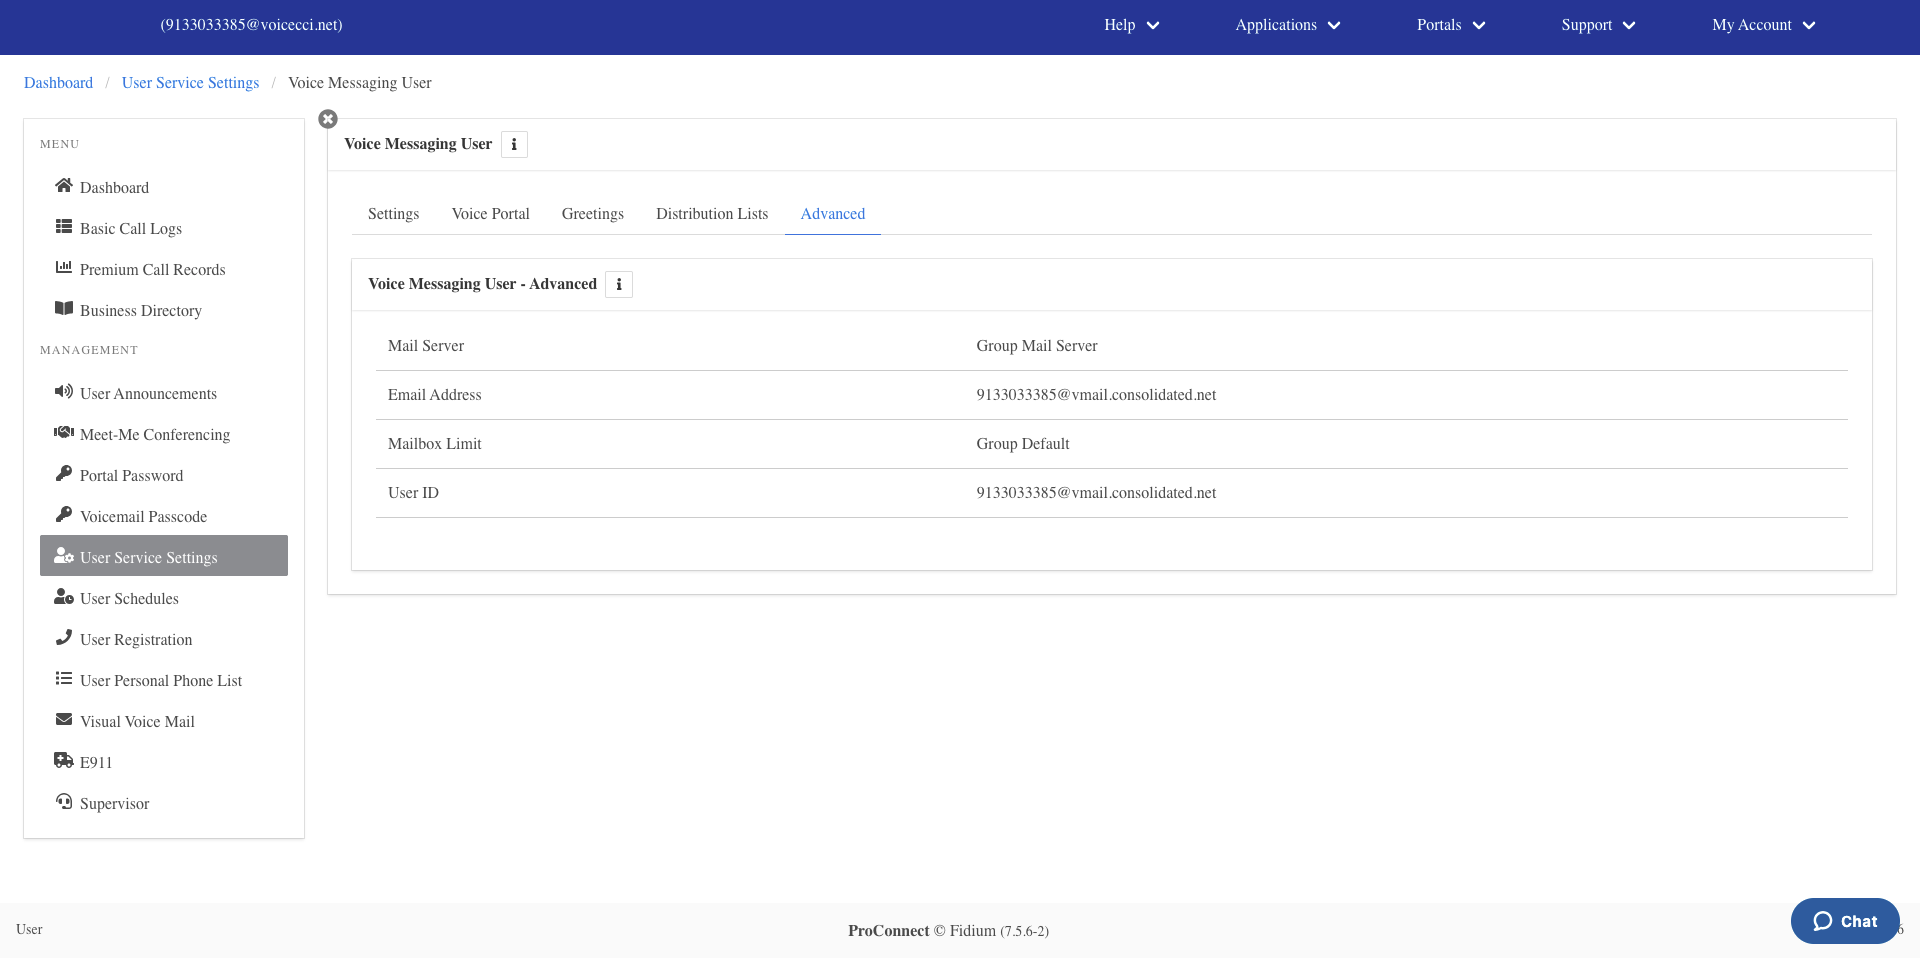
7.
Advanced Options
Note: The Advanced tab is for reference only and should not be modified.